Be My Valentine

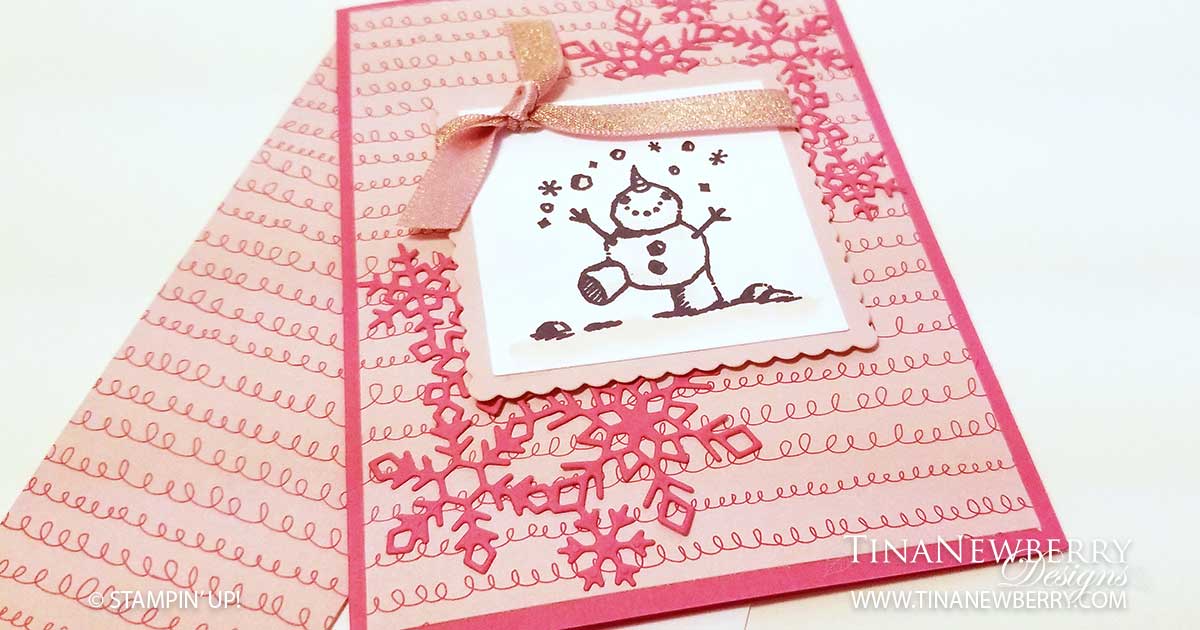
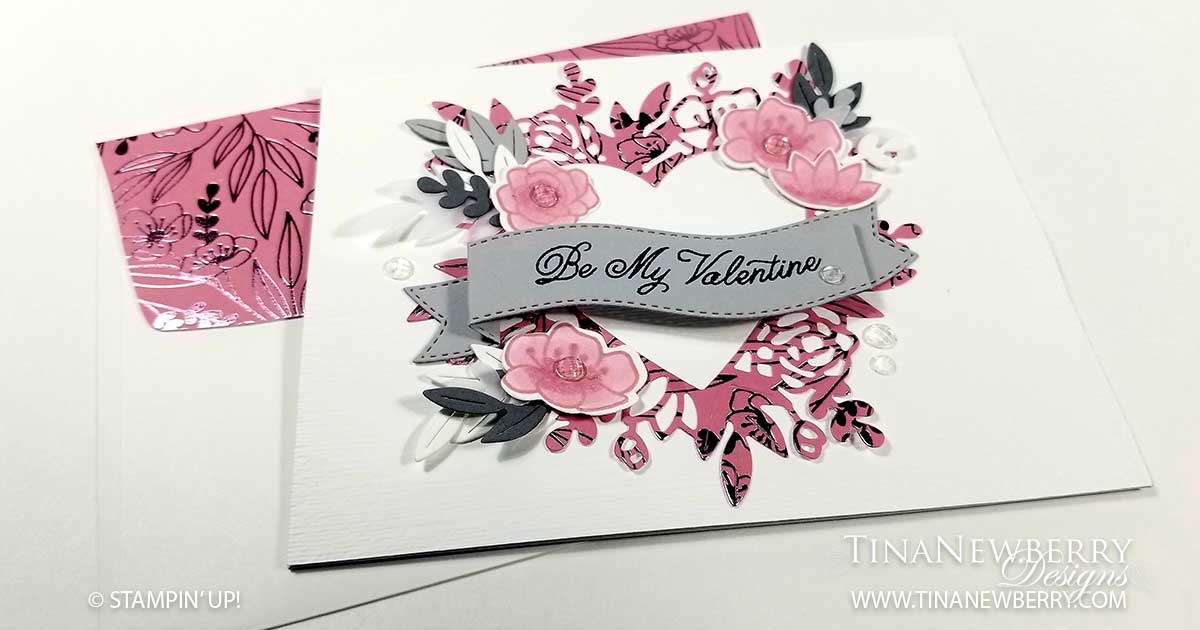
I was first inspired by the new Mini Catalog to make this card. I set out to make the one exactly as seen on page 75.

But then I didn’t have the paper they used on the background and I really liked the idea of a Rococo Rose, Grey and White color scheme. So well, you can see what happened there when I took the road less travelled and was pleasantly surprised when I ended up in a place I never imagined. LOL.

Full list of supplies needed, listed below. A die cutting machine is needed for this card.
Card Base: Smoky Slate Cardstock 4 1/4 h” x 11″ w folded to 4 1/4″ h x 5 1/2″ w.
Background: Basic White 4 1/4″ h x 5 1/2″ w.
Sentiment Layer: 
Smoky Slate Cardstock scrap.
Heart: Love You Always Specialty Designer Series Paper scrap.
Flowers & Leaves: Basic White, Smoky Slate, Basic Grey and Vellum scraps.
Inside Layer: Basic White Cardstock 4″ h x 5 1/4″ w.

  1. Affix all stamps to Acrylic Blocks.
  2. Fold the Card Base in half using a Bone Folder to sharpen the crease.
  3. Run the Background through the Stampin’ Cut & Emboss Machine with the Subtle Embossing Folder. Then attach with Stampin’ Dimensionals.
  4. Attach an Adhesive Sheet to the scrap Love You Always Specialty Designer Series paper and die cut with the Heart.
  5. Adhere the Heart to the Background.
  6. Stamp the Sentiment in Tuxedo Black Memento Ink on Smoky Slate scrap, die cut with the Banner Die, and fold along the score lines.
  7. Attach the Sentiment to the Card using Stampin’ Seal.
  8. Die cut various leaves from Basic White, Smoky Slate, Basic Grey and Vellum scraps.
  9. On Basic White scrap, stamp two of each flower in Rococo Rose ink, use Rococo Rose Blender Pens to color, and then die cut.
  10. Arrange the leaves and flowers and then glue dot in place.
  11. Add Elegant Faceted Gems.
  12. Decorate the Inside Layer and attach.
  13. Decorate the envelope.
  14. It’s Beautiful! Put it in the mail today.

Shopping List

Stamper’s Toolkit

You will also need adhesive, acrylic blocks, scissors and other basic PaperCrafting items from the Stamper’s Toolkit

You Had Me at Hello

With black and white paper and a little ink, you can create your own colored pattern paper! I added Flirty Flamingo, Melon Mambo and Magenta Madness using a brayer and some sponge daubers (one for each color) to the colorful strip on this card. And then I stamped the hearts and heart outlines in Real Red. Voila! A pretty piece of paper ready to turn into a card.

Full list of supplies needed, listed below. A die cutting machine is needed for this card.
Card Base: Basic White Thick Cardstock 8 1/2 h” x 5 1/2″ w folded to 5 1/2″ h x 4 1/4″ w.
Background: Basic White Cardstock 5 1/4″ h x 4″ w
Striped Layer: True Love DSP 5 1/4″ h x 3″ w
Hearts and Dots Layer: True Love DSP 5 1/4″ h x 2 1/2″ w
Sentiment Layer: Basic White Cardstock scrap
Inside Layer: Whisper White Cardstock 5 1/4″ h x 4″ w

  1. Affix all stamps to Acrylic Blocks.
  2. Fold the Card Base in half using a Bone Folder to sharpen the crease.
  3. Run the Background through the Stampin’ Cut and Emboss Machine with the Scripty Embossing Folder.
  4. Create the Background Splatters:
    1. Place the Embossed Background onto a piece of scrap paper or into a box to protect your work surface.
    2. Use an Acrylic Block to pick up some Magenta Madness ink.
    3. Fill the barrel of the Medium Water Painter with water.
    4. Add a few drops to the inked block by squeezing the Water Painter over the inked block and stir to thin the ink.
    5. Hold your inked Water Painter positioned parallel about 3-6″ above the Background.
    6. Place your other hand below the Water Painter and tap the Water Painter on your other hand and splatters will end up on your Background. Repeat moving your hand around until you have enough splatters on your Background.
    7. Repeat #2-6 using Tuxedo Black.
  5. Attach Background using Stampin’ Dimensionals.
  6. Color the DSP:
    1. Cut your Heart and Dots Layer from True Love DSP 5 1/4″ h x 2 1/2″ w
    2. Protect your work surface by placing your Hearts and Dots Layer on scrap or grid paper.
    3. Add color to your Layer starting with the lightest color first.
    4. With a Sponge Brayer, lay some Flirty Flamingo down on your Layer.
    5. Next use a Sponge Dauber to swipe Melon Mambo in areas of the Layer.
    6. Lastly use a Sponge Dauber to swipe Magenta Madness in areas of the Layer.
    7. Once you have the Layer colored to your satisfaction, stamp the Hearts and Hearts Outlines in a random pattern using Real Red ink.
  7. Attach the Hearts and Dots Layer to the Striped Layer using Stampin’ Seal and attach the Embossed Background Layer using Stampin’ Seal+ or Tear & Tape.
  8. Wrap the Background Layer twice around with Linen Thread, add a Heart Charm and tie a bow.
  9. Stamp the Sentiment on Basic White Cardstock scrap with Tuxedo Black ink and Die Cut.
  10. Attach the Sentiment with Stampin’ Dimensionals.
  11. Add more Heart Charms with Fine Tip Glue.
  12. Decorate the Inside Layer and attach.
  13. Decorate the envelope.
  14. Lovely! Who will you send it to?

Shopping List

Stamper’s Toolkit

You will also need adhesive, acrylic blocks, scissors and other basic PaperCrafting items from the Stamper’s Toolkit

Catching Snowflakes

I just love Snowmen and this one just looks like he is so happy catching snowflakes. The playfulness of the Snail Mail Designer Series Paper becomes available tomorrow (eek!) and is just perfect for Mr. Snowman. Vellum adds a softness to the card with the crinkle seam ribbon in the background. I attempted to put a sentiment on the front of this one and decided against it. I like him just as he is.

Full list of supplies needed, listed below. A die cutting machine is needed for this card.
Card Base: Canine Cabana Cardstock 8 1/2 h” x 5 1/2″ w folded to 5 1/2″ h x 4 1/4″ w.
Background: Snail Mail DSP 5″ h x 3 3/4″ w
Vellum Layer: Vellum Cardstock 5″ h x 3 3/4″ w
Sentiment Matte: Bermuda Bay Cardstock trimmed with the Layering Squares Dies to a 3″ square
Sentiment Layer: 
Whisper White Cardstock – Stamp first (see below) then trim with the Layering Squares Dies to a 2 5/8″ square
Inside Layer: Whisper White Cardstock 5 1/4″ h x 4″ w

  1. Affix all stamps to Acrylic Blocks.
  2. Fold the Card Base in half using a Bone Folder to sharpen the crease.
  3. Attach the Background DSP with Stampin’ Seal
  4. Add the Vellum Cardstock with Stampin Seal, being sure to limit the adhesive to where the Sentiment will be.
  5. Add two staples to the right-hand side – for design elements more than to hold the paper on.
  6. Run Stampin’ Seal on top of the Vellum in a Z pattern and place the Crinkle Ribbon along that adhesive.
  7. Stamp the Snowman in Tuxedo Memento Ink on the Sentiment Layer and color with the Bermuda Bay and Pumpkin Pie Stampin’ Blends.
  8. Attach the Sentiment to the Sentiment Matte and attach the Sentiment Matte with Stampin’ Dimensionals.
  9. Decorate the Inside Layer and attach.
  10. Decorate the envelope.
  11. So cute! Now send it to someone special.

Shopping List

This project uses the Snail Mail Designer Series Paper from the Jan-June Mini Catalog, available January 5, 2020

Recommended Stamper’s Toolkit

Product List
Order online from the convenience of your own home or send me your order and I’ll take care of you. ❤ Either way, please use the host code ANTD9UHS. Order online AND, if your order is $50 or more using host code ANTD9UHS between now and the end of the month you’ll receive a free pack of embellishment as a THANK YOU gift from me. ❤ If your order is over $150, skip the host code, earn Stampin’ Rewards for free stuff yourself and I’ll still send you a free pack of embellishment as a THANK YOU gift from me. ❤

Snowflake Swirls

When I saw the Snail Mail Designer Series Paper in the Jan-June Mini Catalog, I just knew it was perfect for more cards with the a-dorable Snowman Season Photopolymer Stamp set. This little guy comes to life with the beautiful snowflakes from the Christmas Layers Dies, which really are more winter than Christmas. The Die set comes with 7 snowflake and foliage dies so you can add a pop of snowflake color to any project.

Full list of supplies needed, listed below. A die cutting machine is needed for this card.
Card Base: Melon Mambo Cardstock 8 1/2 h” x 5 1/2″ w folded to 5 1/2″ h x 4 1/4″ w.
Background: Snail Mail DSP 5 1/4″ h x 4″ w
Snowflake Decorations (2): Melon Mambo Trimmed with the Christmas Layers Dies
Sentiment Matte: Blushing Bride Cardstock 2 3/4″ x 2 3/4″ w trimmed with the Layer Squares Dies
Sentiment Layer: 
Stamp first (see instructions below) Whisper White Cardstock 3/8″ h x 2 3/8″ w trimmed with the Layer Squares Dies
Ribbon: 6″ Blushing Bride 3/8″ Metallic Ribbon (avail in the Jan – June Mini Catalog Jan 5th)
Inside Layer: Whisper White Cardstock 5 1/4″ h x 4″ w

  1. Affix all stamps to Acrylic Blocks.
  2. Fold the Card Base in half using a Bone Folder to sharpen the crease.
  3. Attach the Background using Stampin’ Seal.
  4. Making the Snowflake Layer
    1. Attach Adhesive Sheets to the Melon Mambo Cardstock
    2. Die Cut the Snowflakes to make stickers
    3. Poke out the extra pieces from the Snowflake Die Cut, being careful not to remove the backing.
    4. Remove the backing to reveal the adhesive.
    5. Attach to Card.
  5. Stamp the Snowman on Whisper White Cardstock and Die Cut with the Layering Square Die.
  6. Use the Petal Pink Stampin’ Blend to add a little color to the Sentiment.
  7. Attach the Sentiment to the Sentiment Matte.
  8. Wrap Ribbon around Sentiment Matte and tie a knot.
  9. Attach the Sentiment Matte with Stampin’ Dimensionals.
  10. Decorate the Inside Layer and attach.
  11. Decorate the envelope.
  12. So cute! Now send it to someone special.

Shopping List

This project uses the Snail Mail Designer Series Paper and the Blushing Bride 3/8″ Metallic Ribbon. Both will be available starting January 5, 2021 in the January to June Mini Catalog.

Recommended Stamper’s Toolkit

Product List
Order online from the convenience of your own home or send me your order and I’ll take care of you. ❤ Either way, please use the host code ANTD9UHS. Order online AND, if your order is $50 or more using host code ANTD9UHS between now and the end of the month you’ll receive a free pack of embellishment as a THANK YOU gift from me. ❤ If your order is over $150, skip the host code, earn Stampin’ Rewards for free stuff yourself and I’ll still send you a free pack of embellishment as a THANK YOU gift from me. ❤