In CASE of Emergency

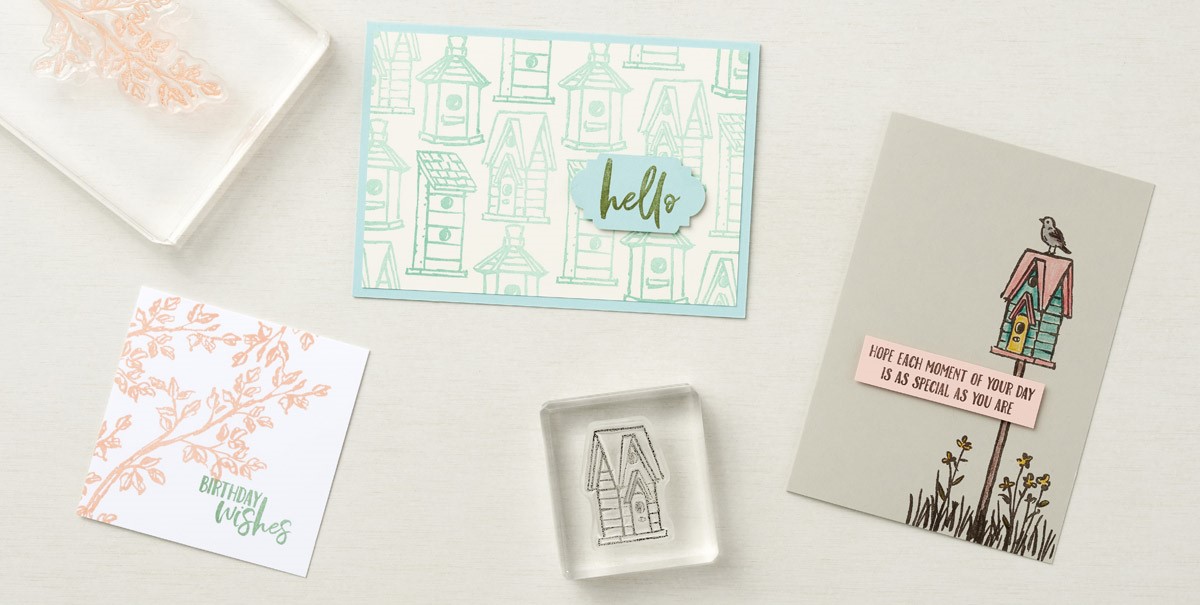
CASEing means Copy and Share Everything, but it also means “sanity saver” on days when you desperately want to create something handmade but don’t have the time (or the energy) to brainstorm.

If you’re having a papercrafting emergency, this is our tried-and-true method for achieving immediate relief. Look through the catalog, find a project you love, then . . .

  1. Copy the layout.
  2. Copy the color scheme.
  3. Copy the technique.

Whatever you do, copy SOMETHING and you will be well on your way to making a project that you can proudly share.

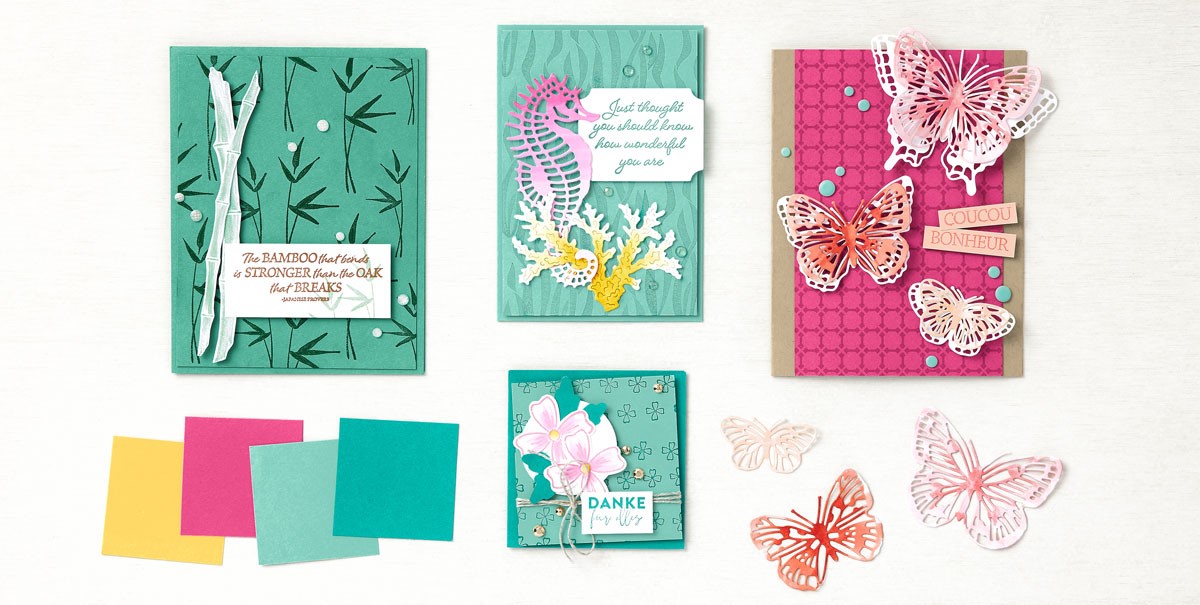
We CASEd the pretty layout for the Bamboo card and added fussy-cut bamboo stems for an eye-catching focal point. Simple, yet lovely using the Bamboo Beauty Stamp Set.

To create the Danke card, we borrowed the Bermuda Bay, Coastal Cabana, Daffodil Delight, and Polished Pink color combo. (Pro tip: Always keep a list of favorite color combos on hand—in CASE of emergency.) Additional tip: Stamp the flower in Polished Pink ink, then use a light Stampin’ Blend of the same color to add dimension to the flower petals, leaving the edges white.

For the Coucou bonheur card, our concept artist CASEd a terrific technique: She inked up the Brilliant Wings Dies with light and dark Calypso Coral, Flirty Flamingo, and Petal Pink Stampin’ Blends Alcohol Markers to fashion richly hued butterfly wings. Gorgeous!

My Tail Says It’s the Twitching Hour

Thank you for your interest in this project. Some projects are exclusive to subscribers who will receive passwords by email.

Are you a subscriber? Awesome! Check your email for the password and enter it here to view this project.

Not yet subscribed?  We’d love for you to join us.  Subscribe to my email list and receive news, information and inspiration by email.

Really I’ve Been This Cute All Nine Lives

I’ve had many cats over the years and most have been quite entertaining. Each with their own personality. The big fat cat in the box in this stamp set made me chuckle and reminded me of Fletcher, a stray feral kitten we adopted about 8 years ago. He continues to be a bit wild living the dream on an inlet at our dear friends’ the Lynn’s, and for sure will be the first to try to fit in a box half his size. Bwahahah!

Measurements

Full list of supplies needed, listed below. A die cutting machine is needed for this card.
Card Base: Bumblebee Cardstock 5 1/2″ h x 8 1/2″ w folded to 5 1/2″ h x 4 1/4″ w
Background:
Harvest Meadow Designer Series Paper 5 1/4″ h x 4″ w
Decorative Rectangle:
In the Wild Designer Series Paper 4″h x 2 5/8″ w
Decorative Rectangle Matte:
Soft Suede Cardstock 4 1/4″ h x 2 3/4″ w
Sentiment Layer:
Basic White Cardstock scrap stamped first, then trimmed with the Tailored Tag Punch
Sentiment Matte:
Kraft Paper Pack trimmed with the Tailored Tag Punch
Decorative Circle:
Basic White Cardstock trimmed with the Painted Labels Dies
Cat:
Basic White Cardstock scrap
Inside Layer (optional):
Basic White Cardstock 5 1/4″ h x 4″ w

Let’s Create

  1. Affix all stamps to Acrylic Blocks.
  2. Fold the Card Base in half using a Bone Folder to sharpen the crease.
  3. Attach the Harvest Meadow Background using Stampin’ Seal.
  4. Attach the In The Wilde Decorative Rectangle to the Soft Suede Decorative Rectangle Matte and attach to the card with Stampin’ Seal.
  5. Stamp
    1. the Cat in Bumblebee Ink on Basic White Cardstock scrap
    2. the Box in Soft Suede ink on Kraft Paper
    3. the Sentiment in Soft Suede ink on Basic White Cardstock scrap
  6. Fussy Cut with Paper Snips
    1. the Bumblebee Cat
    2. the Kraft Paper Box
  7. Punch with the Tailored Tag Punch
    1. the Sentiment
    2. the Sentiment Matte and then use Paper Snips to cut in half length-wise
  8. Use Stampin’ Seal to attach the Kraft Paper Box to the Bumbleebee Cat and then attach to the Basic White Decorative Circle with Stampin’ Dimensionals.
  9. Use Stampin’ Seal to attach the Sentiment Matte to the back of the Sentiment and then use Stampin’ Dimensionals to attach.
  10. Sprinkle with 2020-2022 In-Color Gems in Cinnamon Cider and Bumblebee
  11. Stamp the Inside Layer to your liking and attach with adhesive of your choice.
  12. Decorate your envelope.
  13. So cute! Put it in the mail!

Shopping List

Stamper’s Toolkit

You will also need adhesive, acrylic blocks, scissors and other basic PaperCrafting items from the Stamper’s Toolkit

Have a Purr-fect Halloween

I’ve had many cats over the years and most have been quite entertaining. Each with their own personality. The big fat cat in the box in this stamp set made me chuckle and reminded me of Fletcher, a stray feral kitten we adopted about 8 years ago. He continues to be a bit wild living the dream on an inlet at our dear friends’ the Lynn’s, and for sure will be the first to try to fit in a box half his size. Bwahahah!

Measurements

Full list of supplies needed, listed below.
Card Base: Granny Apple Green Cardstock 5 1/2″ h x 8 1/2″ w folded to 5 1/2″ h x 4 1/4″ w
Background: Cute Halloween Designer Series Paper 5 1/4″ h x 4″ w
Banner: Black Glitter Paper 4 1/2″h x 2 1/2″ w
Sentiment Layer: Basic White Cardstock scrap
Pumpkin, Bat, & Spider: Basic White Cardstock scrap
Inside Layer (optional): Basic White Cardstock 5 1/4″ h x 4″ w

Let’s Create

  1. Affix all stamps to Acrylic Blocks.
  2. Fold the Card Base in half using a Bone Folder to sharpen the crease.
  3. Use a Blending Brush to apply Granny Apple Ink to the Cute Halloween Designer Series Paper Background and then attach using Stampin’ Seal.
  4. Stamp the Spider, Pumpkin, Bat and Sentiment using Tuxedo Black Memento Ink on Basic White Cardstock scrap and stamp the Pumpkin fill stamp in Pumpkin Pie. If preferred, use a Pumpkin Pie Stampin’ Blend to darken the color on the Pumpkin.
  5. Fussy cut all of them out and set aside.
  6. To create the banner tip:
    1. Gently pinch one end of the Black Glitter Banner layer in half to mark the middle. Then unfold.
    2. Use Paper Snips to cut a 1/4″ – 1/2″ slit along the center crease you just made. The longer your slit the deeper your banner will be.
    3. Cut from the corner to the bottom of the slit, removing a triangle. Repeat from other corner.
  7. Wrap about 6″ of Black and White Gingham Ribbon around the top of the Banner and tie a bow.
  8. Use Stampin’ Dimensionals to attach the Spider, Pumpkin and Bat to the Banner – extra adhesive may be needed to adhere to the Glitter Paper.
  9. Use a Chalk Marker to draw a spider web strand from the Ribbon to the Spider.
  10. Use Stampin’ Dimensionals to attach the Banner.
  11. Use Stampin’ Seal to attach the Sentiment.
  12. Sprinkle with Silver Metallic Pearls.
  13. Stamp the Inside Layer to your liking and attach with adhesive of your choice.
  14. Decorate your envelope.
  15. HA! Love it! Who will you send it to?

Shopping List

Stamper’s Toolkit

You will also need adhesive, acrylic blocks, scissors and other basic PaperCrafting items from the Stamper’s Toolkit

Sweet and #SimpleStamping

#SimpleStamping is a great way to create beautiful cards, using minimal supplies, layers and embellishments. Just stick to a SIP – stamps, ink and paper.

All three cards use one stamp set—the Garden Birdhouses Stamp Set—and yet each card uses a different technique to create a unique style. Explore the stamp sets in your annual catalog and plan three simple cards that you can share with your friends and family. If you post online, use #SimpleStamping in the caption.

Each card features only two ink pads and one or two colors of cardstock.

  1. The Birthday Wishes card is the simplest with just one color of cardstock and a couple of images, all stamped on a single layer.
  2. The Hello card uses more images, layers, and a punch. We even customized the punch shape to fit the sentiment a little better—all it took was a couple of snips with our trusty Paper Snips.
  3. And lastly, the third card has some additional color added in, which is easy to do with a set of Watercolor Pencils.

What will you make today?