
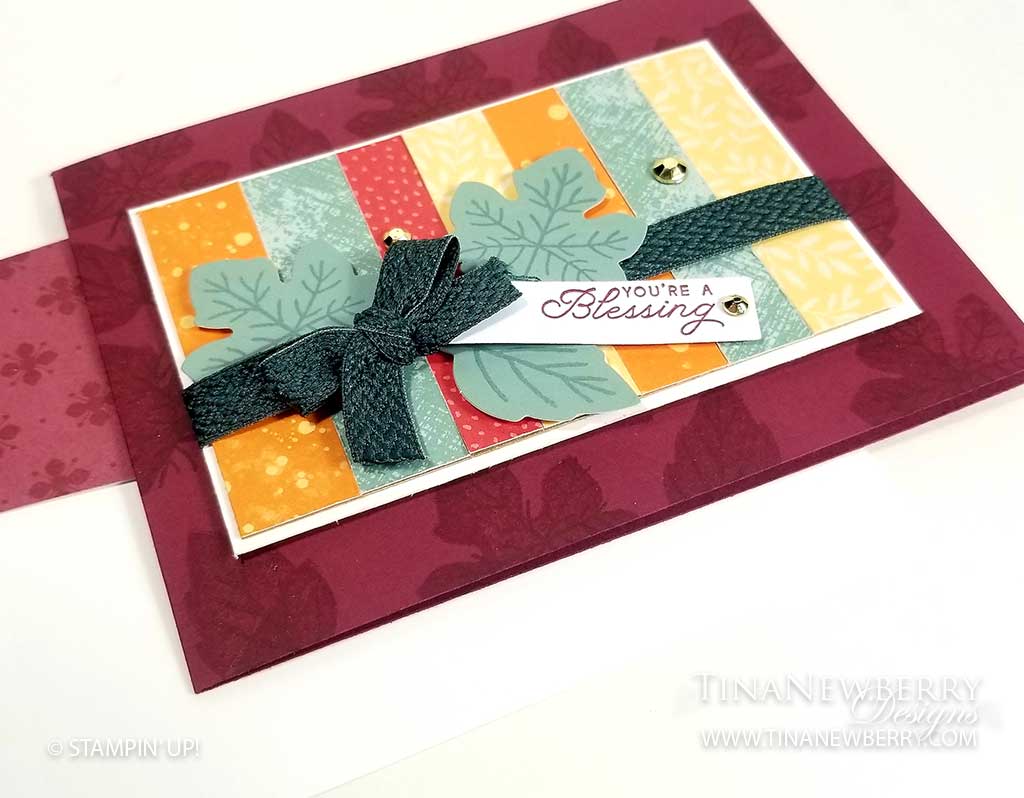
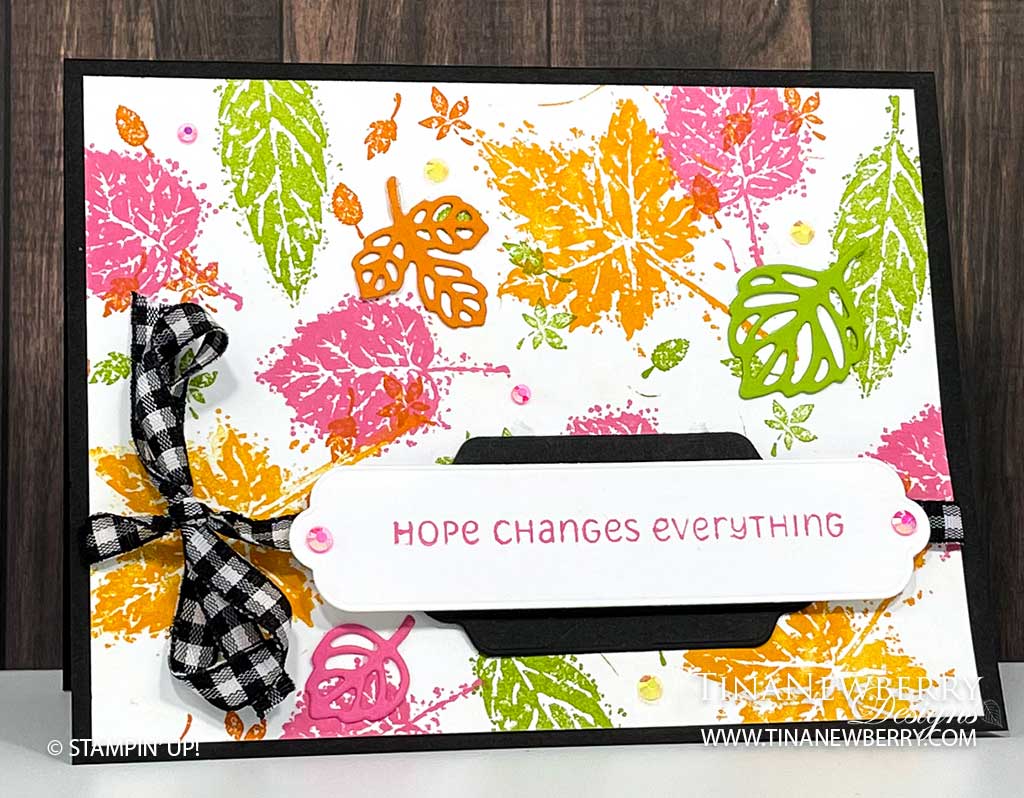
Here’s a beautiful quick & easy card! The Expressions in Ink Designer Series Paper and Intricate Leaves Dies do all the work on this stunning card.
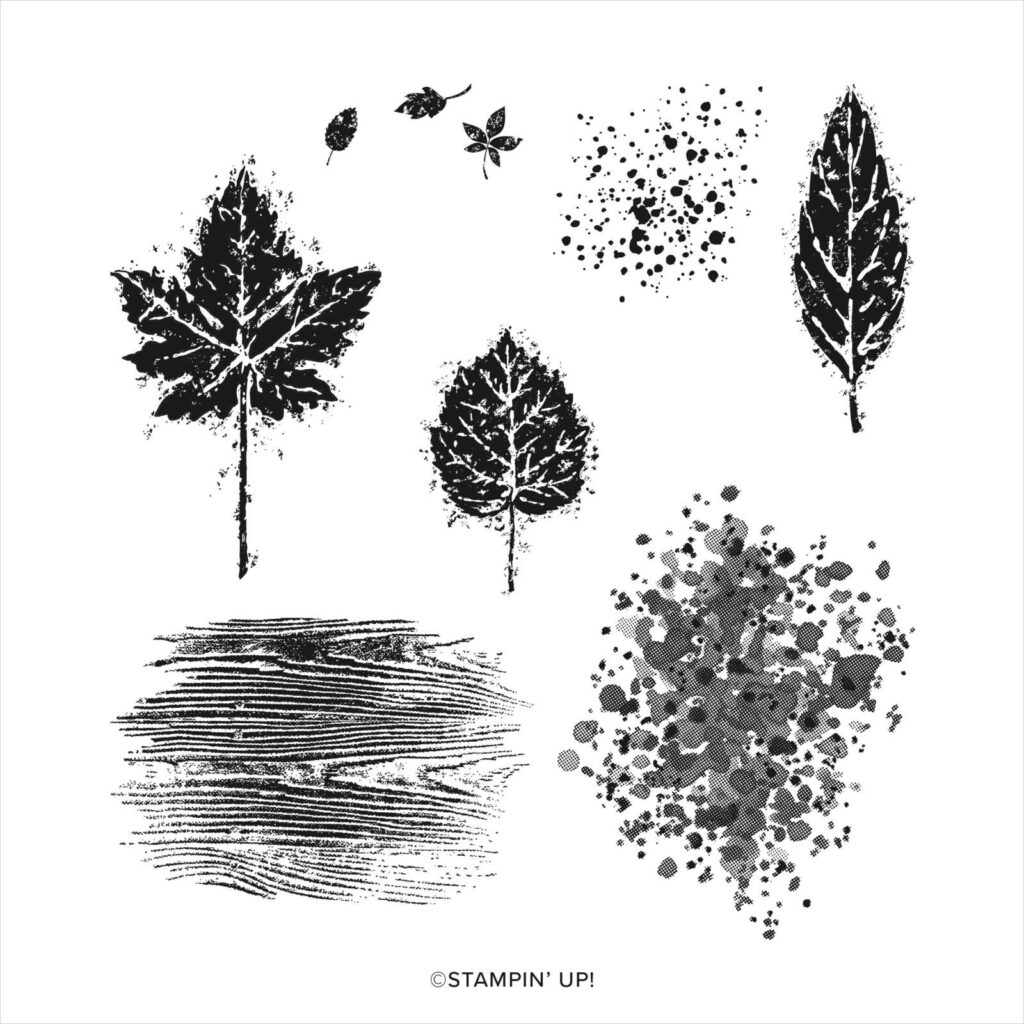
Gorgeous Leaves Stamp Set 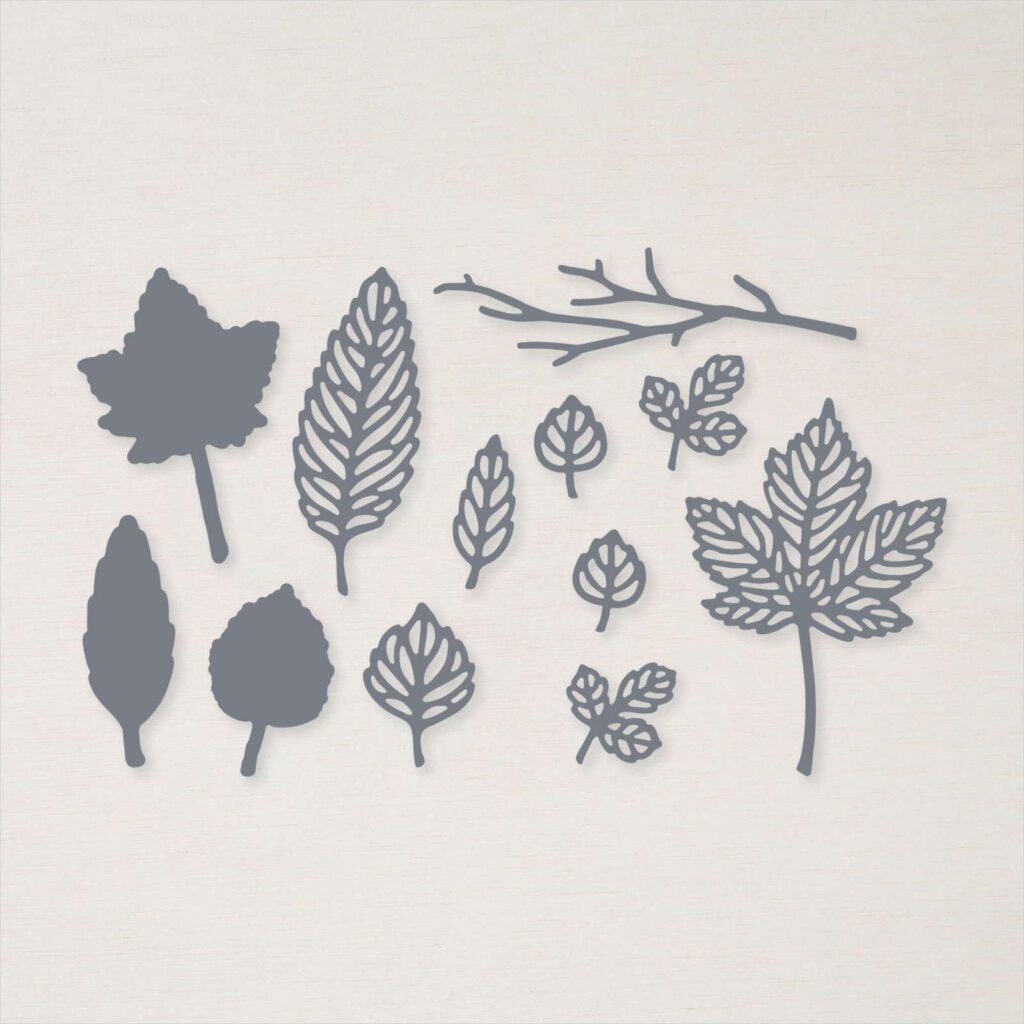
Intricate Leaves Dies
Measurements
Full list of supplies needed, listed below. A die cutting machine is needed for this card.
Card Base: Shaded Spruce 5 1/2” h x 8 1/2” w, scored on the long side at 4 1/4”
Background: Expressions in Ink Specialty Designer Series Paper 5 1/4″ h x 4″ w
Inside Layer (Optional): Basic White Cardstock 5 1/2″ h x 4 1/4″ w
Let’s Create
- Affix all stamps to Acrylic Blocks.
- Fold the Card Base in half using a Bone Folder to sharpen the crease.
- Stamp your Sentiment along the bottom of the Expressions in Ink Background layer in Shaded Spruce and Polished Pink
- Die-cut two leaves from the Expressions In Ink Specialty Designer Series Paper using the Intricate Leaves Dies.
- Adhere Background layer to Card Base.
- Adhere leaves to the background layer using a small amount of liquid glue, or Mini-Glue dots.
- Tie a small bow (or knot) and adhere it to the stem of the largest leaf.
- Sprinkle on the sequins.
- Stamp the Inside Layer to your liking and attach with adhesive of your choice.
- Decorate your envelope
- So pretty!!! Who will you send it to?
Shopping List

 Specialty Designer Series Paper")


 Fine Art Ribbon")


Stamper’s Toolkit
You will also need adhesive, acrylic blocks, scissors and other basic PaperCrafting items from the Stamper’s Toolkit

$8.00

$12.00

$4.00

$5.25

$7.00
$4.00

$7.00

$10.00

$8.00

$8.00

$10.00
$25.00

$7.00

$6.00

$10.00

$8.00

$5.00

$5.00

$6.00

$71.50

$8.00

$11.75
")
$30.00

$9.50

$120.00


")


 Gingham Ribbon")

