Handmade Gift Card Holder

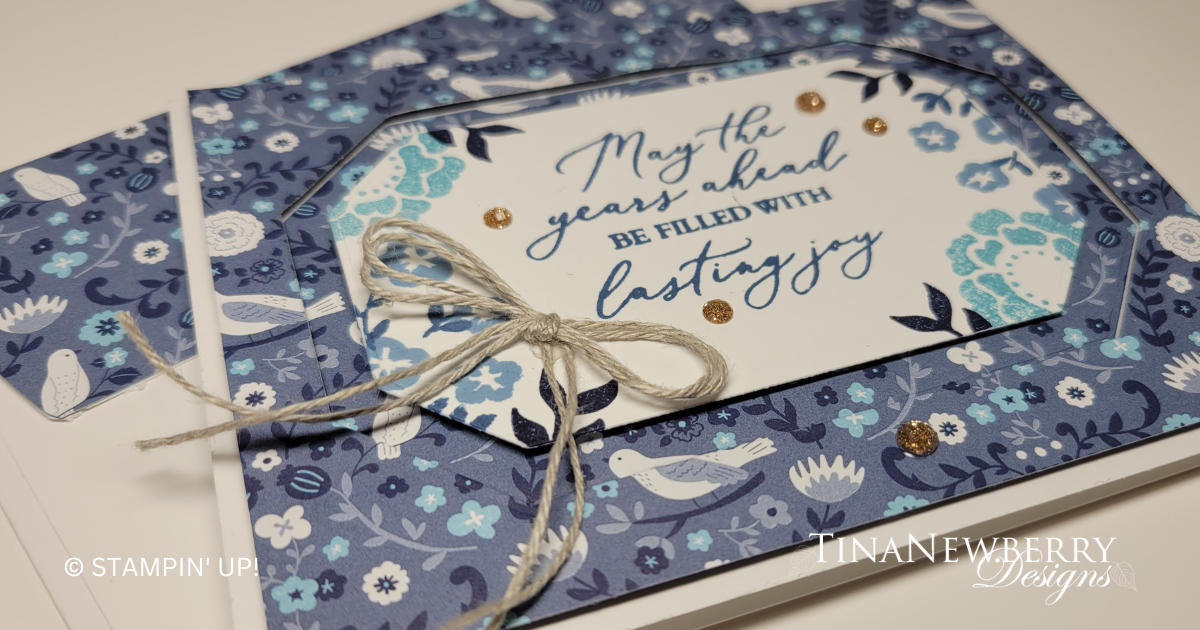
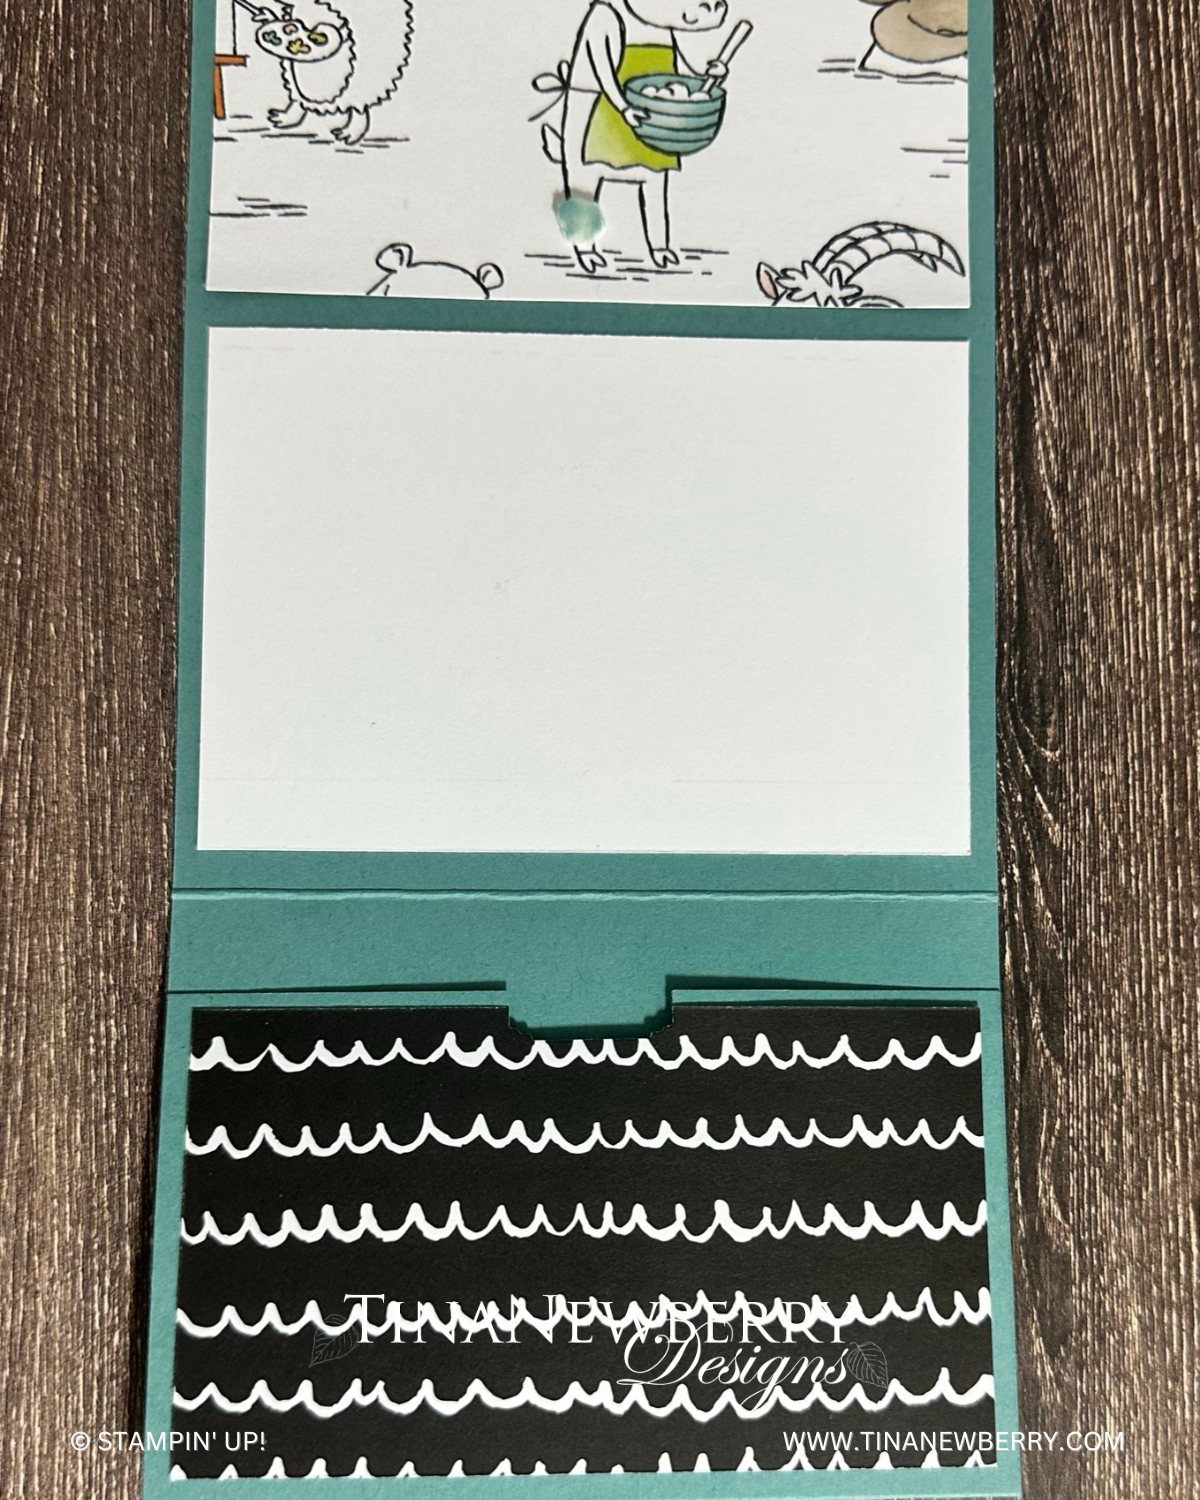
Who says giving a gift card has to be boring? Send personalized cheer with a handmade gift card holder- the same size as a regular card. Fits in a standard envelope and mailable. So thoughtful!

Stamp and color an animal of your choice, then cut it out using one of the coordinating dies with the Zany Zoo Bundle. Set the stage for your dancing cheetah or create a quiet landscape for your knitting llama with the additional dies and prop pieces. Keep it simple or add as much detail as you want. Let your creativity shine!

Measurements

Full list of supplies needed, listed below. A die cutting machine is needed for this card.

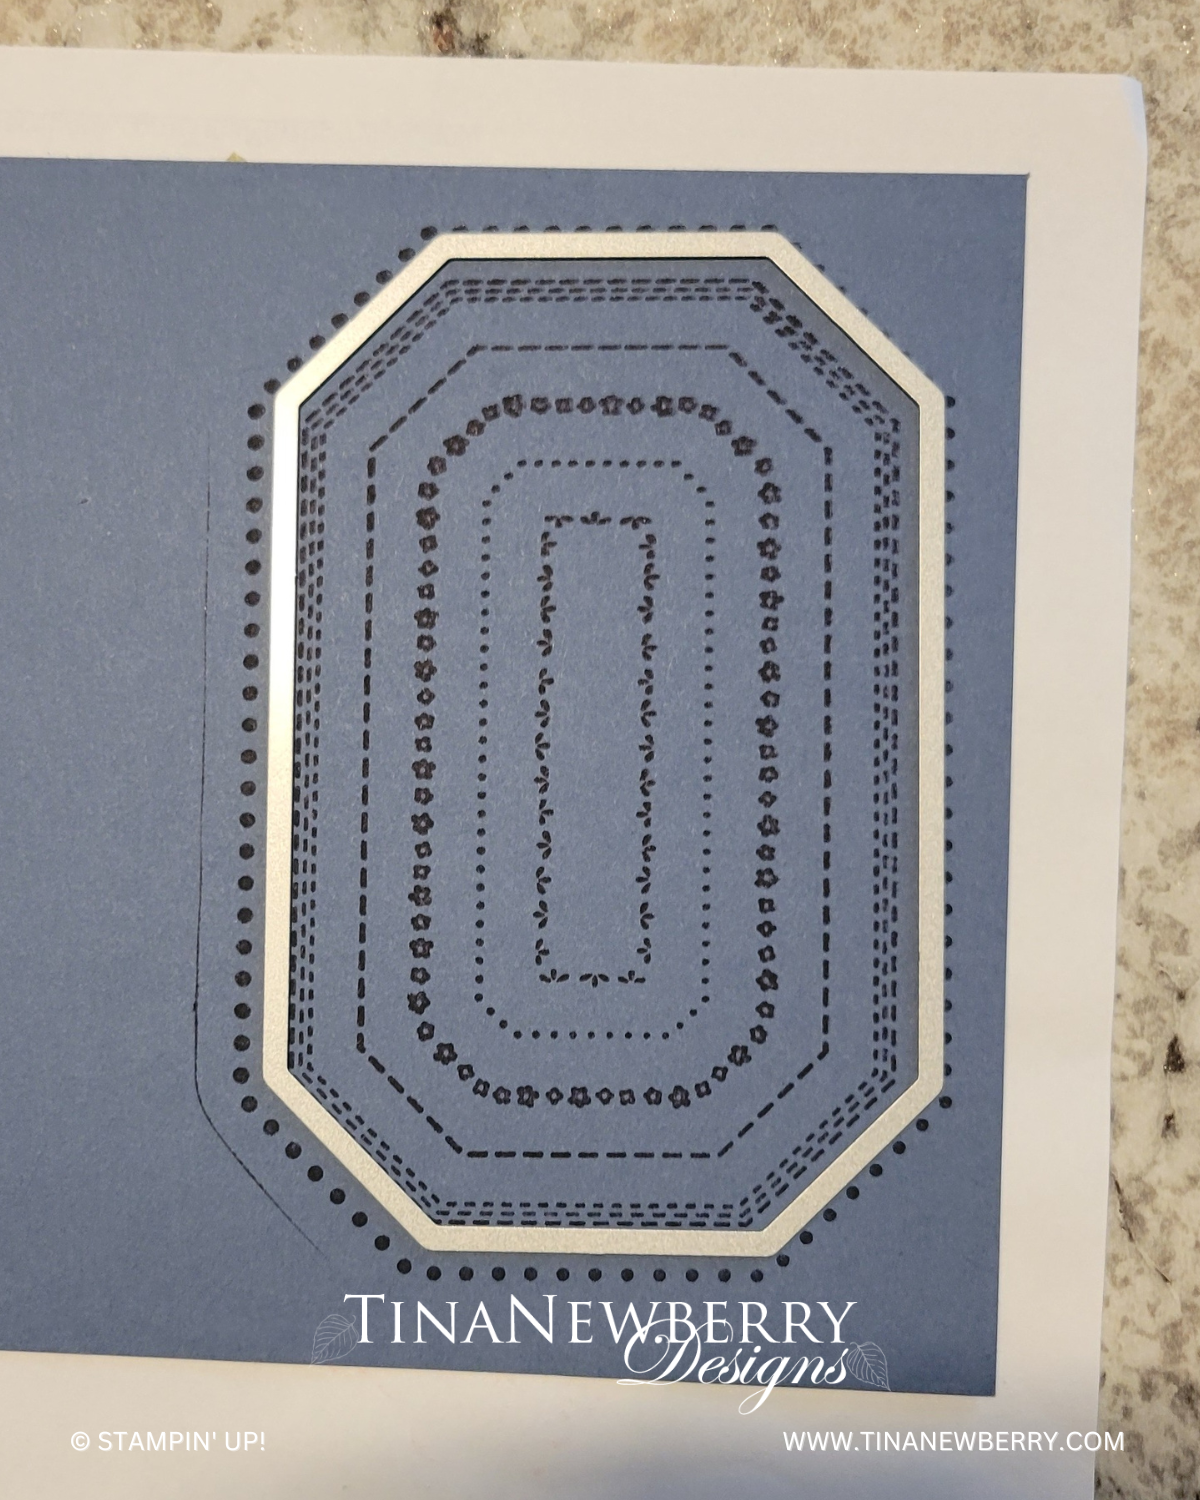
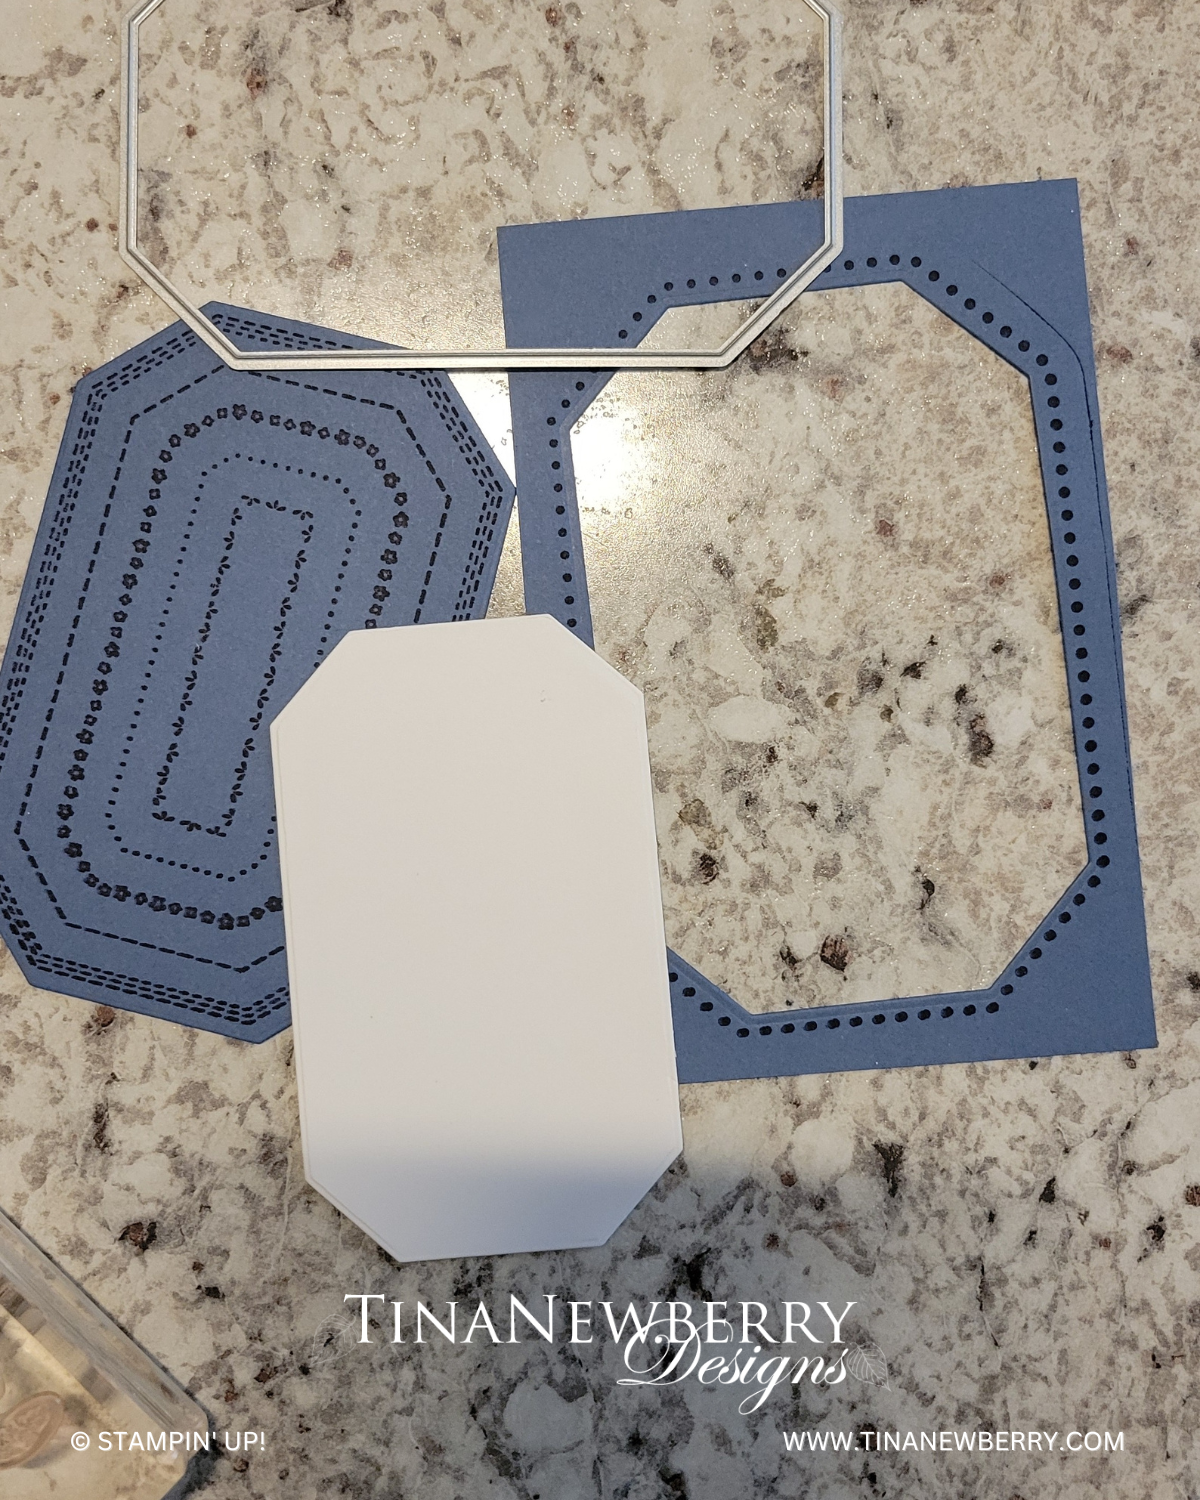
  • Card Base Lost Lagoon 4 ¼” x 11”, scored at 2 ½” and 5 ½”
  • Lost Lagoon Square 2 ½” x 2 ½”
  • Basic White Square 2 ¼” x 2 ¼”
  • Designer Series Paper (DSP) 4” x 2 ¾”
  • (2) DSP 4” x 2 ¼”
  • Basic White (for inside) 4” x 2 ¾”


Let’s Create

  1. Affix all stamps to Acrylic Blocks.
  2. Fold the Card Base at the score lines using a Bone Folder to sharpen the creases.
  3. Adhere DSP to top of card. Decorate inside Basic White panel and adhere. 
  4. Use Tear-n-Tape on the short edges of the 4 1/4″ x 2 1/2″ panel and fold up, to create a pocket for the gift card.
  5. Adhere DSP with Stampin’ Seal.
  6. Use Best Label Punch to create a little notch.
  7. Fold-up pocket section and adhere DSP to the card front.
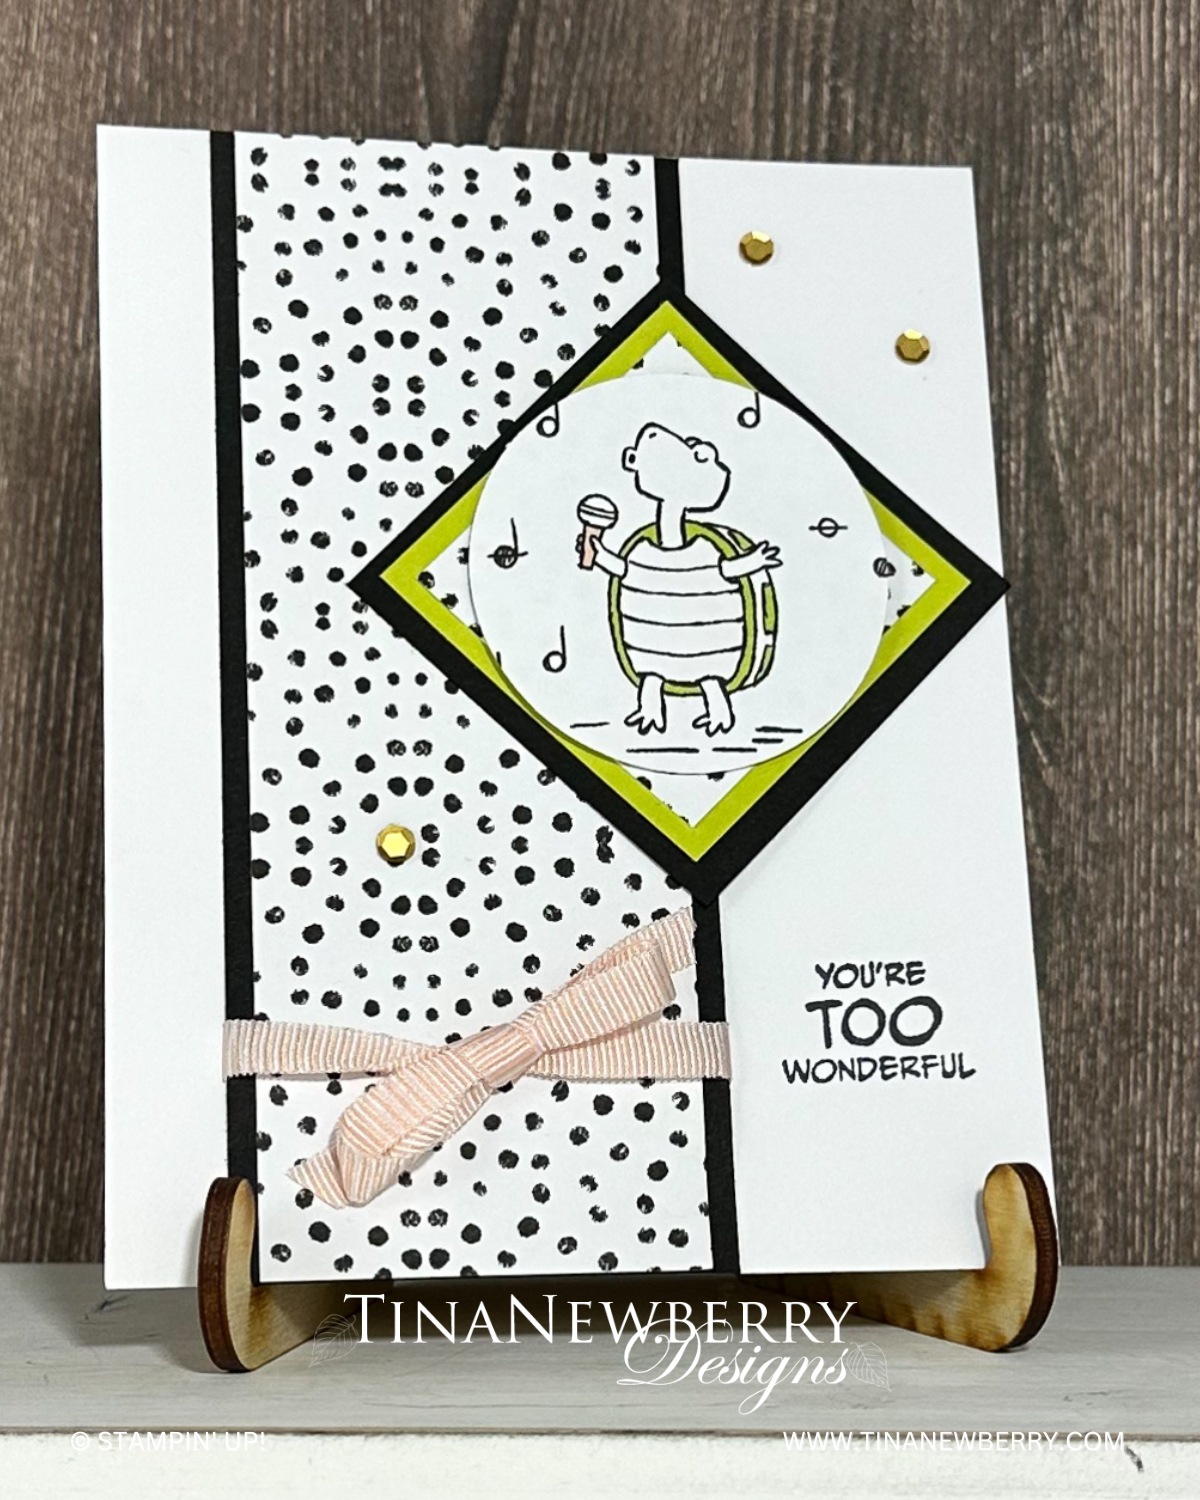
  8. Decorate Basic White square and adhere to Lost Lagoon square. Wrap ribbon around and tie a bow. Adhere square to front of card
  9. Decorate your envelope.
  10. So thoughtful! Now send it to someone special.

Inspired by stampinmom.com.

Shopping List

Recommended Stamper’s Toolkit ❤


You’re Too Wonderful

The characters in the Zoo Crew Suite, like this little singing turtle, are A-Dorable! Leave them as outline art or color them in- your choice! Get inspiration from the Designer Series Paper.

Stamp and color an animal of your choice, then cut it out using one of the coordinating dies with the Zany Zoo Bundle. Set the stage for your dancing cheetah or create a quiet landscape for your knitting llama with the additional dies and prop pieces. Keep it simple or add as much detail as you want. Let your creativity shine!

Measurements

Full list of supplies needed, listed below. A die cutting machine is needed for this card.

Card Base Basic White Thick 8 ½” x 5 ½”, scored at 4 ¼”
Basic Black layer 5 ½” x 2 ¼”
Designer Series Paper (DSP) layer 5 ½” x 2”
Basic Black square 2 ¼”
Lemon Lime Twist square 2”
Designer Series Paper (DSP) Square 1 ¾”
Basic White Circle ~2”


Let’s Create

  1. Affix all stamps to Acrylic Blocks.
  2. Fold the Card Base in half using a Bone Folder to sharpen the crease.
  3. Die-Cut or Punch Basic White Circle ~2”
  4. Assemble Card. Adhere DSP strip to Basic Black strip. Wrap ribbon around and tie a bow. Adhere this panel to card front.
  5. Stamp sentiment.
  6. Adhere Lemon Lime Twist square to Basic Black square. Adhere DSP square to Lemon Lime Twist square. Decorate circle, and adhere circle to square panel with Stampin’ Dimensionals. Adhere this panel to card front.
  7. Sprinkle on the sequins.
  8. Decorate your envelope.
  9. So cute! Who is wonderful in your life that needs this card?

Shopping List

Recommended Stamper’s Toolkit ❤


Countryside Inn – For You

A bit of an advanced card using die cutting, two-step stamping, watermarking, coloring stamps, and fussy cutting! Had a fun time making a version with some of the Moose Friends!

The Countryside Corners Bundle has everything you need to take your crafts to the next level. The image-only stamp comes with several elegant borders that can be transformed into beautiful projects. The borders can be cut out using the Countryside Corners Dies. When you use them together, you can add layers and texture, and create frames, peek-through frames, centerpieces, and so much more!

Measurements

Full list of supplies needed, listed below. A die cutting machine is needed for this card.

Boho Blue Cardstock: 

  • 5 1/2″hw x 8 1/2″ w folded to 5 1/2″ h x 4 1/4″ w

Misty Moonlight

  • 5” h x 3 ½” h 

Basic White Cardstock: 

  • 4 ½” h x 3” w 
  • Scrap for tag, and bottle
  • 5 ¼” h x 4” w for inside

Daffodil Delight

  • ½” x 4 ¼” w

Countryside Inn Designer Series Paper (DSP)

  • 2” h x 4 ¼” w

Let’s Create

  1. Affix all stamps to Acrylic Blocks.
  2. Fold the Card Base in half using a Bone Folder to sharpen the crease
  3. Stamp the Countryside Corners Stamp in Misty Moonlight Ink on the Misty Moonlight and die cut down to the 3 dashed lines (see picture). 
  4. Stamp the bottle in Night of Navy Ink on Basic White scrap and use Paper Snips to fussy cut. 
  5. Die cut the 4 ½” h x 3” w Basic White with the die smaller than than the Misty Moonlight.
  6. Ink the Flower Stamp with Daffodil Delight and then color the tall flowers with Early Espresso Stampin’ Write marker. Huff on the stamp to re-wet the ink and stamp on the Basic White tag. Stamp the leaves and flower centers stamp over the flowers stamp withBoho Blue ink to finish the image.
  7. Stamp the For You sentiment on Basic White scrap and die cut with the flagged tag die. 
  8. Use Versamark ink to stamp the edges of the Daffodil Delight strip. 
  9. Attach the Versamarked strip and the DSP to the front of the Card Base using Stampin’ Seal. 
  10. Attach the die cut Misty Moonlight stamped layer with Stampin’ Dimensionals. 
  11. Attach the Stamped Basic White layer with Stampin Dimensionals.
  12. Attach the Bottle with Stampin’ Dimensionals.
  13. Trim the sentiment tag and attach with Multipurpose glue. 
  14. Sprinkle on some gems
  15. Attach a ribbon (optional)
  16. Stamp and decorate the remaining 5 1/4″ w x 4″ h for the inside and attach with Stampin’ Seal.
  17. Decorate your envelope. 
  18. Pretty! Who will you send it to?!

Shopping List

Recommended Stamper’s Toolkit ❤


May the Years Ahead Be Filled With Lasting Joy

Show off your Designer Series Paper with this layout! I’m using the beautiful Countryside Inn, DSP. Copy me or use paper from your stash.

The Countryside Corners Bundle has everything you need to take your crafts to the next level. The image-only stamp comes with several elegant borders that can be transformed into beautiful projects. The borders can be cut out using the Countryside Corners Dies. When you use them together, you can add layers and texture, and create frames, peek-through frames, centerpieces, and so much more!

Measurements

Full list of supplies needed, listed below. A die cutting machine is needed for this card.

Basic White Thick Cardstock: 

  • 5 1/2″h w x 8 1/2″ h folded to 5 1/2″ w x 4 1/4″ h

Basic White Cardstock: 

  • 4 ½” h x 3” w 
  • 5 ¼” h x 4” w for inside

Countryside Inn Designer Series Paper (DSP)

  • 5 ½” w x 4 ¼” h

Let’s Create

  1. Affix all stamps to Acrylic Blocks.
  2. Fold the Card Base in half using a Bone Folder to sharpen the crease
  3. Die cut the DSP with the 2nd largest die.
  4. Die cut the 4 ½” x 3” Basic White. 
  5. Lay the two nested DSP pieces onto the card base and line up with the edges of the card.
  6. Press firmly to hold the outer piece  into place and remove the inside piece. 
  7. Carefully lift each corner to add a Stampin’ Dimensional the outside DSP piece. And then carefully add 4 more Stampin’ Dimensionals under the four sides. 
  8. Use Stampin’ Seal to attach the inside piece of the DSP. 
  9. Use Balmy Blue, Boho Blue, Misty Moonlight and Night of Navy to stamp sentiment, flowers, leaves and stems on the die cut piece of Basic White. Attach to the inside piece of DSP with Stampin’ Dimensionals. 
  10. Double up about 12” of Linen Thread and tie a small bow. Attach with a Mini Glue Dot.
  11. Sprinkle on some Adhesive Backed Sparkle gems
  12. Stamp and decorate the remaining Basic White piece and attach to the inside.
  13. Decorate your envelope. 
  14. So fun! Send it.
Product List

Recommended Stamper’s Toolkit ❤