Step It Up: Bee Mine

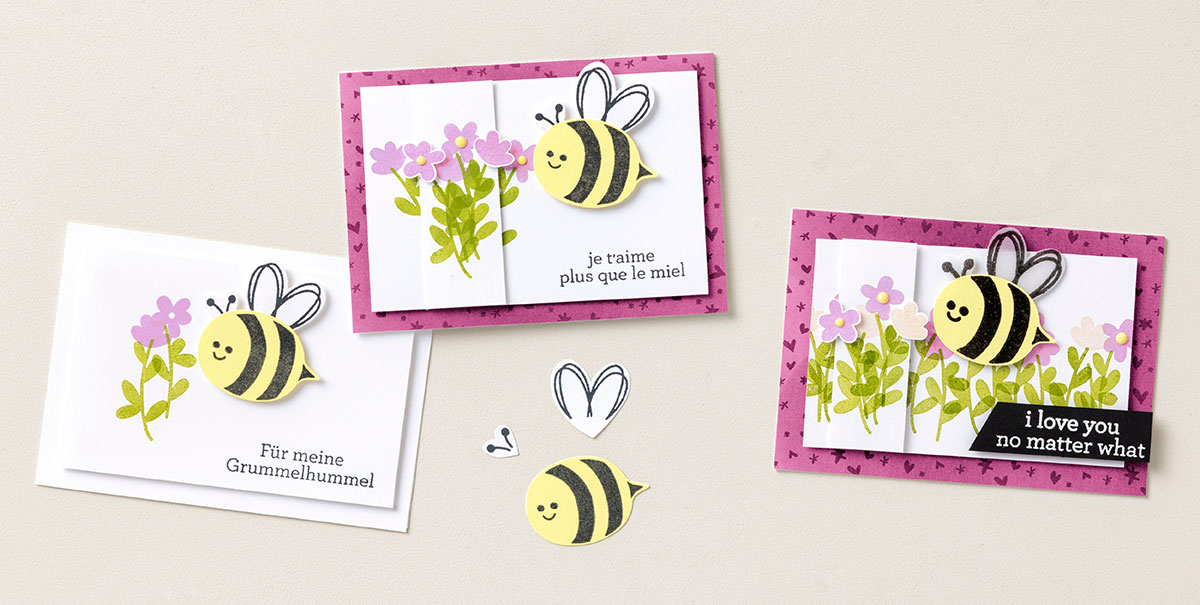
Need fun ideas for your project? Try making these cards using the Bee My Valentine Bundle. Keep your card simple with the Beginner design or “step it up” by making the Avid card!

BEGINNER

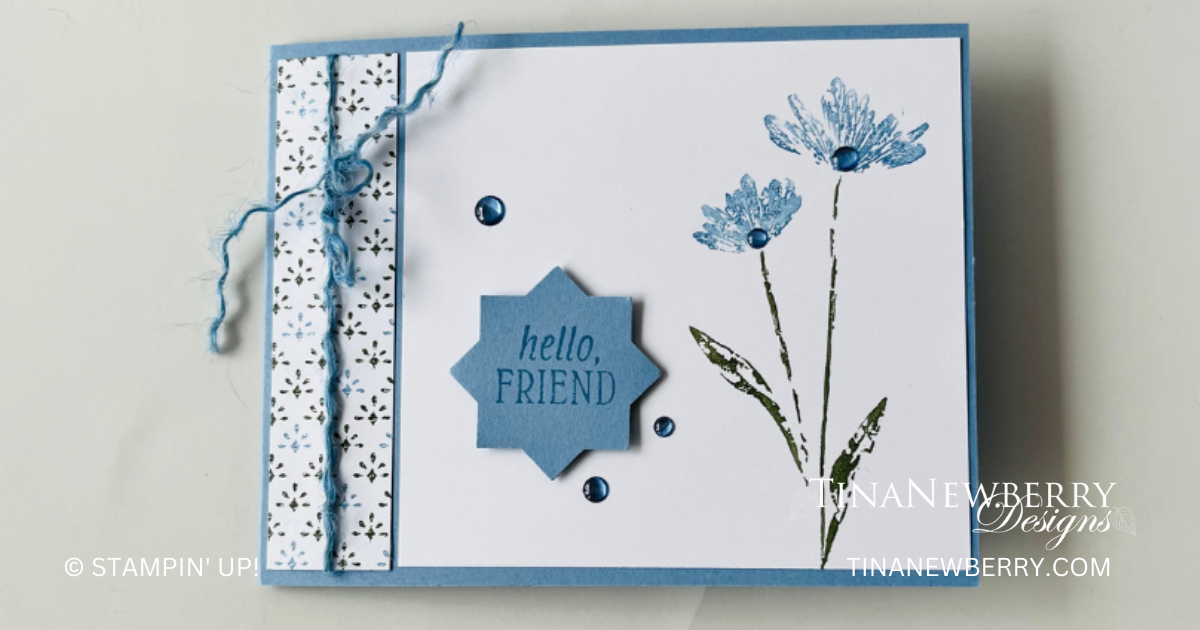
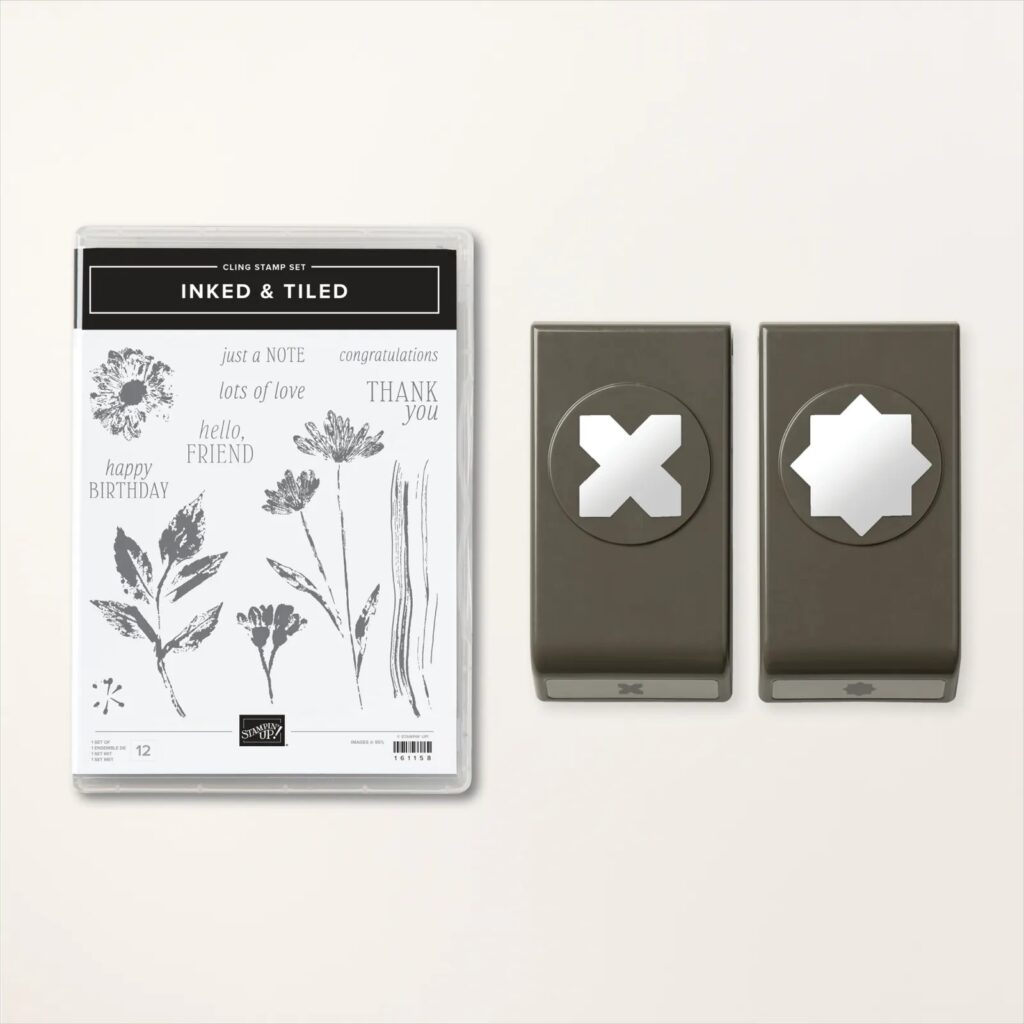
To make this card, we stamped the flower images using Fresh Freesia and Granny Apple Green. Then we stamped the bee body image on Lemon Lolly Cardstock and the wings and antennae on Basic White Cardstock. We punched out all the bee parts using the Bee Builder Punch and adhered them together using Multipurpose Liquid Glue. We adhered the bee to the card front using Stampin’ Dimensionals and finished the card with our sentiment.

CASUAL

To step up this card, we created a card base made of Just Kiddin’ Designer Series Paper. We added an extra panel of Basic White Cardstock, where we stamped a few more flowers and adhered extra flower pieces that we stamped and fussy cut. We finished the card with a few Lemon Lolly Adhesive-Backed Solid Gems.

AVID

We stepped up this card by stamping a few more flowers to the card base using Petal Pink ink. We also used black Stampin’ Emboss Powder to add some shine and dimension to our bee. We stamped the bee wings on Vellum Cardstock and finished the card with a sentiment that we heat embossed with white Stampin’ Emboss Powder onto Basic Black Cardstock.

Shopping List

Recommended Stamper’s Toolkit

Product List
Order online from the convenience of your own home or send me your order and I’ll take care of you. ❤ Either way, please use the host code ANTD9UHS. Order online AND, if your order is $50 or more using host code ANTD9UHS between now and the end of the month you’ll receive a free pack of embellishment as a THANK YOU gift from me. ❤ If your order is over $150, skip the host code, earn Stampin’ Rewards for free stuff yourself and I’ll still send you a free pack of embellishment as a THANK YOU gift from me. ❤

Perennial Lavender Calendar

Create a stunning stand-up calendar display with paper and embellishments from the Perennial Lavender Suite.

Measurements

Full list of supplies needed, listed below. A die cutting machine is needed for this card.

Gorgeous Grape Cardstock Base: 4 ½”x 5 3/4”
Highland Heather Cardstock: 3 ¼” x 2 ½”
Gorgeous Grape Cardstock: 3 ¾” x 2 ¼”
Basic White Cardstock: 3″ x 2 1/4″
Perennial Lavender Designer Series Paper (DSP): 4” x 5 1/4”
Taylored Expressions Calendar
Calendar stand from Calendar-Case.com
OPTIONALLY CREATE: Printed list of birthdays for each month, or other decoration (eg, You could either list birthdays on a printed page, or you can decorate a layer as shown here)


Let’s Create

  1. Affix all stamps to Acrylic Blocks.
  2. Fold the Card Base in half using a Bone Folder to sharpen the crease.
  3. Adhere DSP to front of Card Base with Stampin’ Seal.
  4. Adhere Taylored Expressions calendar (one month or whole year) to the 3 ¾” x 2 ¼” Gorgeous Grape layer and attach with Stampin’ Seal.
  5. On the 3″ x 2 1/4″ Basic White cardstock, stamp the flowers in Orchid Oasis and stems in Lost Lagoon ink. Stamp the sentiment in Orchid Oasis. Attach to the 3 ¼” x 2 ½” Highland Heather Layer with Stampin’ Seal.
  6. Adhere the stamped layer with Stampin’ Dimensionals.
  7. Add a Paper Butterfly Accent in the upper corner.
  8. Add some Purple Fine Shimmer Gems.
  9. Open plastic case and stand it upright in an easel shape. Add your decorated page and enjoy :).  These are great to give as gifts also!
  10. You can either make a new page for each month of the year, or you could make one main page for the entire year.

Shopping List

Recommended Stamper’s Toolkit

Product List
Order online from the convenience of your own home or send me your order and I’ll take care of you. ❤ Either way, please use the host code ANTD9UHS. Order online AND, if your order is $50 or more using host code ANTD9UHS between now and the end of the month you’ll receive a free pack of embellishment as a THANK YOU gift from me. ❤ If your order is over $150, skip the host code, earn Stampin’ Rewards for free stuff yourself and I’ll still send you a free pack of embellishment as a THANK YOU gift from me. ❤

May You Feel Sheltered in the Love That Surrounds You

Remember that Postage Stamp punch we had awhile ago? So fun right? Well… did you see all of the “postage stamp” dies in the Perennial Postage Bundle?! Loads more fun. I have a feeling these dies will be around for awhile.

Create all-occasion greetings with the Perennial Postage stamp and die bundle. The stamp set offers multiple sentiments, ranging from love and support to thanks and Mother’s Day wishes. The dies give you a wide range of options for creating die-cut postage stamps to use as card backgrounds or accent pieces.

Measurements

Full list of supplies needed, listed below. A die cutting machine is needed for this card.

Crumb Cake Card Base: 4 ¼” x 11”, score at 5 1/2”

Perennial Lavender Designer Series Paper (DSP):

  • 4” x 5 ¼”
  • scrap for 2 ¾” x 2” die cut

Vellum Cardstock: scrap for 2 ¾” x 2” die cut

Basic White scrap for 2 ¾” x 2” die cut


Let’s Create

  1. Affix all stamps to Acrylic Blocks.
  2. Fold the Card Base in half using a Bone Folder to sharpen the crease.
  3. Die-Cut
    • 2 ¾” x 2” size Perennial Postage Dies in Vellum
    • 2 ¾” x 2” size Perennial Postage Dies in Designer Series Paper
    • 1 ¾” square size Perennial Postage Dies in Basic White
  4. Adhere Designer Series Paper to front of card with Stampin’ Seal.
  5. Stamp sentiment in Orchid Oasis on Basic White die cut.
  6. Arrange layers in a pleasing manner and adhere. NOTE: Only put adhesive on the back of the vellum in places that are not visible (ie covered by other layers).
  7. Wrap ribbon around the card front, near the fold and tie a bow in the upper left corner.
  8. Sprinkle on the Purple Shimmer gems.
  9. Stamp and decorate the inside and attach with Stampin’ Seal.
  10. Decorate your envelope.
  11. Pretty! Now send it to someone special.

Shopping List

Recommended Stamper’s Toolkit

Product List
Order online from the convenience of your own home or send me your order and I’ll take care of you. ❤ Either way, please use the host code ANTD9UHS. Order online AND, if your order is $50 or more using host code ANTD9UHS between now and the end of the month you’ll receive a free pack of embellishment as a THANK YOU gift from me. ❤ If your order is over $150, skip the host code, earn Stampin’ Rewards for free stuff yourself and I’ll still send you a free pack of embellishment as a THANK YOU gift from me. ❤

Hello Friend with Poetic Expressions Patterned Paper

A quick & simple card for a friend. Change up up the colors to match any Designer Series patterned paper and you’ll have a whole stack of these for your stash and ready to send.

The Inked & Tiled Bundle is all about timelessly classic beauty. While the images do not directly coordinate, the styles do! Use the Inked & Tiled Punch Pack to create a seamless background with lots of texture and dimension, then add the Inked & Tiled Stamp Set to decorate.

Measurements

Full list of supplies needed, listed below. A die cutting machine is needed for this card.

Boho Blue Cardstock

  •  4 ¼” x 11” scored at 5 ½”
  • Scrap for punching

Basic White Cardstock

  • 4” x 5 ¼” – inside of card
  • 4” x 4 ¼”

Poetic Expressions Designer Series Paper (DSP) – Boho Blue and Mossy Meadow diamond sparkle pattern

  • 1” x 4”


Let’s Create

  1. Affix all stamps to acrylic blocks.
  2. Fold and burnish card base using bone folder.
  3. Take a 12” piece of the Boho Blue twine and separate into 3 strands.  You will only use 1 strand for the card.
  4. Add Tear & Tape to the back of the DSP strip at the top and bottom.  Attach 
  5. Boho Blue twine so it is centered across the strip.  Add more Tear & Tape  around the edges of the DSP then adhere to the left card front about 1/8” from the fold.
  6. Tie a bow with the 2 ends of the twine so it is close to the top.
  7. Use Boho Blue and Mossy Meadow markers to color the tall flower stem before stamping it on the right hand side of the 4” x 4 ¼” piece of White.
  8. Glue the panel from Step 6 to the card front making sure the top and bottom are even with the DSP strip.  
  9. Stamp your sentiment with Boho Blue onto the Boho Blue scrap of card stock. Use the star punch from the bundle to punch out the sentiment.
  10. Add the sentiment shape to the lower left hand side of the White card front panel using dimensionals.
  11.  Add Boho Blue In Color dots to the base of the flower and on the card front.  See photo for placement. 
  12. Use the tall flower stamp and markers to color to decorate the inside of the card and envelope.
  13. Send this happy mail to a friend today.

Shopping List

Recommended Stamper’s Toolkit

Product List
Order online from the convenience of your own home or send me your order and I’ll take care of you. ❤ Either way, please use the host code ANTD9UHS. Order online AND, if your order is $50 or more using host code ANTD9UHS between now and the end of the month you’ll receive a free pack of embellishment as a THANK YOU gift from me. ❤ If your order is over $150, skip the host code, earn Stampin’ Rewards for free stuff yourself and I’ll still send you a free pack of embellishment as a THANK YOU gift from me. ❤