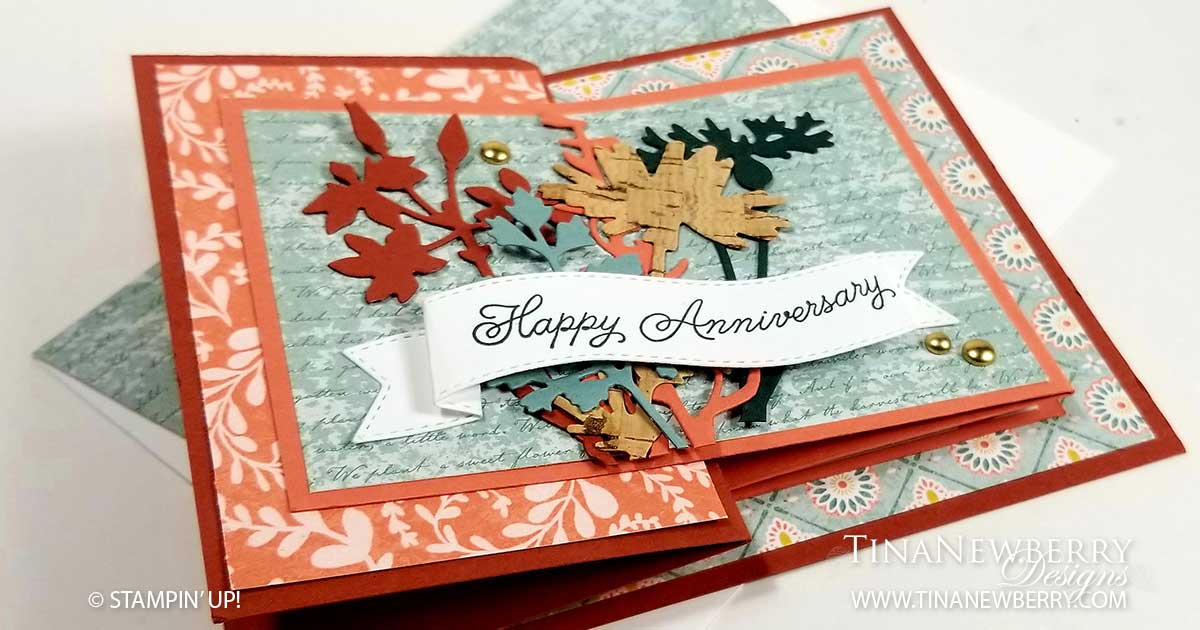
SO much fun! Combine dies, stamps and stunning paper to create this fall festive Double Z-Fold Anniversary card. The Double Z-Fold adds some WOW factor with little effort. This one was made for my parents Anniversary using the beautiful Nature’s Harvest Designer Series Paper, Always in My Heart Stamp set and Meadow Dies.
Measurements
Full list of supplies needed, listed below. A die cutting machine is needed for this card. LARGE OUTER Z Card Base Z: Cajun Craze Cardstock 11” w x 4-1/4” h scored along the long side at 5 1/2″ and 8 1/4”. Fold on the score lines Front Background: Harvest Meadow DSP 4” h x 2 1/2″ w Middle Background: Harvest Meadow DSP 4” h x 2 1/2″ w Inside Background: Harvest Meadow DSP 4” h x 5 1/4″ w
SMALL INNER Z Card Base: Calypso Cardstock 10” w x 3 1/4″ h and score along the long side at 4 1/2″ and 7 1/4” Fold on the score lines Front Background: Harvest Meadow DSP 3” h x 4 1/4″ w Middle Background: Harvest Meadow DSP 3” h x 2-1/2” w Inside Sentiment: White Cardstock 3” h x 2-1/2” w Front Sentiment: White Cardstock scrap
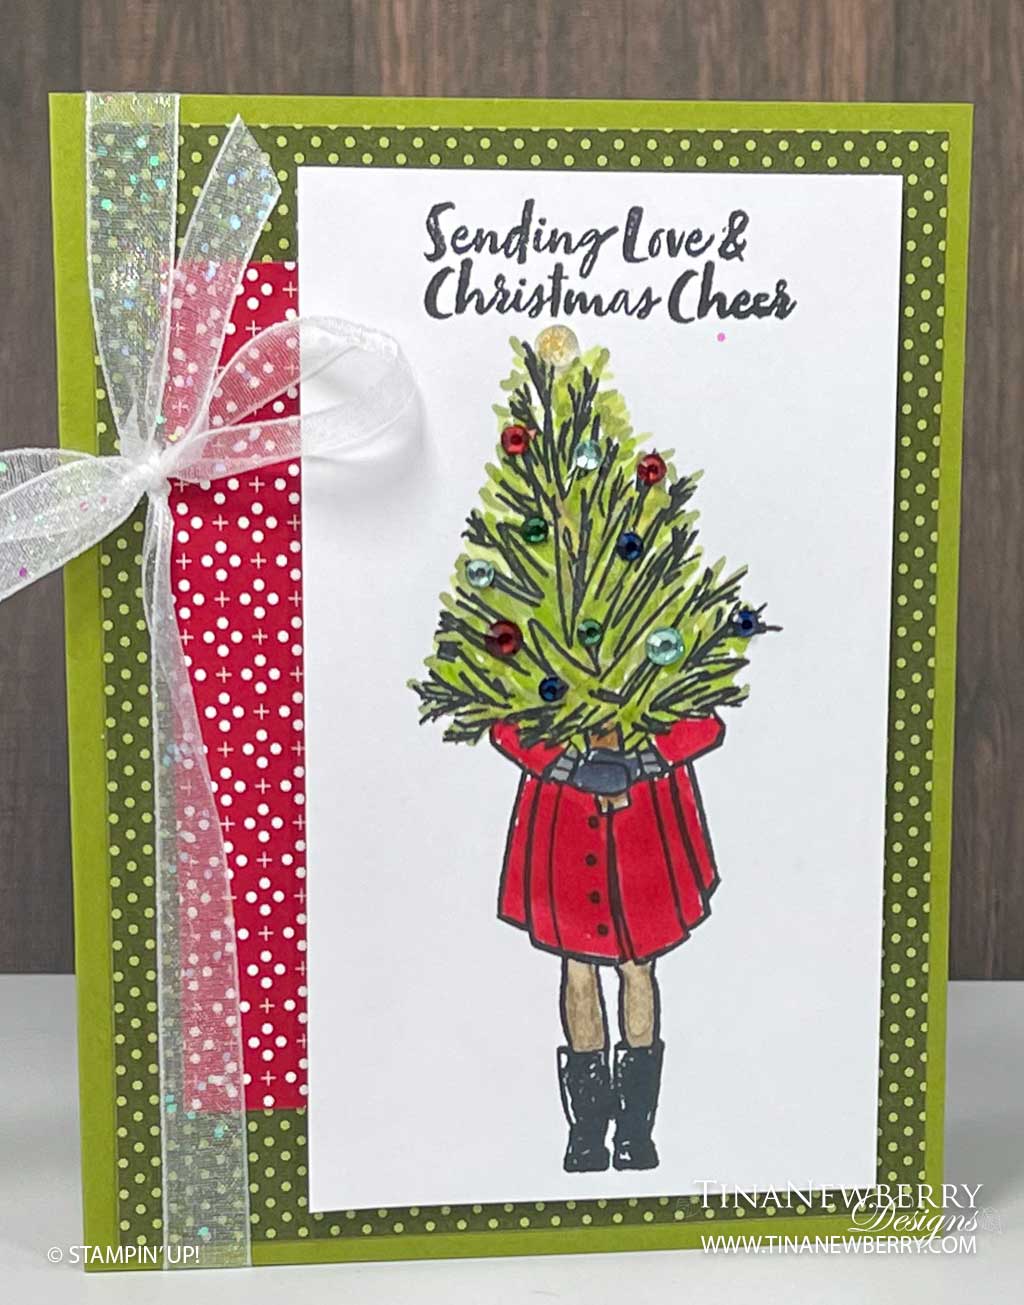
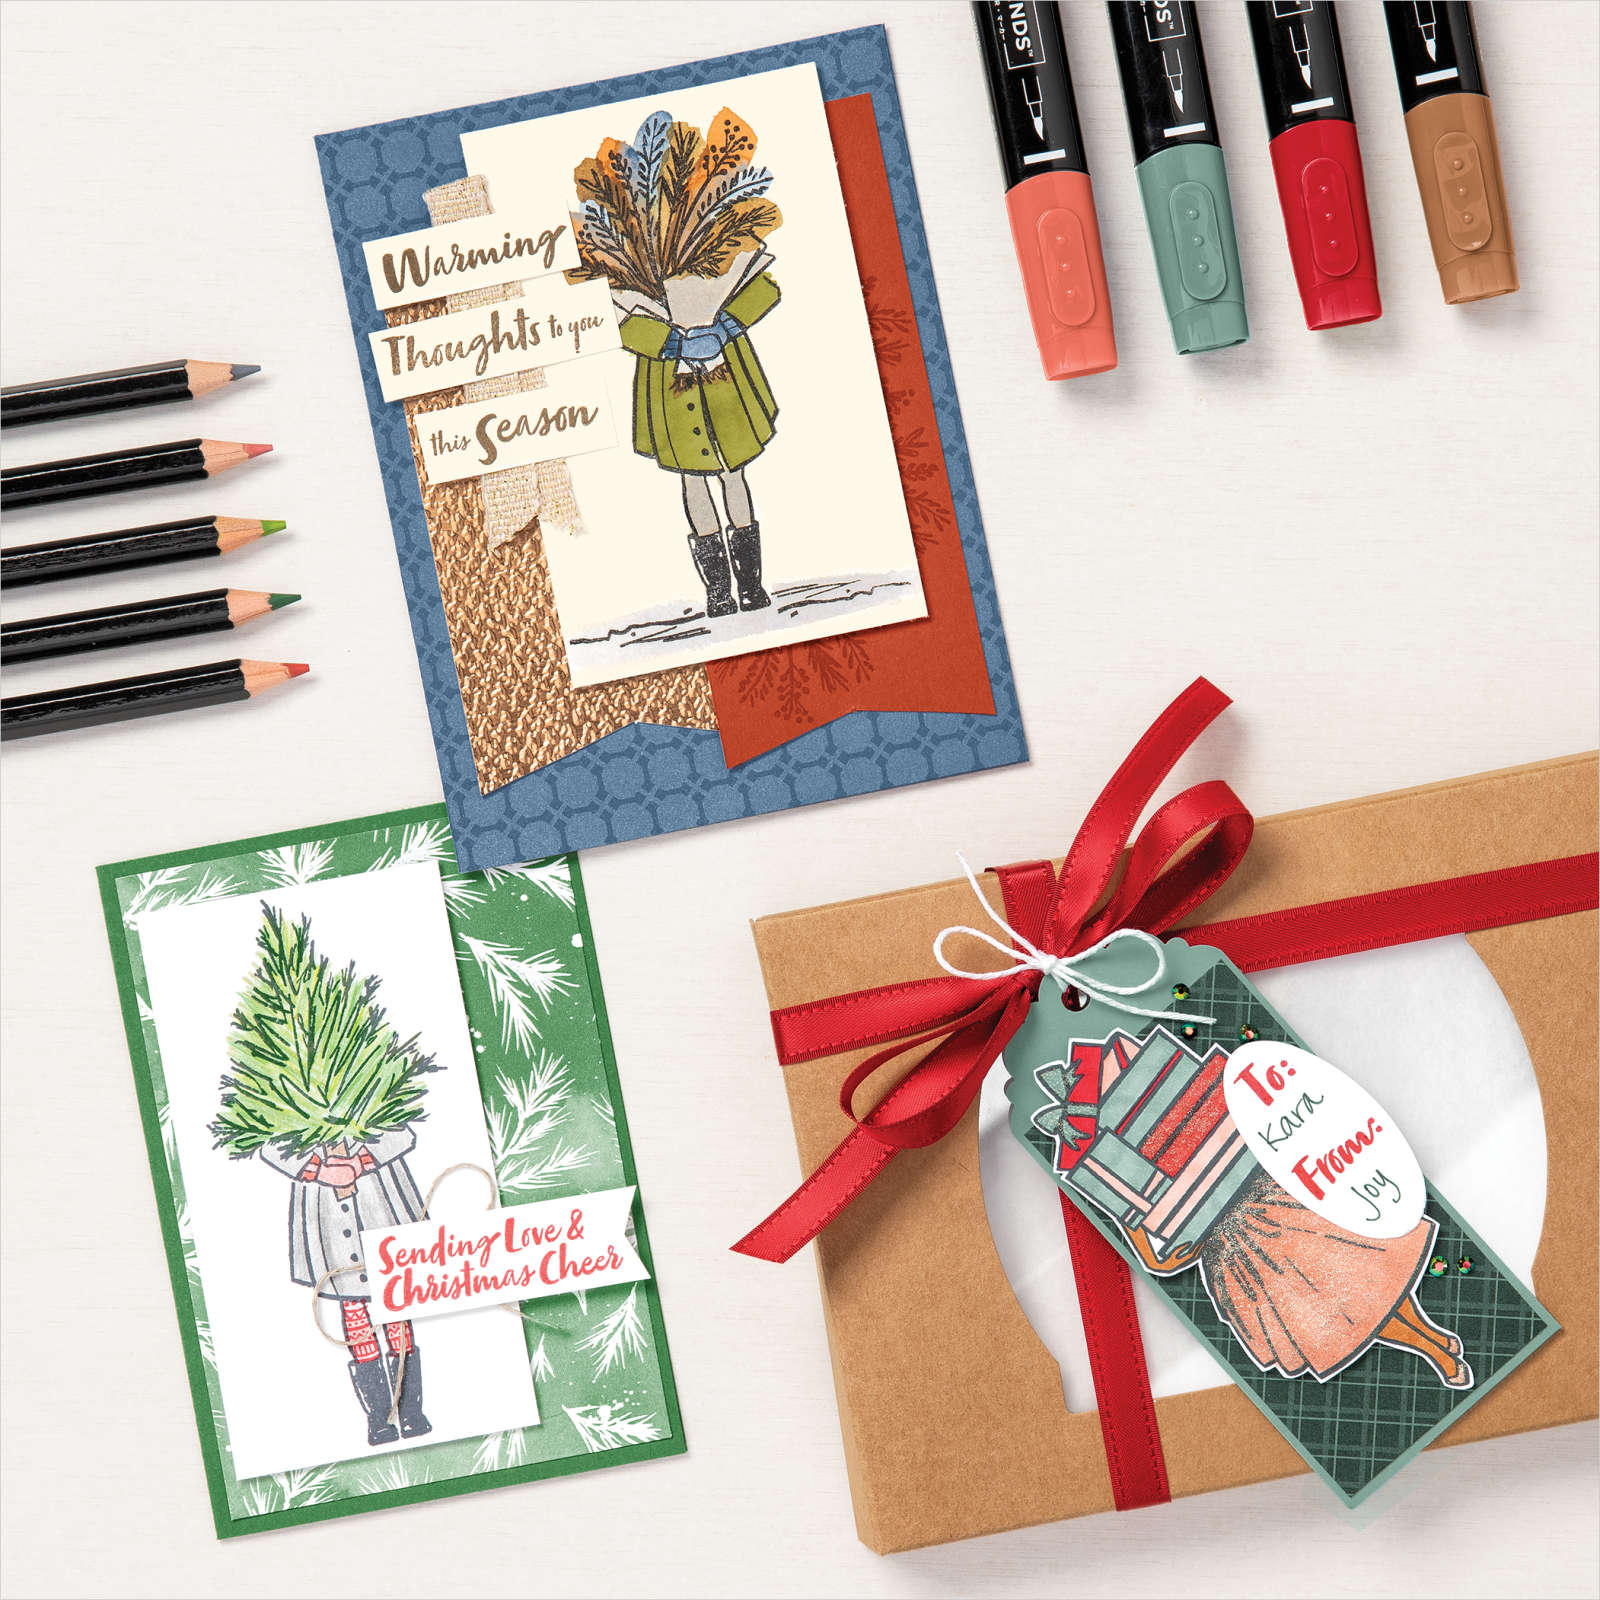
Bring your imagination to life, first when you select the package being delivered and again when you set to coloring the girl. Coloring is an increasingly popular activity known for being relaxing and this stamp set sets you up for a good coloring session in the middle of your papercrafty time. Enjoy!
Misty Moonlight Card Base 8 ½” x 5 ½”, scored at 4 ¼”
Basic White
Inside Layer: 5 1/4″ h x 4″ w
Panel Basic White 2 ½” x 4 ¼”
Harvest Meadow Designer Series Paper
Misty Moonlight layer 3 ¾” x 5”
Bumblebee layer 3 ½” x 4 ¾”
Coordinating Scrap 3” x 6 (for envelope)
Cardstock Layer Bumblebee 3 ¾” x 5”
Let’s Create
Adhere all stamps to acrylic blocks.
Stamp top half of girl in Memento Black on Basic White panel
Align and stamp bottom half of girl in Memento Black
Stamp off once, and stamp the ground lightly underneath the girls boots in Memento Black
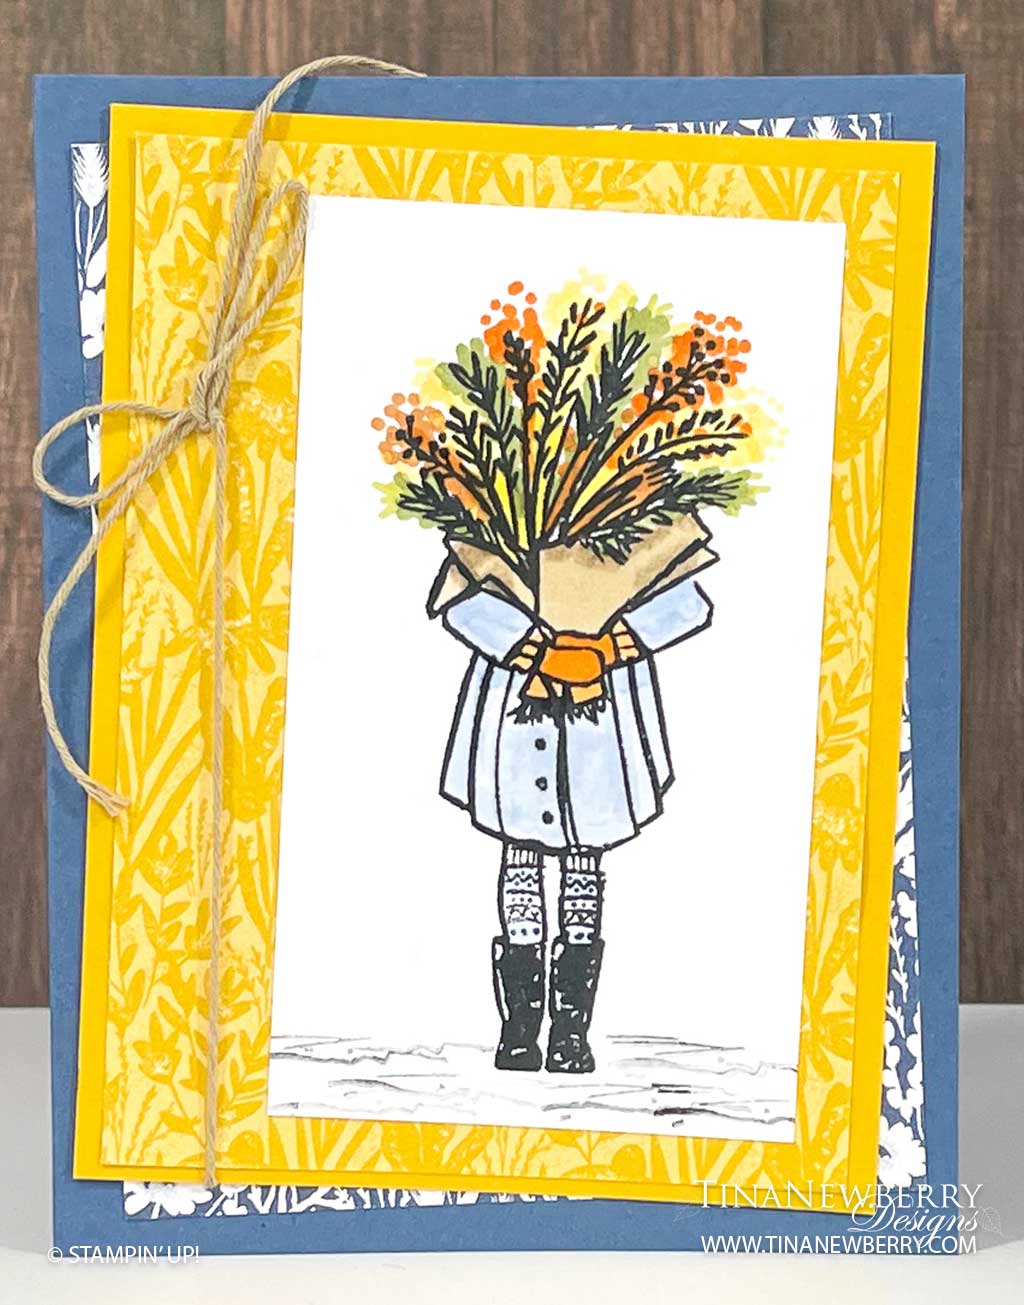
Use Blends and Color Lifter to color the image:
Boots are done in Basic Black light
Leggings are done in Balmy Blue light on every other stripe
Coat is done in Balmy Blue light, and lightened with the Color Lifter
Gloves are done in Pumpkin Pie dark
Cuffs and scarf are done in Pumpkin Pie light
Flower wrapping is done in Crumb Cake light (using dark for just the shadows)
Bouquet is done in Pumpkin Pie, Bumblebee, Daffodil Delight, Old Olive, CInnamon Cider and Crumb Cake. CREATIVE TIP: Use short pen strokes to achieve a look of long needles. Use a dot motion to achieve a “spray” look
Stamp bottom right corner of inside layer and color.
Adhere the Misty Moonlight DSP on an angle tilted to the left.
Adhere Bumblebee DSP to Bumblebee Cardstock.
Wrap Crumb Cake twine around this layer and tie in a bow.
Then adhere this panel to the card front on an angle tilted to the right.
Adhere colored image to card front with liquid glue.
Adhere decorated inside layer.
Cut a piece of scrap Designer Series Paper to 3” x 6”. Adhere to back flap of envelope and follow around the edge of the envelope with snips to trim the paper into shape.
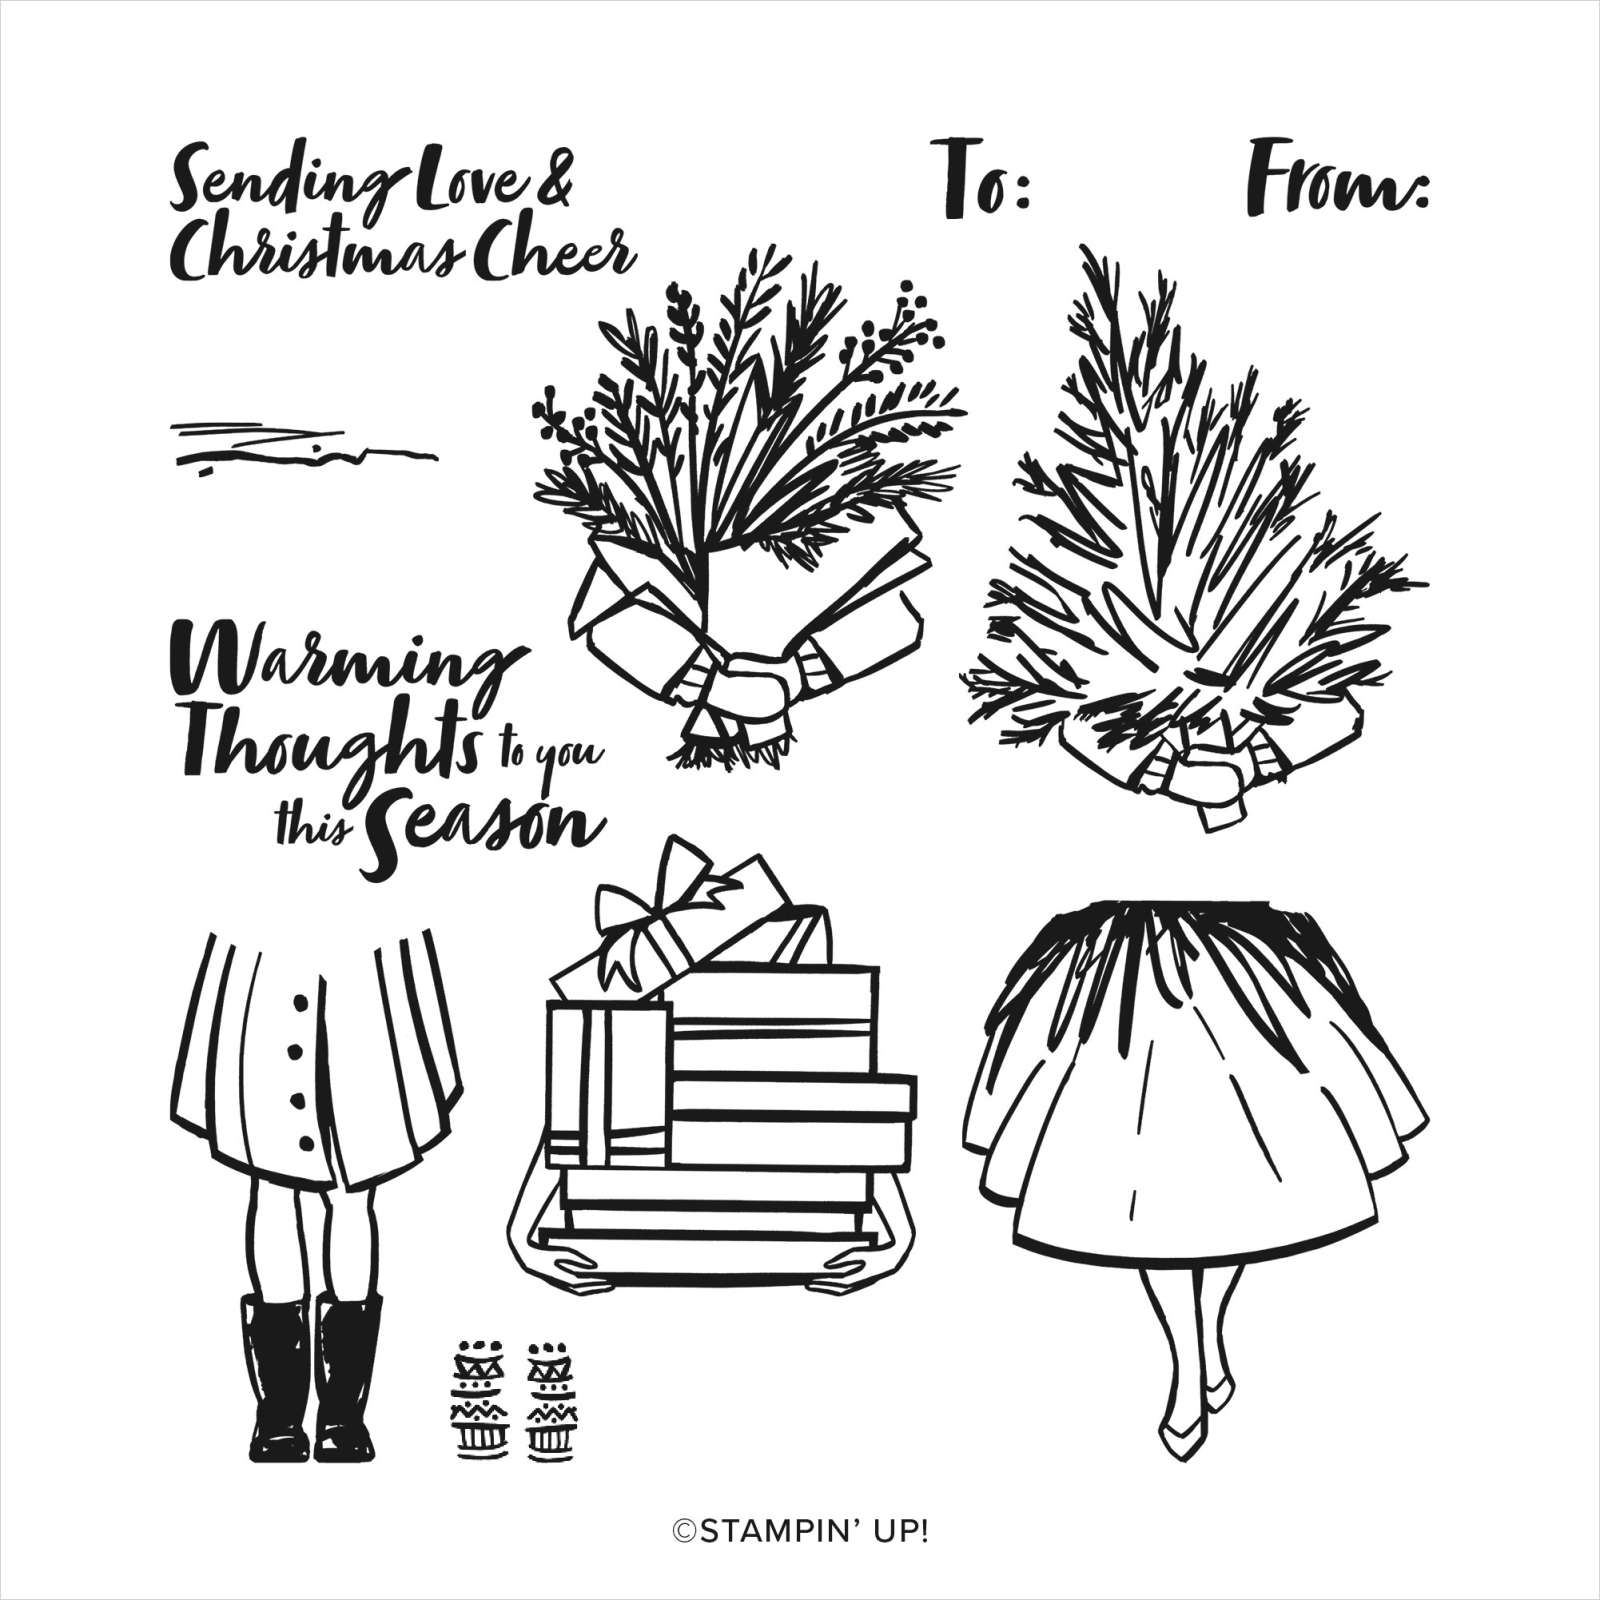
Ooh so cute! I just love the versatility of the Delivering Cheer Photopolymer Stamp Set. Birthdays, thoughtful wishes, Christmas Cheer and all occasion cards. You name it, you can make it with this set. So cute!
Cardstock panel 2 ½” x 4 ¼” 3” x 3” label scrap 5” x 5” scrap top half of woman 5 1/4″ h x 4″ w Inside Layer:
Whimsy and Wonder Designer Series Paper
Polished Pink Layer 4” x 5 ¼” 3” x 6” (envelope) Scrap 4” x 4” (skirt) Scrap
So Saffron
2 ¾” x 4 ½” Cardstock layer
Let’s Create
Affix all stamps to acrylic blocks.
Die-Cut label from Messages Die
Stamp sentiment on label in Tuxedo Black Ink and set aside
Align and stamp bottom half of woman on Basic White Cardstock panel.
Stamp top half of woman on scrap of paper. Fussy cut.
Stamp skirt on scrap of Designer Series paper and fussy cut.
Use Blends and Color Lifter to color the images:
Skin is done in skin tones (Ivory here)
Shoes are done in Polished Pink dark
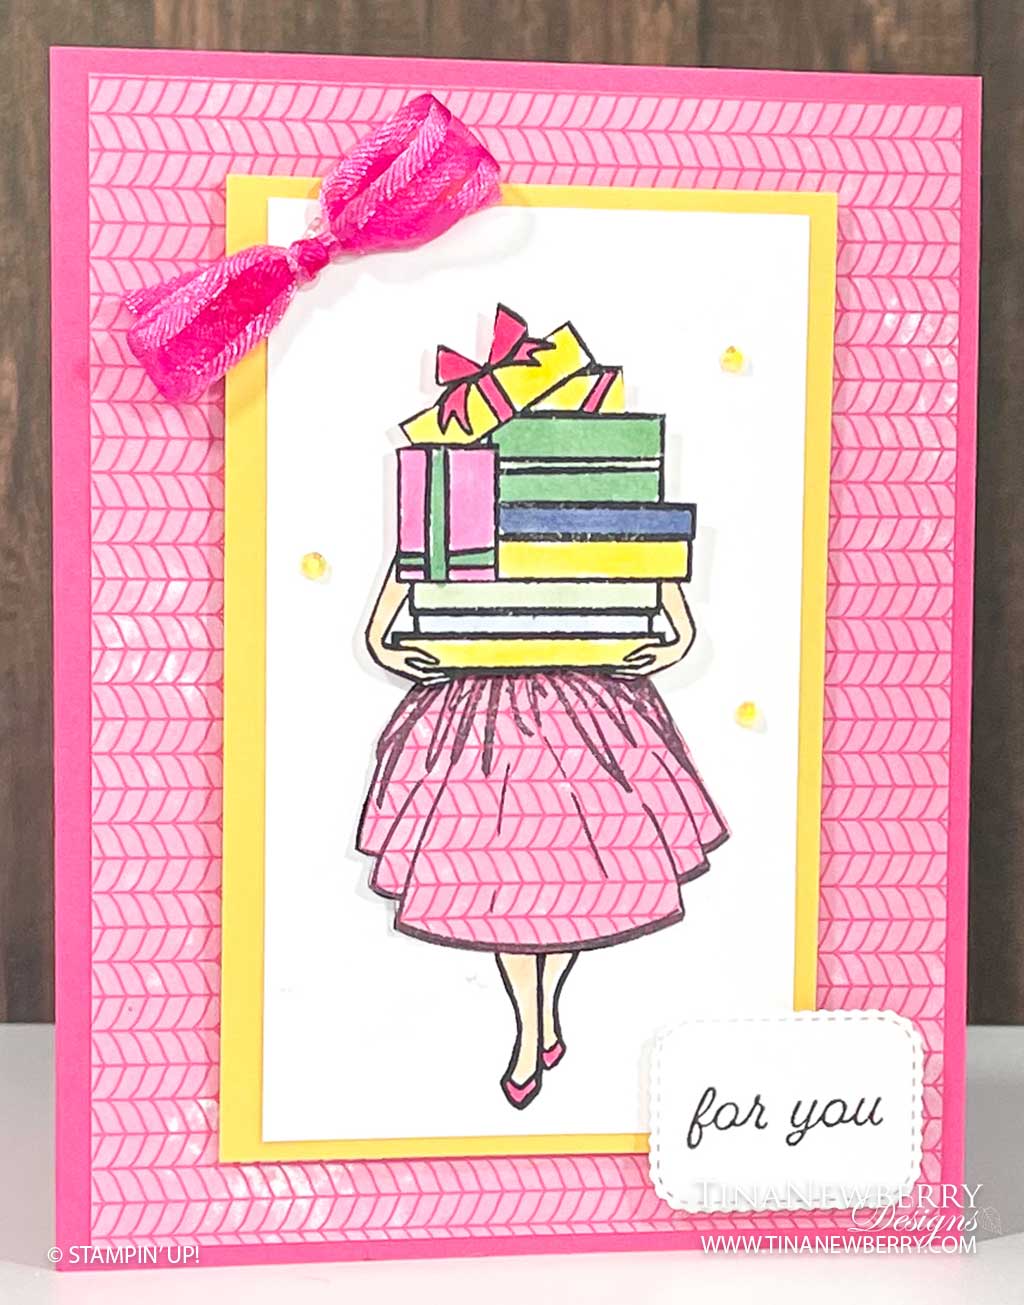
Presents are done in varying colors and shades of Balmy Blue, Misty Moonlight, Mint Macaron, Polished Pink, So Saffron
Adhere the Polished Pink DSP to the card front.
Adhere colored image to So Saffron Cardstock layer.
Adhere this panel to card front with Stampin’ Dimensionals.
Adhere skirt with glue
Adhere top half of colored image with Stampin’ Dimensionals
Adhere sentiment with Stampin’ Dimensional
Tie a bow and adhere in upper left corner with a Mini-Glue Dot.
Stamp presents in the bottom right corner of inside layer.
Stamp Happy Birthday sentiment on the inside layer
Adhere decorated inside layer.
Cut a piece of scrap Designer Series Paper to 3” x 6”. Adhere to back flap of envelope and follow around the edge of the envelope with snips to trim the paper into shape.


 Specialty Paper")
 Designer Series Paper")


")


 Specialty Designer Series Paper")


 Open Weave Ribbon")

