Perennial Lavender Calendar

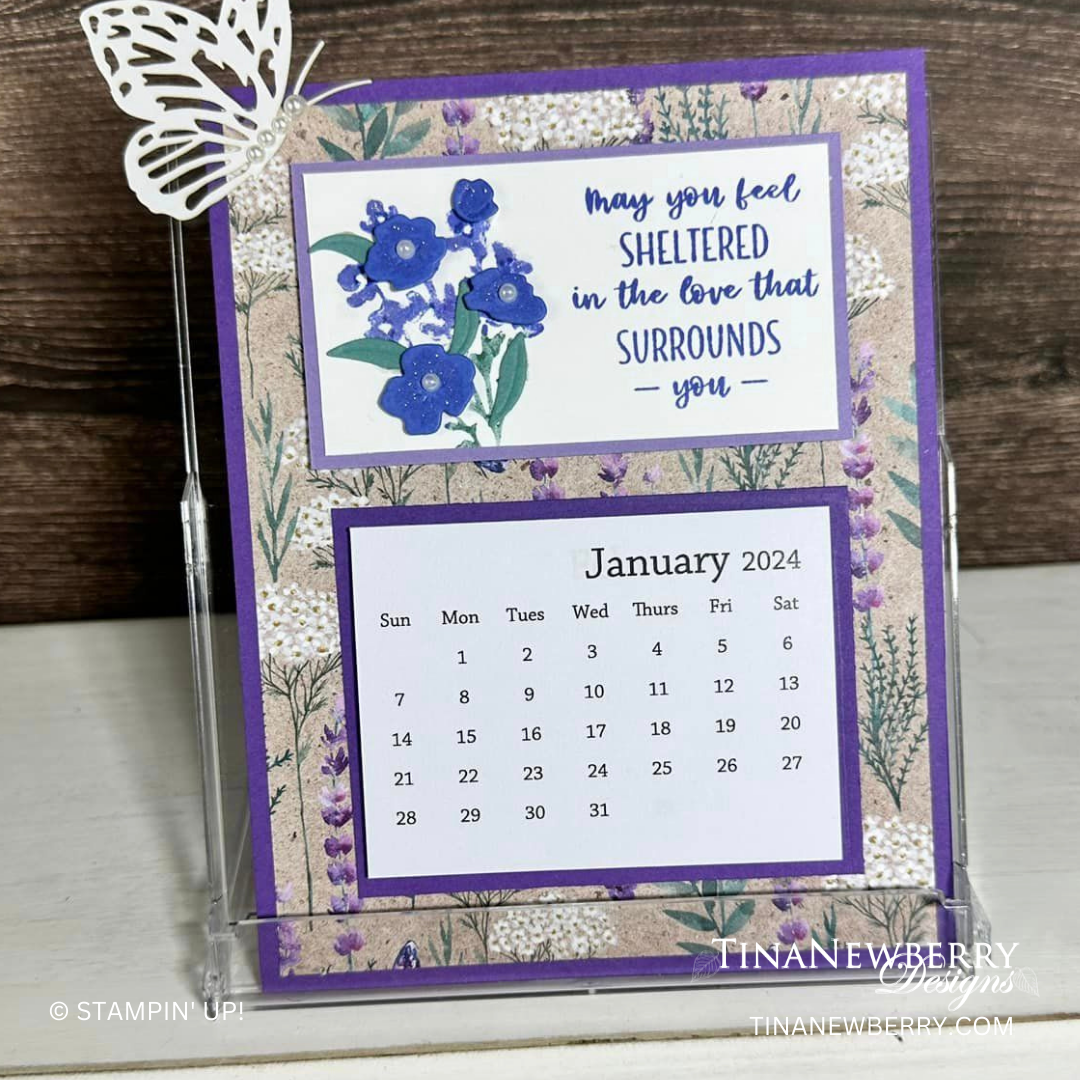
Create a stunning stand-up calendar display with paper and embellishments from the Perennial Lavender Suite.

Measurements

Full list of supplies needed, listed below. A die cutting machine is needed for this card.

Gorgeous Grape Cardstock Base: 4 ½”x 5 3/4”
Highland Heather Cardstock: 3 ¼” x 2 ½”
Gorgeous Grape Cardstock: 3 ¾” x 2 ¼”
Basic White Cardstock: 3″ x 2 1/4″
Perennial Lavender Designer Series Paper (DSP): 4” x 5 1/4”
Taylored Expressions Calendar
Calendar stand from Calendar-Case.com
OPTIONALLY CREATE: Printed list of birthdays for each month, or other decoration (eg, You could either list birthdays on a printed page, or you can decorate a layer as shown here)


Let’s Create

  1. Affix all stamps to Acrylic Blocks.
  2. Fold the Card Base in half using a Bone Folder to sharpen the crease.
  3. Adhere DSP to front of Card Base with Stampin’ Seal.
  4. Adhere Taylored Expressions calendar (one month or whole year) to the 3 ¾” x 2 ¼” Gorgeous Grape layer and attach with Stampin’ Seal.
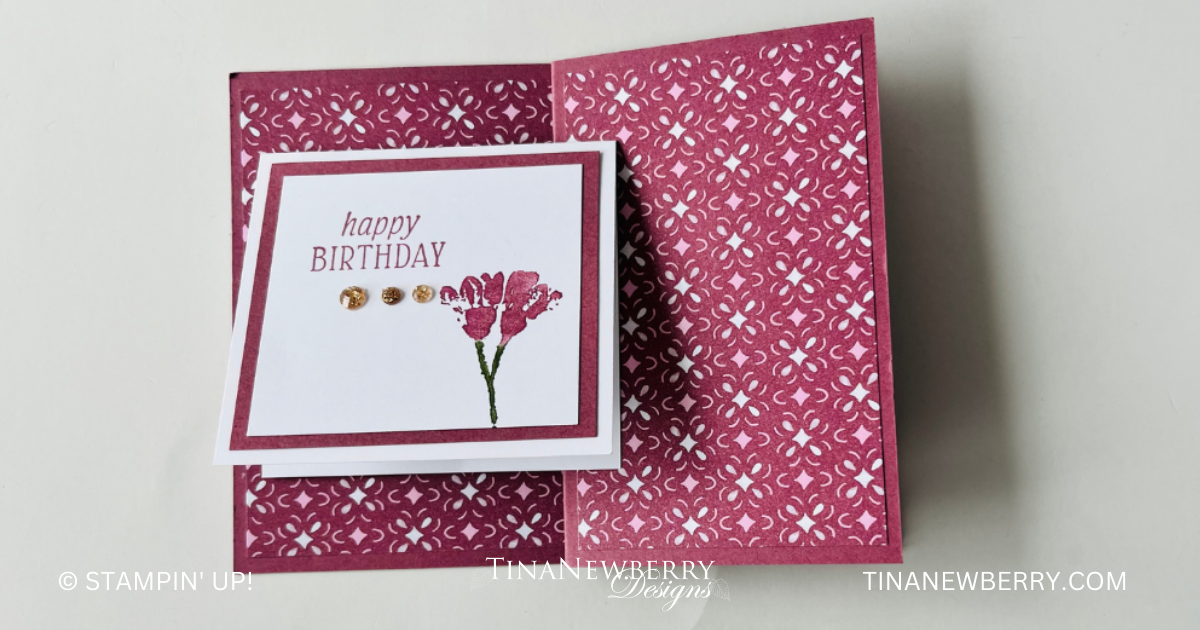
  5. On the 3″ x 2 1/4″ Basic White cardstock, stamp the flowers in Orchid Oasis and stems in Lost Lagoon ink. Stamp the sentiment in Orchid Oasis. Attach to the 3 ¼” x 2 ½” Highland Heather Layer with Stampin’ Seal.
  6. Adhere the stamped layer with Stampin’ Dimensionals.
  7. Add a Paper Butterfly Accent in the upper corner.
  8. Add some Purple Fine Shimmer Gems.
  9. Open plastic case and stand it upright in an easel shape. Add your decorated page and enjoy :).  These are great to give as gifts also!
  10. You can either make a new page for each month of the year, or you could make one main page for the entire year.

Shopping List

Recommended Stamper’s Toolkit

Product List
Order online from the convenience of your own home or send me your order and I’ll take care of you. ❤ Either way, please use the host code ANTD9UHS. Order online AND, if your order is $50 or more using host code ANTD9UHS between now and the end of the month you’ll receive a free pack of embellishment as a THANK YOU gift from me. ❤ If your order is over $150, skip the host code, earn Stampin’ Rewards for free stuff yourself and I’ll still send you a free pack of embellishment as a THANK YOU gift from me. ❤

Hello Friend with Poetic Expressions Patterned Paper

A quick & simple card for a friend. Change up up the colors to match any Designer Series patterned paper and you’ll have a whole stack of these for your stash and ready to send.

The Inked & Tiled Bundle is all about timelessly classic beauty. While the images do not directly coordinate, the styles do! Use the Inked & Tiled Punch Pack to create a seamless background with lots of texture and dimension, then add the Inked & Tiled Stamp Set to decorate.

Measurements

Full list of supplies needed, listed below. A die cutting machine is needed for this card.

Boho Blue Cardstock

  •  4 ¼” x 11” scored at 5 ½”
  • Scrap for punching

Basic White Cardstock

  • 4” x 5 ¼” – inside of card
  • 4” x 4 ¼”

Poetic Expressions Designer Series Paper (DSP) – Boho Blue and Mossy Meadow diamond sparkle pattern

  • 1” x 4”


Let’s Create

  1. Affix all stamps to acrylic blocks.
  2. Fold and burnish card base using bone folder.
  3. Take a 12” piece of the Boho Blue twine and separate into 3 strands.  You will only use 1 strand for the card.
  4. Add Tear & Tape to the back of the DSP strip at the top and bottom.  Attach 
  5. Boho Blue twine so it is centered across the strip.  Add more Tear & Tape  around the edges of the DSP then adhere to the left card front about 1/8” from the fold.
  6. Tie a bow with the 2 ends of the twine so it is close to the top.
  7. Use Boho Blue and Mossy Meadow markers to color the tall flower stem before stamping it on the right hand side of the 4” x 4 ¼” piece of White.
  8. Glue the panel from Step 6 to the card front making sure the top and bottom are even with the DSP strip.  
  9. Stamp your sentiment with Boho Blue onto the Boho Blue scrap of card stock. Use the star punch from the bundle to punch out the sentiment.
  10. Add the sentiment shape to the lower left hand side of the White card front panel using dimensionals.
  11.  Add Boho Blue In Color dots to the base of the flower and on the card front.  See photo for placement. 
  12. Use the tall flower stamp and markers to color to decorate the inside of the card and envelope.
  13. Send this happy mail to a friend today.

Shopping List

Recommended Stamper’s Toolkit

Product List
Order online from the convenience of your own home or send me your order and I’ll take care of you. ❤ Either way, please use the host code ANTD9UHS. Order online AND, if your order is $50 or more using host code ANTD9UHS between now and the end of the month you’ll receive a free pack of embellishment as a THANK YOU gift from me. ❤ If your order is over $150, skip the host code, earn Stampin’ Rewards for free stuff yourself and I’ll still send you a free pack of embellishment as a THANK YOU gift from me. ❤

Poetic Expressions- Happy Birthday Fun Fold

Create a fun-fold with an additional fold for the inside sentiment and let your Designer Series Paper shine with this quick & easy card!

The Inked & Tiled Bundle is all about timelessly classic beauty. While the images do not directly coordinate, the styles do! Use the Inked & Tiled Punch Pack to create a seamless background with lots of texture and dimension, then add the Inked & Tiled Stamp Set to decorate.

Measurements

Full list of supplies needed, listed below. A die cutting machine is needed for this card.

Moody Mauve Cardstock

  • 4 ¼” x 11” scored at 5 ½” and 8 ¼”
  • 2 ½” x 2 ¾”

Basic White Cardstock

  • 3” x 5 ½” scored at 2 ¾”
  • 2 ¼” x 2 ½”

Poetic Expressions Designer Series Paper (DSP) – Moody Mauve diamond pattern

  • 4” x 5 ¼”
  • 4” x 2 ½” – 2 pieces

Let’s Create

  1. Affix all stamps to acrylic blocks.
  2. Fold and burnish card base at the 5 ½” score line using bone folder.  Have the Card fold on the right and fold the front back on the second score line making a Z fold card.
  3. Open the card base so it is flat and the score lines are on the right.  Glue the large dsp panel to the left side of the flat card.  Glue the 2 smaller dsp panels to the 2 sections of the flat card that are on the right.
  4. Take the scored piece of white and fold and burnish on the score line.
  5. With the fold of the white piece at the top, add the small panel of Moody Mauve.
  6. Use Moody Mauve and Mossy Meadow markers to color the small flower stem before stamping it on the right hand side of the 2 ¼” x 2 ½” piece of White.  Note – the 2 ½” side is the top.
  7. Stamp the Happy Birthday using Moody Mauve in the upper left hand corner of the panel from Step 6.
  8. Glue the panel from Step 7 to the front of the small White folded piece of card stock.  
  9. Stamp the sentiment to the inside of the folded White card stock
  10. Add dimensionals to the left back of the folded White card stock.  You want to make sure that the card front fold will tuck under the White folded card stock to hold it closed but still be able to open the side panel.  I added dimesionals to the left side and middle of the folded White card stock.
  11. To ensure proper placement, close the card front completely and then add  the folded White card stock.  I had the folded White card stock overlap the folded front about ½”.  See photo for placement.
  12. Add some Adhesive Backed Sparkle gems underneath the “Happy Birthday” on the folded White card stock.
  13. Use the same small flower stem to decorate the envelope.

Note – if you want more space to write a message, add a 4” x 5 ¼” piece of White to the back of the card.

Shopping List

Recommended Stamper’s Toolkit

Product List
Order online from the convenience of your own home or send me your order and I’ll take care of you. ❤ Either way, please use the host code ANTD9UHS. Order online AND, if your order is $50 or more using host code ANTD9UHS between now and the end of the month you’ll receive a free pack of embellishment as a THANK YOU gift from me. ❤ If your order is over $150, skip the host code, earn Stampin’ Rewards for free stuff yourself and I’ll still send you a free pack of embellishment as a THANK YOU gift from me. ❤

Joy of Christmas – Noel

Check out this fun-fold! Perfect for showing off your pretty patterned paper. What Designer Series Paper will you use for your card?

Add the Joy of Noel Bundle to your paper crafting collection and create all sorts of elegant paper crafts! Mix and match the stamp and die set greetings and designs to make wonderful Christmas wreaths and winter floral arrangements. From tags to cards to home decor elements, share the joy of Christmas with simple or sophisticated projects!

Measurements

Full list of supplies needed, listed below. A die cutting machine is needed for this card.

Card Base Pecan Pie 5 ½” x 4 ¼”

Joy of Christmas Designer Series Paper 5 ¼” x 11 ¾” (pay attention to the orientation).

  • Score at 1 ¾”, 4 ¾”, 7 ¾”
  • Basic White 2 ¼” x 5”
  • Basic White 1 ½” x 5”

Joyful 12×12 Specialty Paper 1 ½ ” x 5”

Die-Cut two sprigs in Shaded Spruce DSP

DIe-Cut two sentiment labels in Basic White

Die-Cut NOEL in Distressed Gold

Let’s Create

  1. Affix all stamps to Acrylic Blocks.
  2. Cut Card Base Pecan Pie 5 ½” x 4 ¼”
  3. Cut Designer Series Paper 5 ¼” x 11 ¾” (pay attention to the orientation).
    1. Score at 1 ¾”, 4 ¾”, 7 ¾”. Use Bone Folder to burnish the folds well.
  4. Fold the left flap back over on itself so the back of the DSP (brown wood grain) shows on the left-most flap.
  5. Adhere DSP to card base.
  6. Cut Specialty Paper 1” x 5” (Gold wood pattern). Adhere to the left-most flap.
  7. Cut Basic White 1 ½” x 5”. Stamp and adhere to inside as shown.
  8. Cut Basic White 2 ¼” x 5”. Stamp and adhere to last panel as shown.
  9. Die-Cut two sprigs in Shaded Spruce DSP 
  10. DIe-Cut (2) sentiment labels in Basic White.
  11. Die-Cut NOEL in Distressed Gold
  12. Adhere NOEL to sentiment label. Adhere sprigs behind sentiment label. Adhere second sentiment label to make a sandwich (to hide the springs when the card is open).
  13. Adhere sandwich to front panel.
  14. Sprinkle on gems as desired.

Shopping List

Recommended Stamper’s Toolkit

Product List
Order online from the convenience of your own home or send me your order and I’ll take care of you. ❤ Either way, please use the host code ANTD9UHS. Order online AND, if your order is $50 or more using host code ANTD9UHS between now and the end of the month you’ll receive a free pack of embellishment as a THANK YOU gift from me. ❤ If your order is over $150, skip the host code, earn Stampin’ Rewards for free stuff yourself and I’ll still send you a free pack of embellishment as a THANK YOU gift from me. ❤