Your Friendship Means Everything

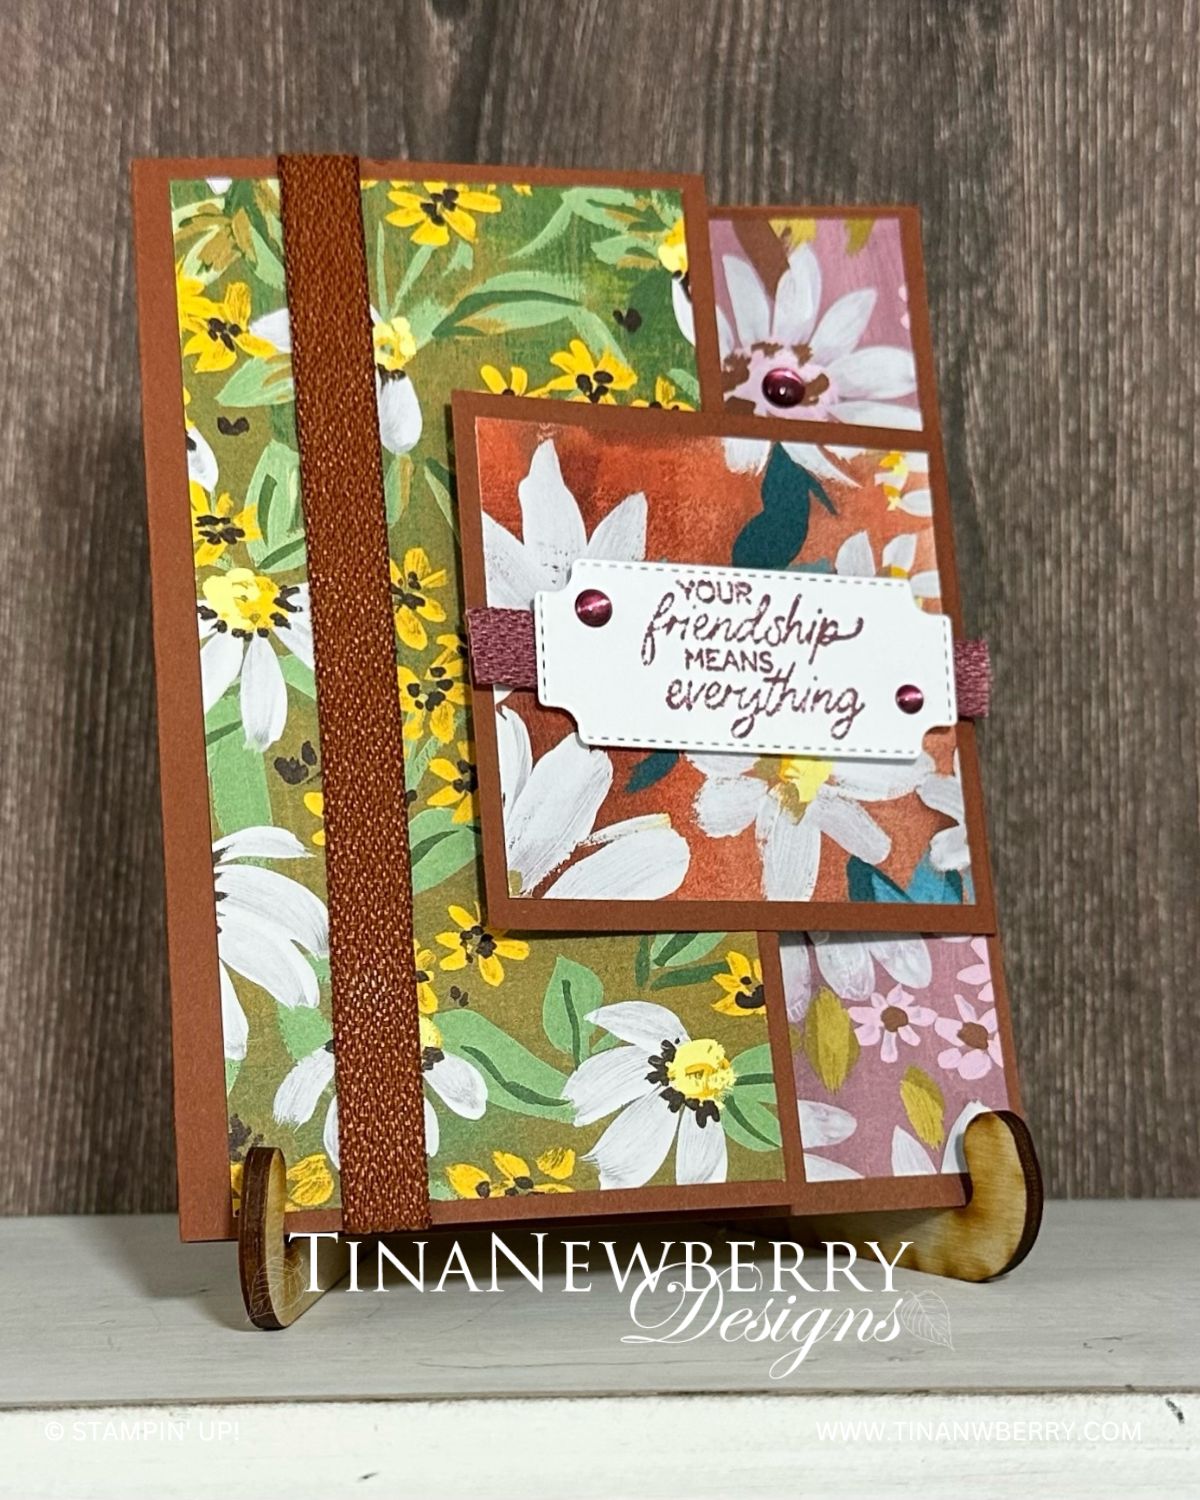
Make a simple fun-fold that showcases your patterned paper while sending cheer to a friend.

Your cards will bloom with happiness when you use the Cheerful Daisies Bundle. Stamp a daisy or two complete with leaves and stem, then cut out using the coordinating dies. Happy has never been so easy!

Measurements

Full list of supplies needed, listed below. A die cutting machine is needed for this card.

Card Base Copper Clay 5 ½” x 7 ¼” and score at 4 ¼”
DSP 2 ¾” x 5 ¼” (front)
DSP 1 ¾” x 5 ¼” (inside right)
Basic White 2 ¼” x 5 ¼” (inside)
Copper Square: 2 ¾” x 3 ¾” scored at 1”
DSP 2 ½” x 2 ½” (decorative layer for the square)
Die-Cut sentiment tag from Daisies Dies
Die-Cut Daisies


Let’s Create

  1. Affix all stamps to Acrylic Blocks.
  2. Fold the Card Base at score line using a Bone Folder to sharpen the crease. Fold 2 ¾” x 3 ¾” Copper Clay Square at 1” score line using a Bone Folder to sharpen the crease.
  3. Adhere DSP to Card Base with Stampin’ Seal.
  4. Use Stampin’ Seal to adhere 2 ¾” x 3 ¾” Copper Clay Square flap by placing fold on inside right edge so that the fold meets the edge of the card base.
  5. Use Stampin’ Seal to adhere DSP over the flap front.
  6. Stamp the sentiment with Copper Clay.
  7. Use a Tear N’ Tape or Mini Glue Dots to adhere a strip of Mauve Ribbon behind the sentiment.
  8. Adhere sentiment to square with Stampin’ Dimensionals.
  9. Wrap full length of ribbon around left of card until it overlaps on the inside of the card. Cut a nice clean edge and adhere ribbon securely with Tear N’ Tape.
  10. Adhere die-cut daisies with Mini Glue Dots..
  11. Sprinkle on the gems.
  12. Attach the DSP 1 ¾” x 5 ¼” (inside right) to the 2 ¼” x 5 ¼” (inside) Basic White. Stamp the Basic White and attach with Stampin’ Seal.
  13. Decorate your envelope.
  14. So pretty! Now send it to someone special.

Shopping List

Recommended Stamper’s Toolkit

Product List
Order online from the convenience of your own home or send me your order and I’ll take care of you. ❤ Either way, please use the host code ANTD9UHS. Order online AND, if your order is $50 or more using host code ANTD9UHS between now and the end of the month you’ll receive a free pack of embellishment as a THANK YOU gift from me. ❤ If your order is over $150, skip the host code, earn Stampin’ Rewards for free stuff yourself and I’ll still send you a free pack of embellishment as a THANK YOU gift from me. ❤

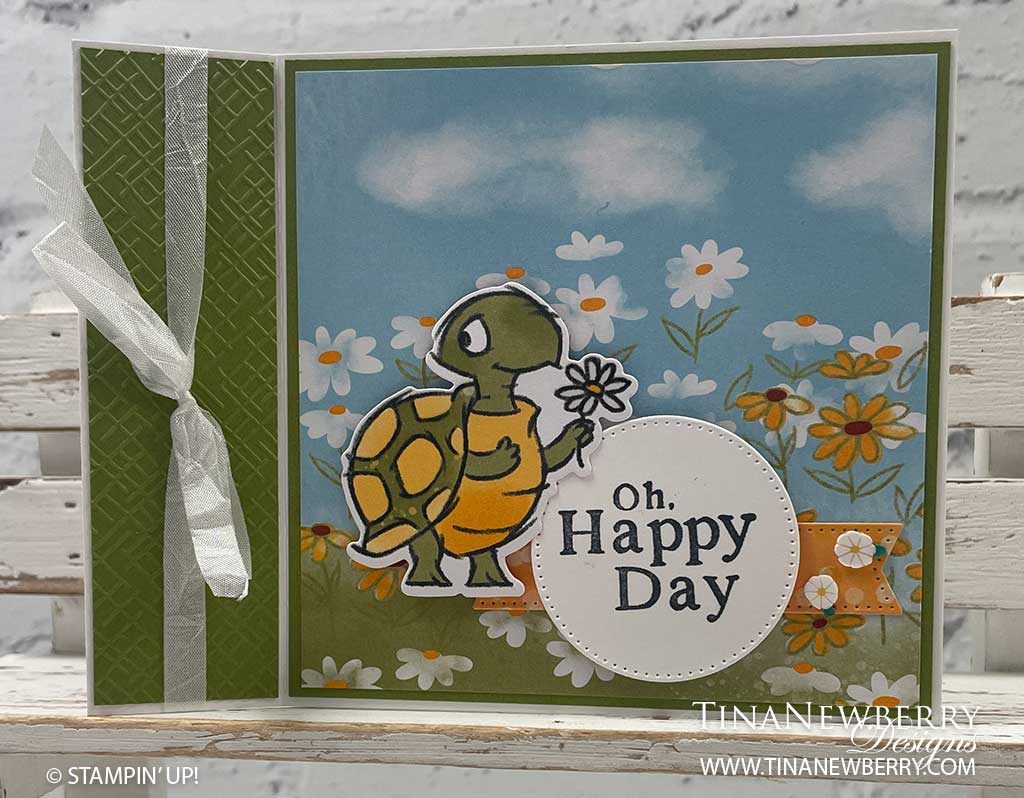
Oh, Happy Turtle! A Book Fold Card

Thank you for your interest in this project. Some projects are exclusive to subscribers who will receive passwords by email.

Are you a subscriber? Awesome! Check your email for the password and enter it here to view this project.

Not yet subscribed?  We’d love for you to join us.  Subscribe to my email list and receive news, information and inspiration by email.

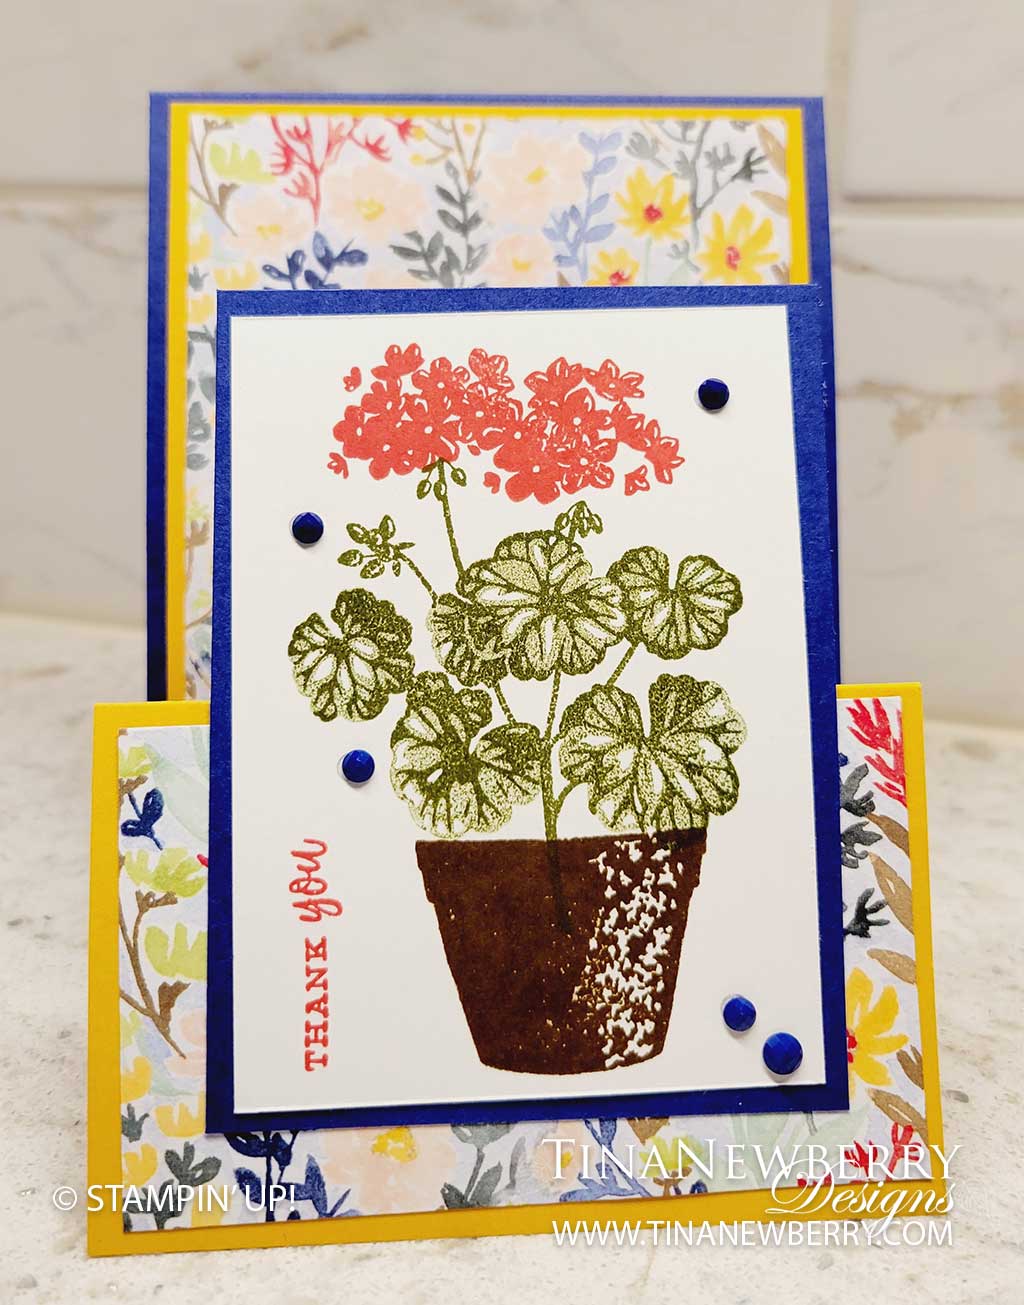
Versatile Double-Easel Card

The sky is the limit with this double easel card layout. Change up the colors, patterned paper, focal image and stamp set to create an array of cards for any occasion.

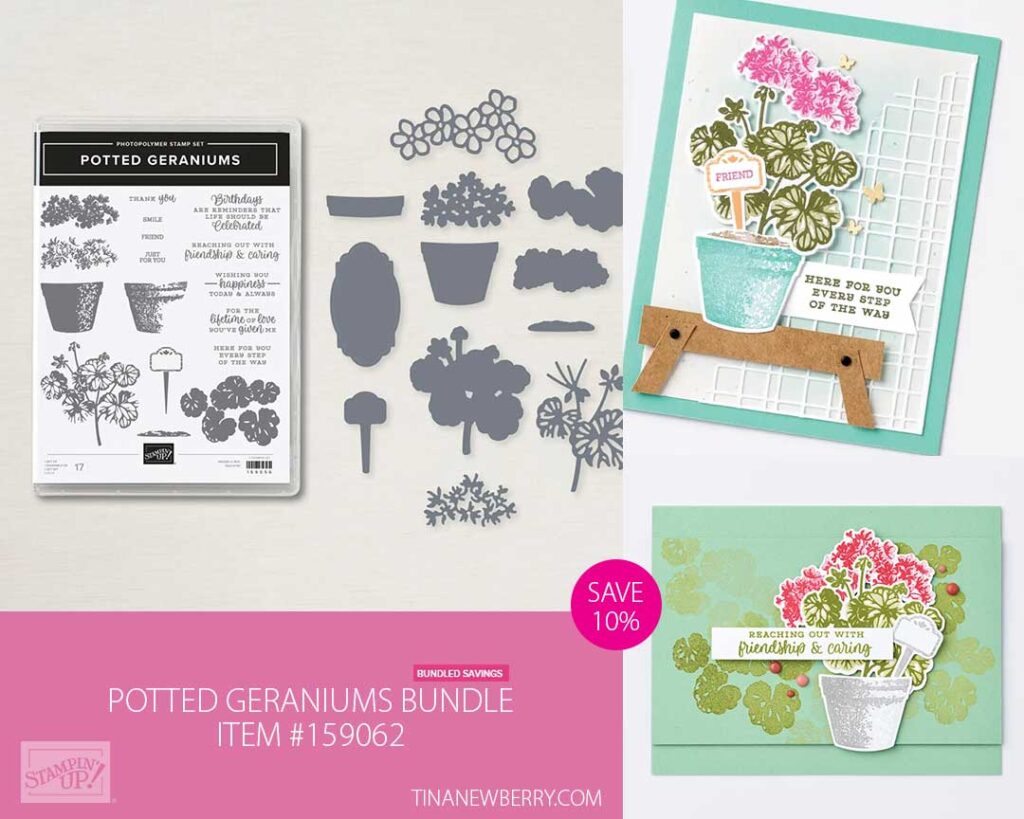
Potted Geraniums Bundle
Beautify your papercraft projects with the Potted Geraniums Bundle. This bundle includes the Potted Geraniums Stamp Set and the Geranium Dies. Save 10% when you buy the bundle.

Measurements

Full list of supplies needed, listed below. A die cutting machine is needed for this card.

Starry Sky Cardstock:

  • 4-1/4″w x 11″h scored at 5-1/2″ for Card Base
  • 3”w x 4” h

Crushed Curry Cardstock: 4″w x 10-1/4″h scored at 2-1/2″ and 5″

White Cardstock:

  • 2 ¾” w x 3 ¾” h for sentiment
  • 5 1/4″ h x 4″ w

Rings of Love Designer Series Paper (DSP – this is a 2022 Sale-a-bration paper. Change it up with what you have.):

  • 3 ¾” x 5″
  • 3 ¾” x 2 ¼”

Let’s Create

  1. Affix all stamps to Acrylic Blocks.
  2. Fold the Starry Sky Card Base in half using a Bone Folder to sharpen the crease.
  3. Accordian fold the Crushed Curry Cardstock at the score lines using a Bone Folder to sharpen the crease
  4. Attach the largest piece of DSP to the large panel of the Crushed Curry Cardstock and the second piece to the front panel of the Crushed Curry Cardstock. Then attach the back of the large panel of the Crushed Curry Cardstock to the Starry Sky Card Base with Stampin’ Seal+
  5. On the 2 ¾” w x 3 ¾” h stamp the Geranium using Poppy Parade, Mossty Meadow (I stamped off for the filler stamp), and Soft Suede and the sentiment in Poppy Parade.
  6. Attach the sentiment panel to the 3”w x 4” h Starry Sky Cardstock and use Stampin’ Dimensionals to attach to the front DSP panel of the Crushed Curry.
  7. Sprinkle on the gems.
  8. Stamp and decorate the 5 1/4″ h x 4″ w Basic White Cardstock inside and attach with Stampin’ Seal.
  9. Decorate your envelope by stamping a focal image on the front or attach DSP to the envelope flap.
  10. So fun!! Now send it to someone special.

Shopping List

Recommended Stamper’s Toolkit

Product List
Order online from the convenience of your own home or send me your order and I’ll take care of you. ❤ Either way, please use the host code ANTD9UHS. Order online AND, if your order is $50 or more using host code ANTD9UHS between now and the end of the month you’ll receive a free pack of embellishment as a THANK YOU gift from me. ❤ If your order is over $150, skip the host code, earn Stampin’ Rewards for free stuff yourself and I’ll still send you a free pack of embellishment as a THANK YOU gift from me. ❤