To a Friend That Makes Me Smile

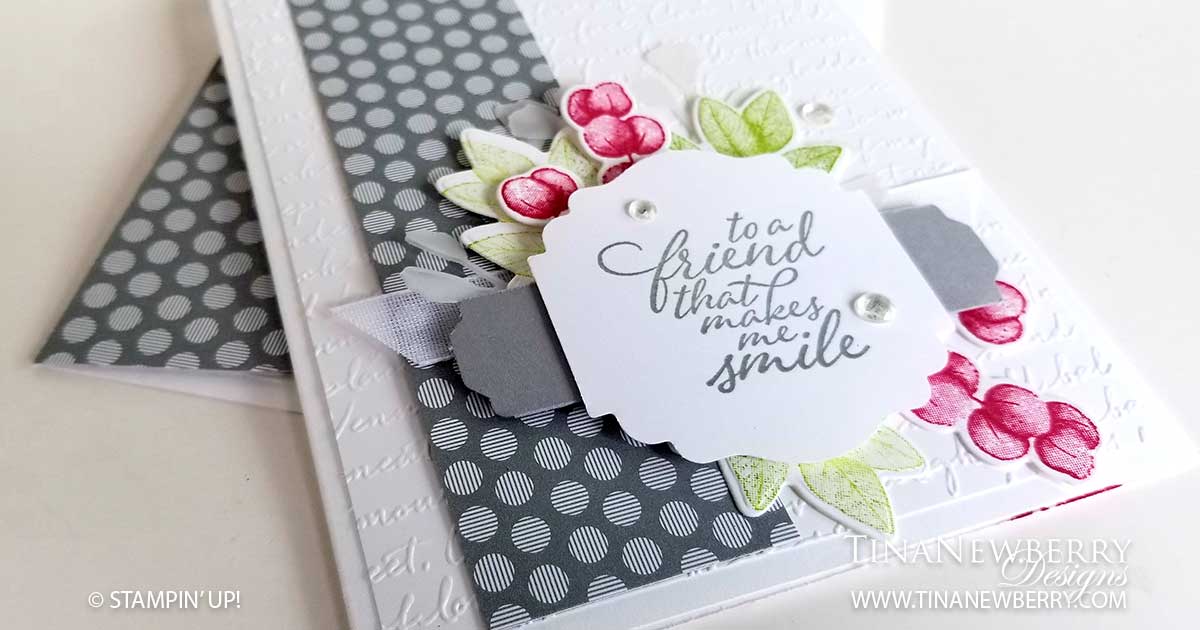
Such a simple and vibrant card! These berries from the Forever Fern Distinktive Stamp Set are spectacular in Melon Mambo with a touch of Smoky Slate and Granny Apple Green. Such a happy and thoughtful card. So fun to make.

Full list of supplies needed, listed below. A die cutting machine is needed for this card.
Card Base: Whisper White Thick Cardstock 8 1/2 h” x 5 1/2″ w folded to 5 1/2″ h x 4 1/4″ w.
Background: Whisper White Cardstock 5 1/4″ h x 4″ w embossed with the Scripty Embossing Folder
Pattern Layer: 2020-2021 Neutrals DSP 5 1/4″ h x 1 1/2″ w
Decorative Layer: Smoky Slate Cardstock 3/4″ h x 3 1/4″ w trimmed with Lovely Labels Pick a Punch
Sentiment Layer: Whisper White Cardstock 1 1/4″ h x 1 1/2″ w with the Label Me Lovely Punch

  1. Affix all stamps to Acrylic Blocks.
  2. Fold the Card Base in half using a Bone Folder to sharpen the crease.
  3. Attach the Embossed Background and Pattern Layers with Stampin’ Seal.
  4. Die cut the Vellum Leaves.
  5. Use Granny Apple Green ink to stamp the Leaves. Stamp-off for the lighter images and die cut.
  6. Stamp the Berries with Melon Mambo ink and die cut.
  7. Layer the ribbon with Tear & Tape, then layer all the Leaves and Berries attach all with Stampin’ Seal.
  8. Use Dimensionals to attach the Decorative Layer.
  9. Stamp the Sentiment on Whisper White Cardstock and punch with the Label Me Lovely Punch and attach with Stampin’ Seal.
  10. Add the Elegant Faceted Gems.
  11. Stamp some Berries in Melon Mambo to decorate the inside.
  12. Decorate the envelope.
  13. Love it! Go make a friends day and put this in the mail.

Shopping List

Product List

Recommended Stamper’s Toolkit

Product List
Order online from the convenience of your own home or send me your order and I’ll take care of you. ❤ Either way, please use the host code ANTD9UHS. Order online AND, if your order is $50 or more using host code ANTD9UHS between now and the end of the month you’ll receive a free pack of embellishment as a THANK YOU gift from me. ❤ If your order is over $150, skip the host code, earn Stampin’ Rewards for free stuff yourself and I’ll still send you a free pack of embellishment as a THANK YOU gift from me. ❤

You Can Do This

Blue and Greens are my favorite colors. Couple that with botanicals and the Forever Greenery Suite delivers! The images of this Distinktive stamp set make it easy to stamp color shading and variations all at the same time. The Suite includes a cozy herringbone knit embossing folder, gold hoops and combo pack of delicate Vanilla Open-Weave Ribbon and Gold Metallic Trim. All of this comes together with the Gilded Gems in some of the most decorative and beautiful cards I’ve ever seen.

Full list of supplies needed, listed below. A die cutting machine is needed for this card.
Card Base: Pretty Peacock Cardstock 8 1/2 h” x 5 1/2″ w folded to 5 1/2″ h x 4 1/4″ w.
Background: Forever Greenery DSP 5 1/4″ h x 4″ w
Decorative Matte: Pretty Peacock Cardstock 4 1/2″ h x 3 1/4″ w
Decorative Layer: Whisper White Cardstock 4 3/8″ h x 3 1/8″ w
Inside Layer: Whisper White Cardstock 5 1/4″ x 4″ w

  1. Affix all stamps to Acrylic Blocks.
  2. Fold the Card Base in half using a Bone Folder to sharpen the crease.
  3. Use Stampin’ Seal to attach the Background.
  4. Emboss the Decorative Layer and attach to the Decorative Matte with Stampin’ Seal and then attach with Stampin’ Dimensionals.
  5. On scrap Whisper White Cardstock stamp the berries with Pretty Peacock and the leaves with Pear Pizzaz, then Die Cut.
  6. Coil some Gold Thread and attach with Mini Glue Dots.
  7. Add a Gold Hoop with Mini Glue Dots.
  8. Arrange the stamped Berries and Leaves with some Gold Die Cut Leaves (some gold side up and some white side up).
  9. Stamp the Sentiment on scrap Pretty Peacock Cardstock with Versamark and heat emboss with White Embossing Powder. Fussy cut and adhere.
  10. Decorate the Inside Layer and attach.
  11. Decorate the envelope.
  12. How pretty! Now send it to someone special.

Shopping List

Stamper’s Toolkit

Design inspired by Sandy McCullough.

Happy Birthday

Isn’t this flower from the Band Together Stamp Set so pretty? I feel like this flower could be for any season, just change up the color. The monochrome color scheme of this card makes me want to go to the ocean! Three of my favorite colors right here. Enjoy!

Measurements

Full list of supplies needed, listed below. A die cutting machine is needed for this card.
Card Base: Pool Party Cardstock 8 1/2 h” x 5 1/2″ w folded to 5 1/2″ w x 4 1/4″ h.
Strip: Bermuda Bay 5 1/2″ h x 1″ w
Decorative Strip: Coastal Cabana with die from Detailed Band Dies
Sentiment Layer: 
Whisper White Cardstock 1 ″ h x 2 1/2″ w Stitched Rectangle Die

Let’s Create

  1. Affix all stamps to Acrylic Blocks.
  2. Fold the Card Base in half using a Bone Folder to sharpen the crease.
  3. Stamp the Flower image with Bermuda Bay ink on the Card Base.
  4. Stamp the Sentiment on the Sentiment Rectangle.
  5. Die cut leaves from Coastal Cabana, Bermuda Bay and Vellum Cardstock scraps.
  6. Attach the Strip and the Decorative Strip with Stampin’ Seal.
  7. Use a Mini Glue Dot to attach the leaves to the lower right corner of the Sentiment Layer.
  8. Attach the Sentiment Layer with Stampin’ Dimensionals.
  9. Color Basic Pearls with the Pool Party Stampin’ Blend and attach.
  10. Pretty simple! Who are you going to send it to?

Product List

Recommended Stamper’s Toolkit

Product List
Order online from the convenience of your own home or send me your order and I’ll take care of you. ❤ Either way, please use the host code ANTD9UHS. Order online AND, if your order is $50 or more using host code ANTD9UHS between now and the end of the month you’ll receive a free pack of embellishment as a THANK YOU gift from me. ❤ If your order is over $150, skip the host code, earn Stampin’ Rewards for free stuff yourself and I’ll still send you a free pack of embellishment as a THANK YOU gift from me. ❤

Design inspired by Brenda Quintana.

Congratulations

These Detailed Band dies really take the show. Their intricate details add so much to any card with extra WOW when layered as in this card. I was in fall color mood when I made this one. Maybe a card for an upcoming Anniversary…. hmmmm.

Measurements

Full list of supplies needed, listed below. A die cutting machine is needed for this card.
Card Base: Merry Merlot Cardstock 8 1/2 h” x 5 1/2″ w folded to 5 1/2″ h x 4 1/4″ w
Background: Whisper White Cardstock 5 1/4″ h x 4″ w
Sentiment Layer: 
Whisper White Cardstock die cut with Detailed Band Dies

Let’s Create

  1. Affix all stamps to Acrylic Blocks.
  2. Fold the Card Base in half using a Bone Folder to sharpen the crease.
  3. Run the Background through die cutting machine with the Subtle Embossing Folder and adhere with Stampin’ Seal.
  4. Die cut Champagne Foil and Merry Merlot Cardstock with Detailed Band Dies.
  5. Stamp the Sentiment with Merry Merlot ink.
  6. Use Fine-Tip Glue pen to attach the Detailed Band Dies and Stampin’ Dimensionals to position the Sentiment in place.
  7. Very Elegant! Ready for a special occasion.

Product List

Recommended Stamper’s Toolkit

Product List
Order online from the convenience of your own home or send me your order and I’ll take care of you. ❤ Either way, please use the host code ANTD9UHS. Order online AND, if your order is $50 or more using host code ANTD9UHS between now and the end of the month you’ll receive a free pack of embellishment as a THANK YOU gift from me. ❤ If your order is over $150, skip the host code, earn Stampin’ Rewards for free stuff yourself and I’ll still send you a free pack of embellishment as a THANK YOU gift from me. ❤

Design inspired by Diane Malcor.