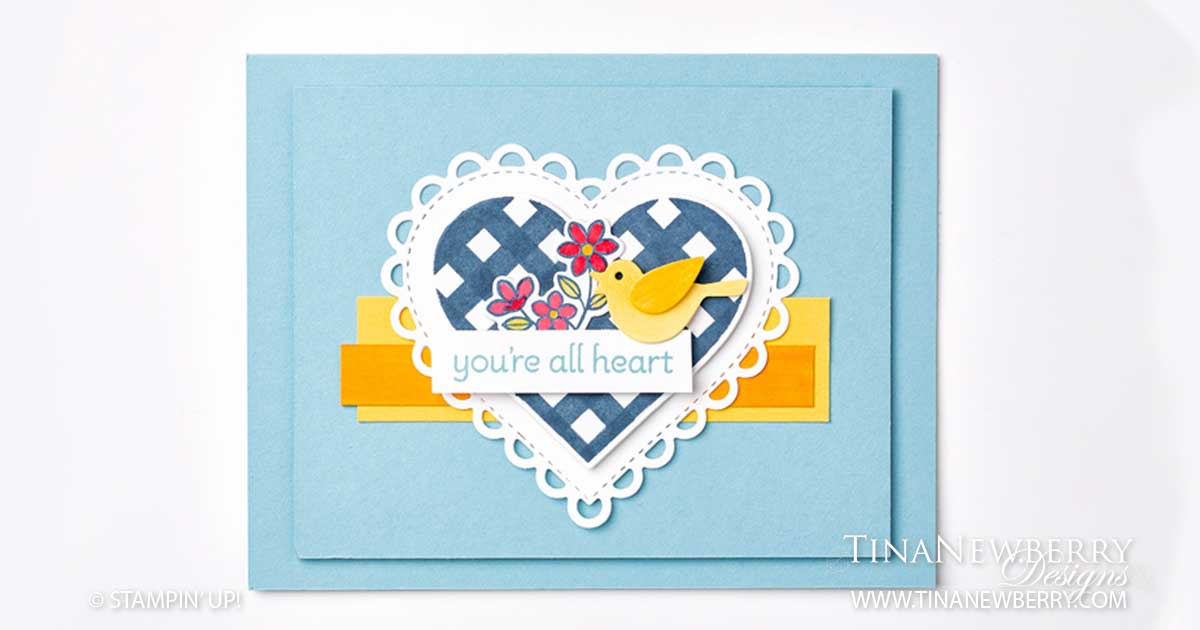
WOW! A few scalloped edges, hearts, gingham check and pops of color whallop all the WOW on this super cute and quick card that accomplishes #simplestamping using just Stamps, Ink and Paper.
Full list of supplies needed, listed below. A die cutting machine is needed for this card. Card Base: Balmy Blue Cardstock 4 1/4″ h x 11″ w folded to 4 1/4″ h x 5 1/2″ w Background: Balmy Blue Cardstock 3 3/4″ h x 4 3/4″ w Decorative Strip Tall: Daffodil Delight Cardstock 1″ h x 3-1/4″ w Decorative Strip Short: Daffodil Delight Cardstock 1/2″ h x 3-1/4″ w Hearts: Basic White Cardstock scraps to fit dies. Bird & Flowers: Basic White Thick Cardstock scraps to fit die. (Always use Thick Cardstock when using Stampin’ Blends) Sentiment Layer: Basic White Cardstock 1/2″ h x 2″ w
Let’s Create
Affix all stamps to Acrylic Blocks.
Fold the Card Base in half using a Bone Folder to sharpen the crease.
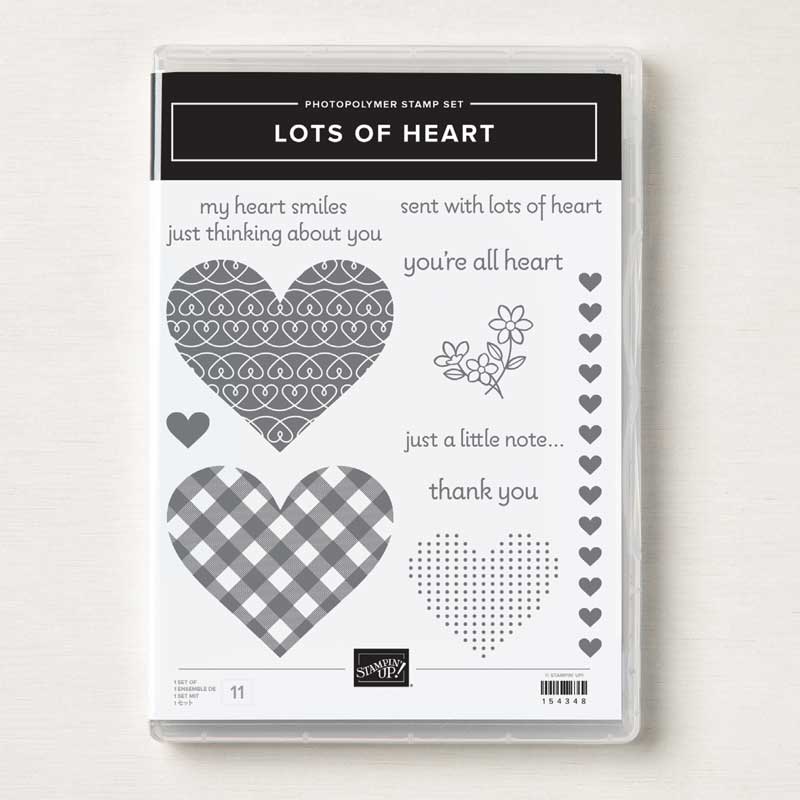
Use the Misty Moonlight Classic Stampin’ Pad to stamp
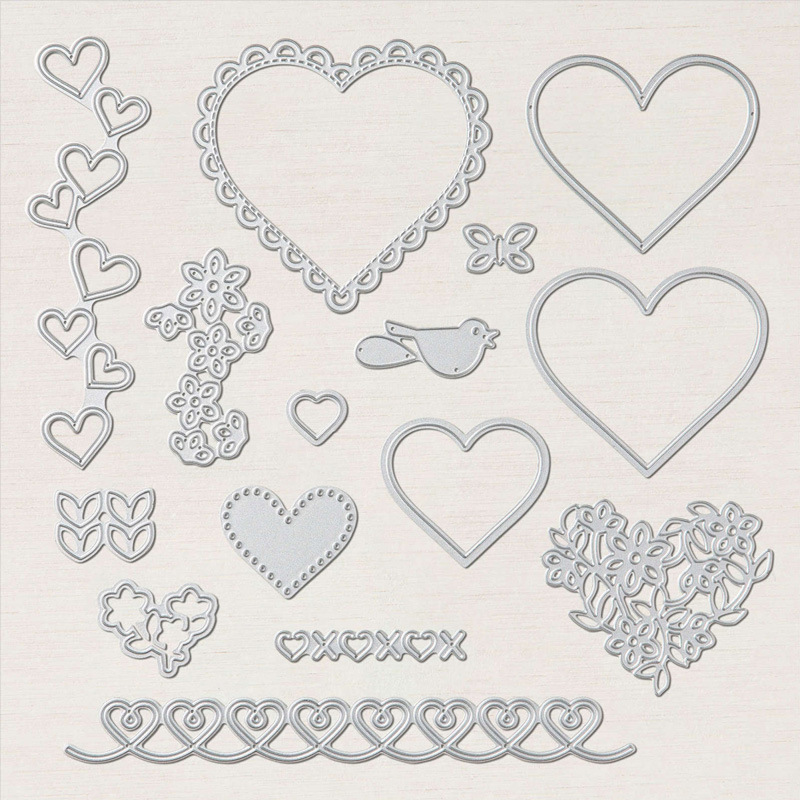
The Gingham Heart on Basic White Cardstock scrap and die cut.
The Flower Image on Basic White Thick Cardstock scrap. Color with Real Red and Daffodil Delight Stampin’ Blends, then die cut.
Use the Daffodil Delight Stampin’ Blends to lay down a swatch of color on a piece of Basic White Thick Cardstock and then die cut the Bird from the swath. Use a Mini Glue dot to attach the wing.
Use the dark Daffodil Delight Stampin’ Blend to color on the Daffodil Delight Cardstock to make some variation in the Decorative Strip Short layer.
Die cut the Scalloped Stitched Heart from Basic White Cardstock.
Use Balmy Blue Ink to stamp the Sentiment.
Now Assemble it all:
Use Stampin’ Dimensionals to attach the Balmy Blue Background.
Use Stampin’ Seal to attach the two Daffodil Delight Decorative Strip Layers.
Use Stampin’ Seal to assemble and attach the Scalloped Stitched Heart, Gingham Heart, and Flowers. Then attach all with Stampin’ Dimensionals.
Use Stampin’ Dimensionals to attach your Sentiment and the Bird.
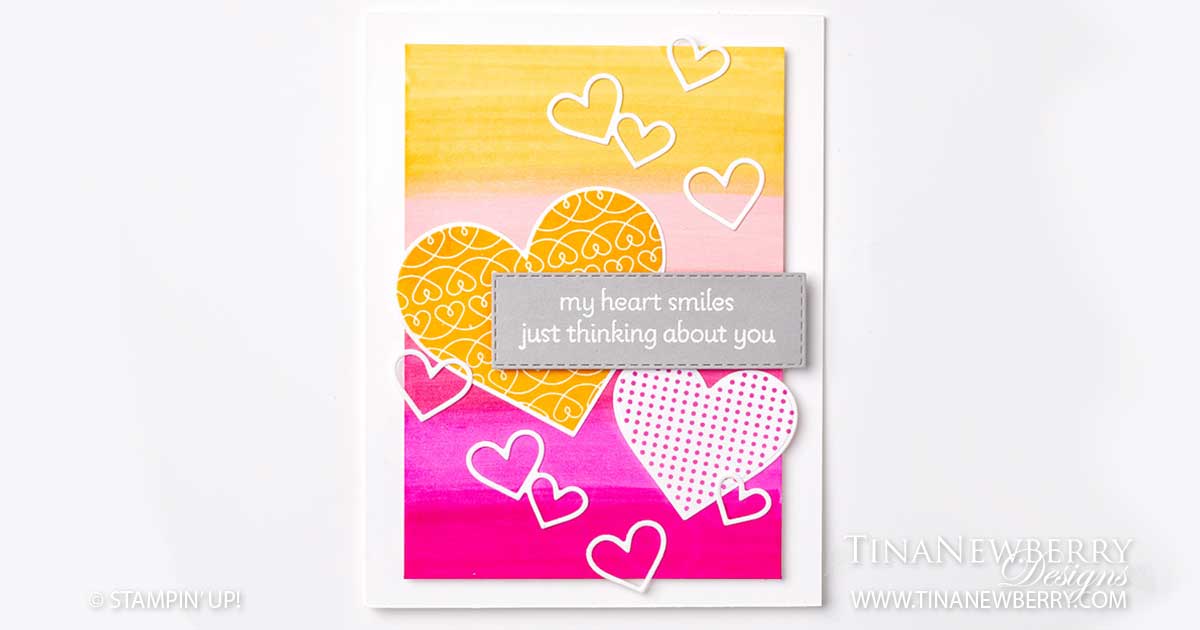
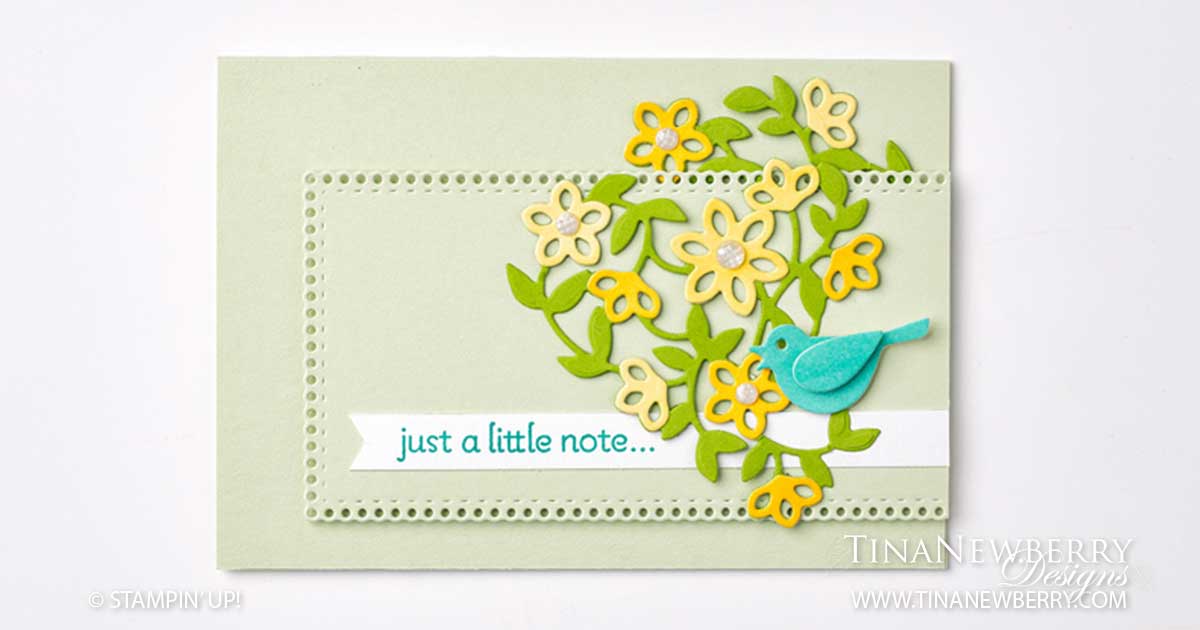
A sunset colored card with a different purposes! So fun! A little, ink, coloring and the dies from the Lots of Heart Bundle will have you finishing this card in a jiffy.
Full list of supplies needed, listed below. A die cutting machine is needed for this card. Card Base: Basic White Thick Cardstock 5 1/2″ h x 8″ w folded to 5 1/2″ h x 4 1/4″ w Background: Basic White Thick Cardstock 5″ h x 3 3/4″ w Hearts: Basic White Cardstock Scraps Sentiment Layer: Smoky Slate Cardstock scrap large enough for your Sentiment. Inside Layer: Basic White Cardstock 5″ h x 3 3/4″ w
Let’s Create
Affix all stamps to Acrylic Blocks.
Fold the Card Base in half using a Bone Folder to sharpen the crease.
Protect your work surface and set the Basic White Background layer down in front on your work surface. Using the Paint Tip of the Stampin’ Blends add color until desired color depth is reached. Colors in sample are Magenta Madness, Mango Melody, Flirty Flamingo, Melon Mambo. When using Stampin’ Blends, remember as the alcohol in the markers dissipates, the lines will smooth out and the colors will blend together creating a nice ombre effect. Be sure to give it time to blend to prevent over-coloring.
On Basic White Cardstock scrap, stamp the Large Heart in Mango Melody and the Smaller Polka Dot Heart Magenta Madness. Die cut out.
Attach Adhesive Sheets to the back of a piece of Basic White Cardstock scrap. Die Cut two Heart Strings and snip apart with Paper Snips.
On Smoky Slate scrap stamp your Sentiment in Versamark Ink. Sprinkle with White Embossing Powder and use your Heat Tool to Heat Emboss. Die cut with Stitched Rectangle Die.
Assemble
Arrange all the Hearts on the Colored Background Layer where you want them.
Use adhesive of your choice to attach the Large Heart and the Smaller Polka Dot Heart.
Remove the backing from the Heart Chain pieces and attach to the Colored Background Layer, overlapping larger Hearts if desired.
Use Stampin’ Dimensionals to attach the Sentiment Layer.
Attach the Colored Background Layer to the Card Base with Stampin’ Dimensionals.
Stamp the inside layer and attach with the adhesive of your choice.
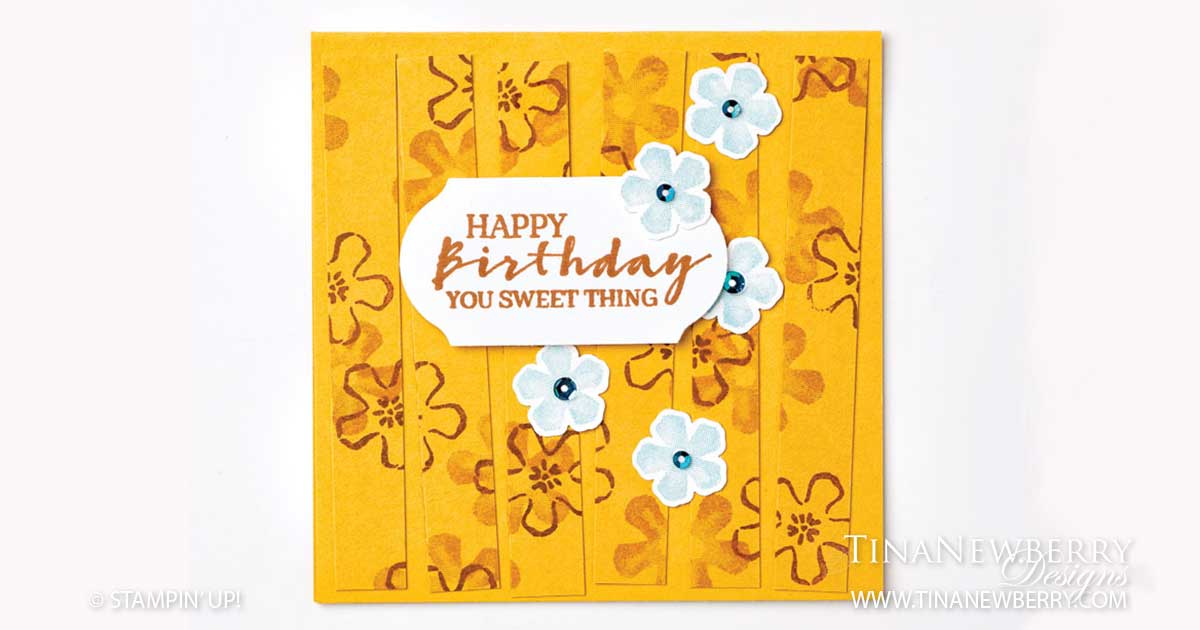
Lots of interesting and simple effects on this card, starting with the compact square size! I tend to make the same sized cards all the time. So boring! But I tell you the reason is, I like my cards to fit in an envelope. I know I can MAKE and envelope, but let’s face it, I’m not that motivated. LOL. But this little 4″x4″ card is super cute and works just fine enough in an invitation envelope for an 5 1/2″ w x 4 1/4″.
Full list of supplies needed, listed below. A die cutting machine is needed for this card. Card Base: Bumble Bee Cardstock 4″ h x 8″ w folded to 4″ h x 4″ w Background: Bumble Bee Cardstock 3 1/2″ h x 3 1/2″ w Sentiment Layer and Flowers: Basic White scraps Inside Layer (optional): Basic White Cardstock 3 1/2″ h x 3 1/2″ w
Let’s Create
Affix all stamps to Acrylic Blocks.
Fold the Card Base in half using a Bone Folder to sharpen the crease.
Use Cinnamon Cider ink to stamp large Flower Outlines and stamp-off the fill images on the Background Layer.
Cut the Background Layer into 1/2″ strips, then use the adhesive of your choice to attach the Background Strips to the Card Base.
Use Cinnamon Cider ink to stamp your Sentiment on scrap Basic White Cardstock. Then punch out with the punch of your choice. The retired Timeless Label Punch, if shown.
Attach your sentiment using Stampin’ Dimensionals.
Use Balmy Blue ink to stamp your the small Flowers on scrap Basic White Cardstock and then punch them out with the Strawberry Builder Punch.
Use Mini Glue Dots to attach Balmy Blue Flowers and then add Whale Done (retired) or Artistry Blooms sequins to the center of the Flowers.
")


")