Quick & Easy Thinking of You Card

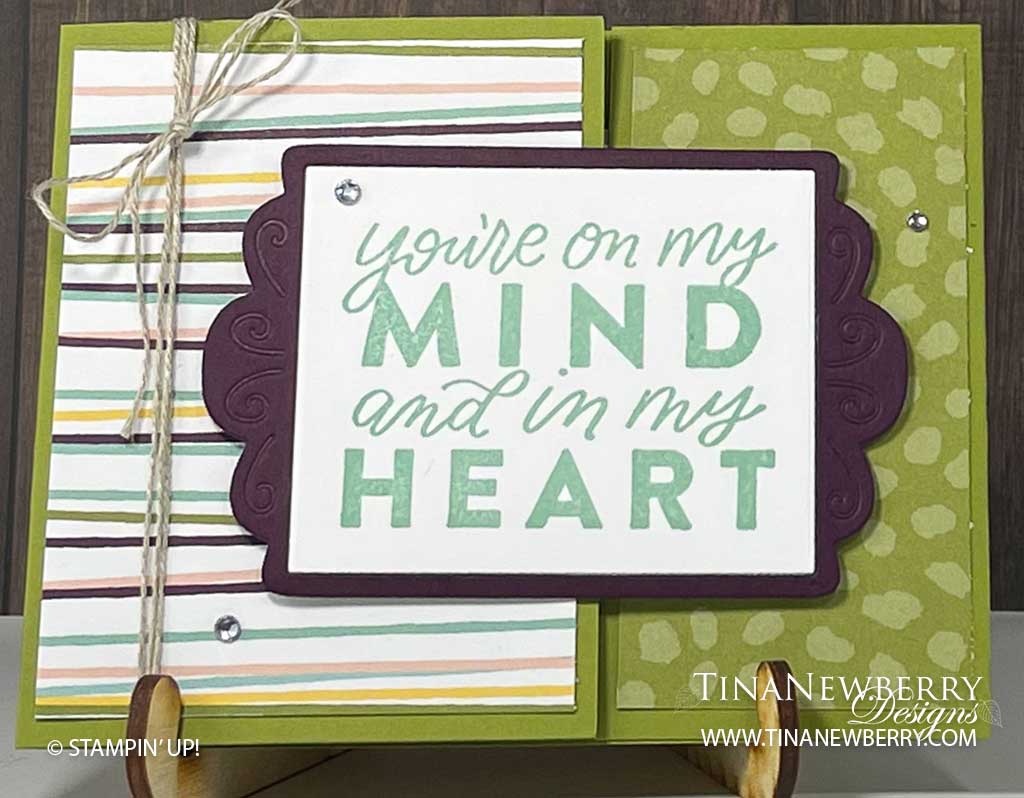
You’re On My Mind and In My Heart in these playful fonts makes for a creative Thinking of You card with a simple fun-fold and lots of room to write your well-wishes.
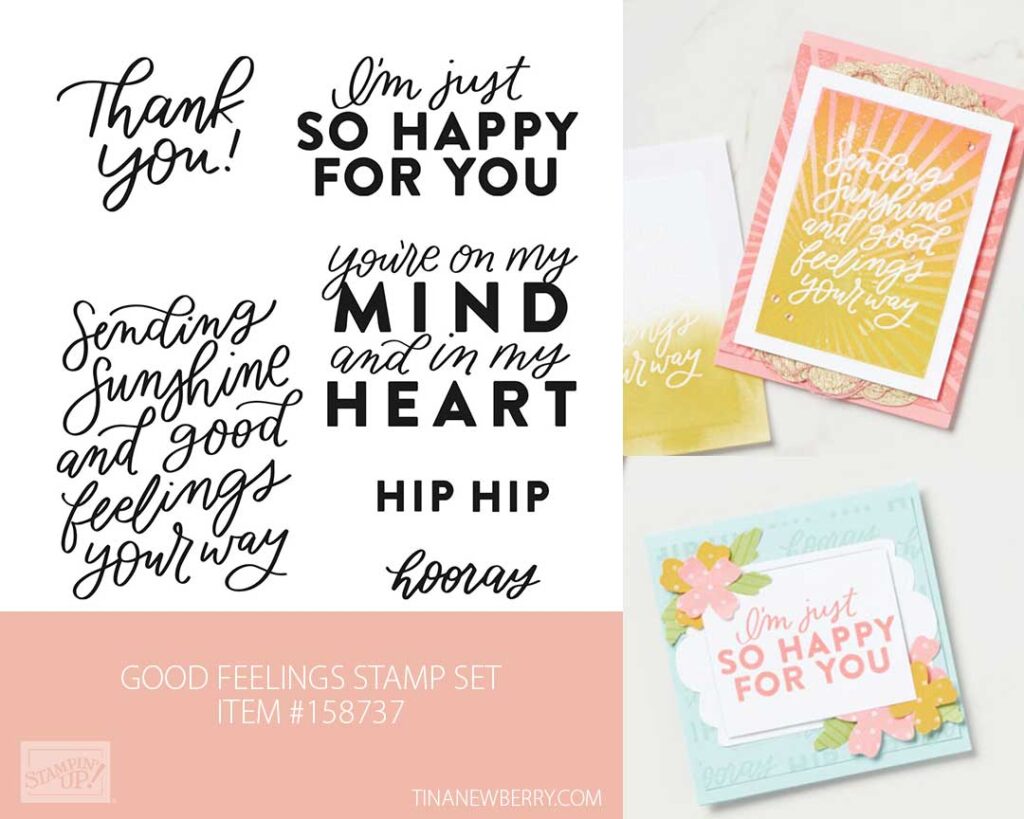
Shop the Good Feelings Stamp Set

Measurements

Full list of supplies needed, listed below. A die cutting machine is needed for this card.

POCKET CARD BASE
Old Olive Cardstock: 4 ¼” x 11”, score at 3 ¼” and 8 ¾” for Card Base
Design a Daydream Designer Series Paper (DSP):

  • 4″ h x 3″ w for larger left flap
  • 4″ h x 2″ w for right flap

SENTIMENT LABEL (attaches to left flap of Card Base)
Blackberry Bliss Cardstock: scrap die-cut frame from Fabulous Frames dies
Basic White Cardstock: 2 ⅝” h x 3 ⅛” w (for adhering behind frame)
INSIDE POCKET CARD
Pool Party Cardstock: 4 1/2″ w x 3″ h
Basic White Cardstock: 4 1/4″ w x 2 3/4″ h
Design a Daydream DSP: ½” h x 4” w


Let’s Create

  1. Affix all stamps to Acrylic Blocks.
  2. Fold the Old Olive Card Base on the score lines using a Bone Folder to sharpen the crease.
  3. Turn the shorter flap into a pocket, using Tear & Tape along the edges.
  4. Hold the Card Base so the pocket is on the right, attach the two largest pieces of Designer Series Paper to the larger flap and pocket with Stampin’ Seal.
  5. Wrap Linen Thread around the largest flap and secure with a bow.
  6. Die cut the Blackberry Bliss Cardstock scrap with the Fabulous Frames Dies.
  7. Stamp the Sentiment on the 2 ⅝” h x 3 ⅛” w Basic White Cardstock in Pool Party Ink. Adhere to back of the Blackberry Bliss Frame.
  8. Adhere the framed sentiment to the largest flap on the front with Stampin’ Dimensionals.
  9. Use Stampin’ Seal to attach the 4 1/4″ w x 2 3/4″ h Basic White Cardstock to the 4 1/2″ w x 3″ h Pool Party Cardstock and attach the ½” h x 4” w to the Basic White layer. This is the inside card.
  10. Wrap Linen Thread around several times and secure with a bow.
  11. Sprinkle on the Rhinestone Basic gems.
  12. Decorate your envelope.
  13. So cute! Now send it to someone special.

Shopping List

Recommended Stamper’s Toolkit

Product List
Order online from the convenience of your own home or send me your order and I’ll take care of you. ❤ Either way, please use the host code ANTD9UHS. Order online AND, if your order is $50 or more using host code ANTD9UHS between now and the end of the month you’ll receive a free pack of embellishment as a THANK YOU gift from me. ❤ If your order is over $150, skip the host code, earn Stampin’ Rewards for free stuff yourself and I’ll still send you a free pack of embellishment as a THANK YOU gift from me. ❤

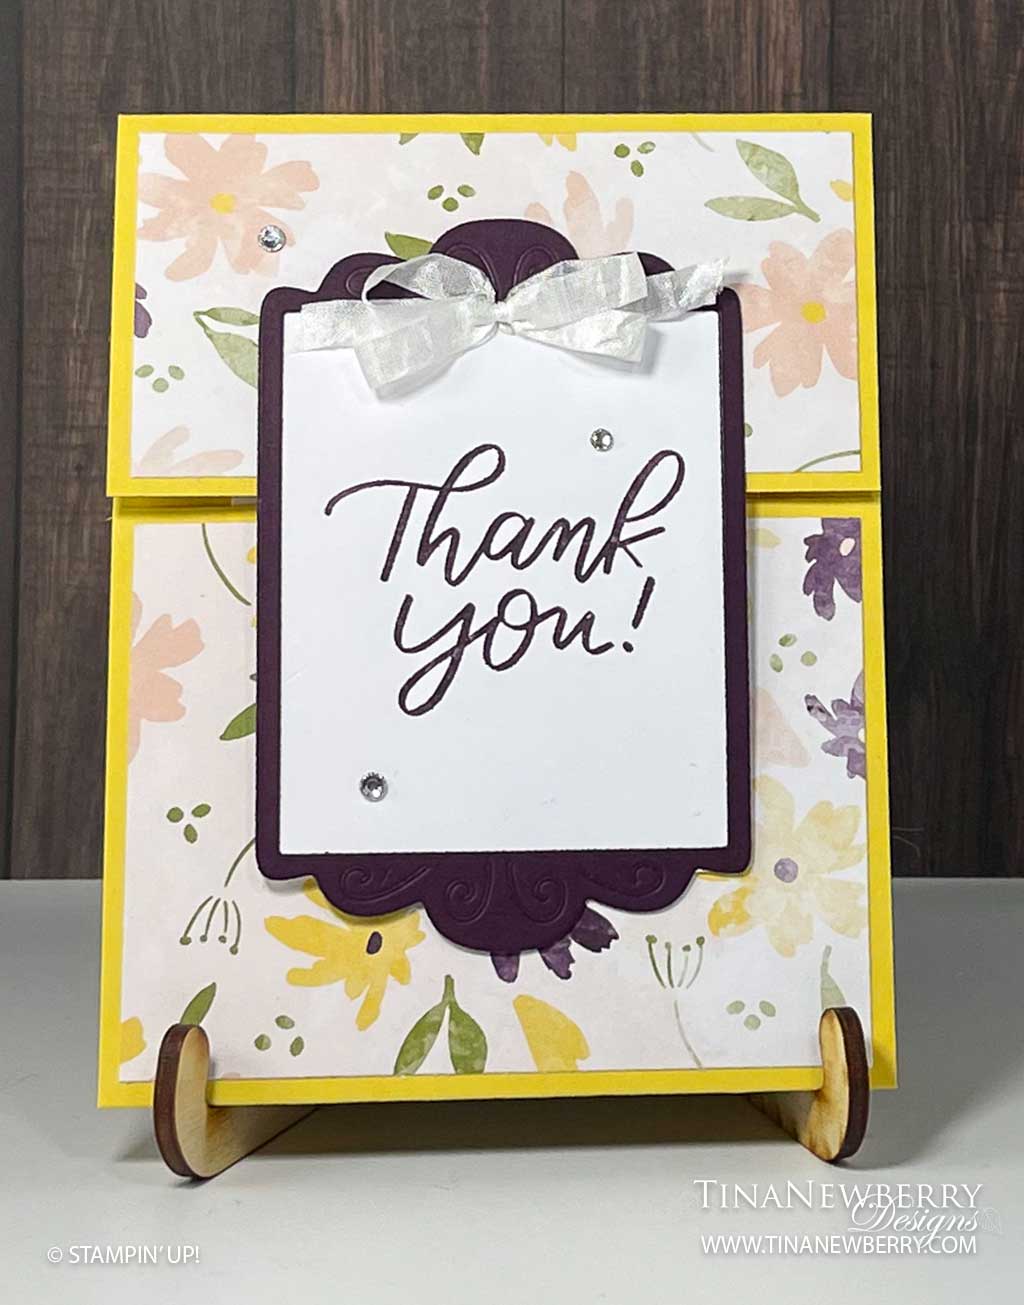
Bold & Pretty Thank You Greeting Card

Show your gratitude and appreciation with a big Thank You on a fancy fold pull out card.

Measurements

Full list of supplies needed, listed below. A die cutting machine is needed for this card.

POCKET CARD BASE

Daffodil Delight Cardsctock Card Base 4 ¼” w x 11” h, scored on the long-side at 3 ¼” and 8 ¾”

Design a Daydream Host 12″x12″ Designer Series Paper for bottom flap  4″ w x 3″ h

Design a Daydream Host 12″x12″ Designer Series Paper for top flap  4″ w x 2″ h

SENTIMENT LABEL (attaches to top flap of Card Base)

Blackberry Bliss Cardsctock die-cut  frame from Fabulous Frames dies

Basic White Cardsctock layer at 2 ⅝” w x 3 ⅛” h (for adhering behind frame)

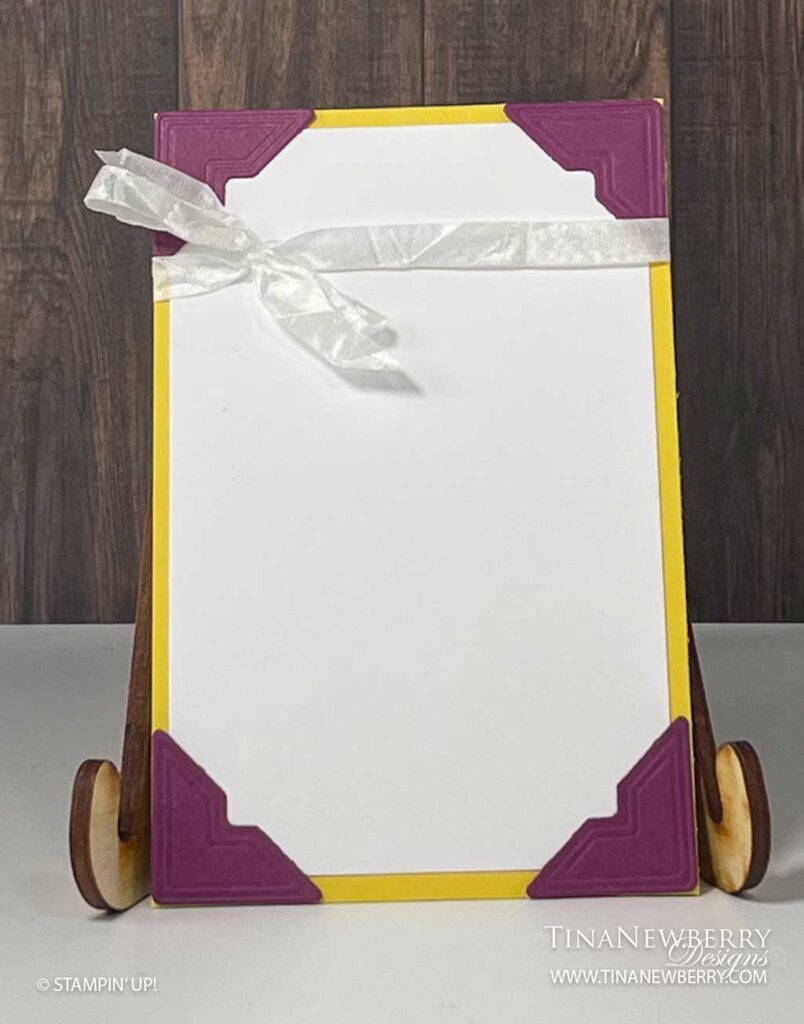
INSIDE POCKET CARD

Daffodil Delight Cardsctock for pocket card  4 1/2″h x 3″ w

Basic White Cardsctock for pocket card  4 1/4″ h x 2 3/4″ w

Blackberry Bliss Cardstock scrap to die-cut corners from Fabulous Frames dies

Let’s Create

  1. Affix all stamps to Acrylic Blocks.
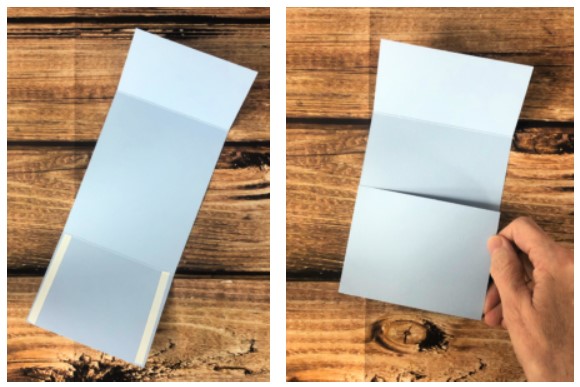
  2. Fold the Card Base at score lines using a Bone Folder to sharpen the crease.
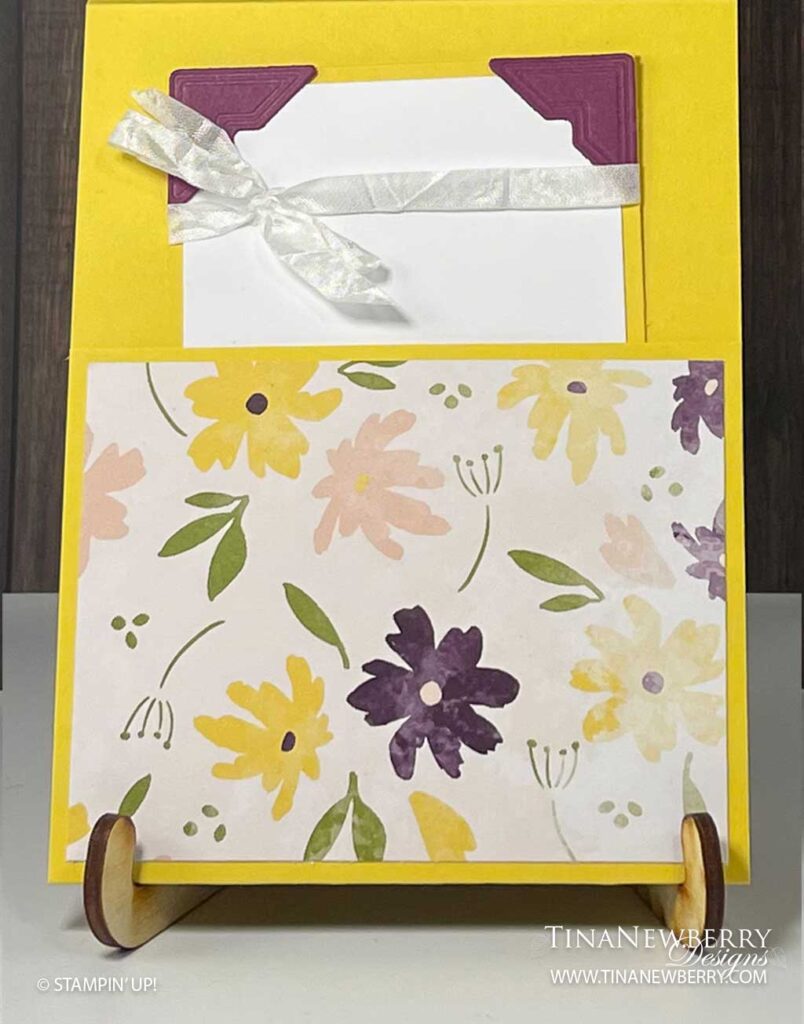
  3. Fold the bottom flap up (the longer one) of the Card Base, and create a pocket using Tear-n-Tape on the edges
  4. Attach Design a Daydream layers to front flaps with Stampin’ Seal.
  5. Use Stampin’ Cut & Emboss to die-cut label from Blackberry Bliss Cardstock.
  6. Stamp sentiment on Basic White Cardstock in Blackberry Bliss ink and adhere to the Blackberry Bliss Fabulous Frame with Stampin’ Seal.
  7. Adhere this layer carefully to the top flap only using Stampin’ Seal.
  8. Use a Mini Glue Dot to add a Crinkle White bow
  9. Sprinkle on the rhinestones.
  10. For the inside, die cut corners in Blackberry Bliss Cardstock from the Fabulouse Frames Dies.
  11. Adhere 4 1/4″ h x 2 3/4″ w Basic White panel to the 4 1/2″h x 3″ w Daffodil Delight Cardstock with Stampin’ Seal and attach Blackberry Bliss Corners.
  12. Wrap Crinkle Seam Ribbon around and tie a bow.
  13. Insert into pocket
  14. Decorate your envelope.
  15. How fun! Now send it to someone special.

SHopping List

Recommended Stamper’s Toolkit

Product List
Order online from the convenience of your own home or send me your order and I’ll take care of you. ❤ Either way, please use the host code ANTD9UHS. Order online AND, if your order is $50 or more using host code ANTD9UHS between now and the end of the month you’ll receive a free pack of embellishment as a THANK YOU gift from me. ❤ If your order is over $150, skip the host code, earn Stampin’ Rewards for free stuff yourself and I’ll still send you a free pack of embellishment as a THANK YOU gift from me. ❤

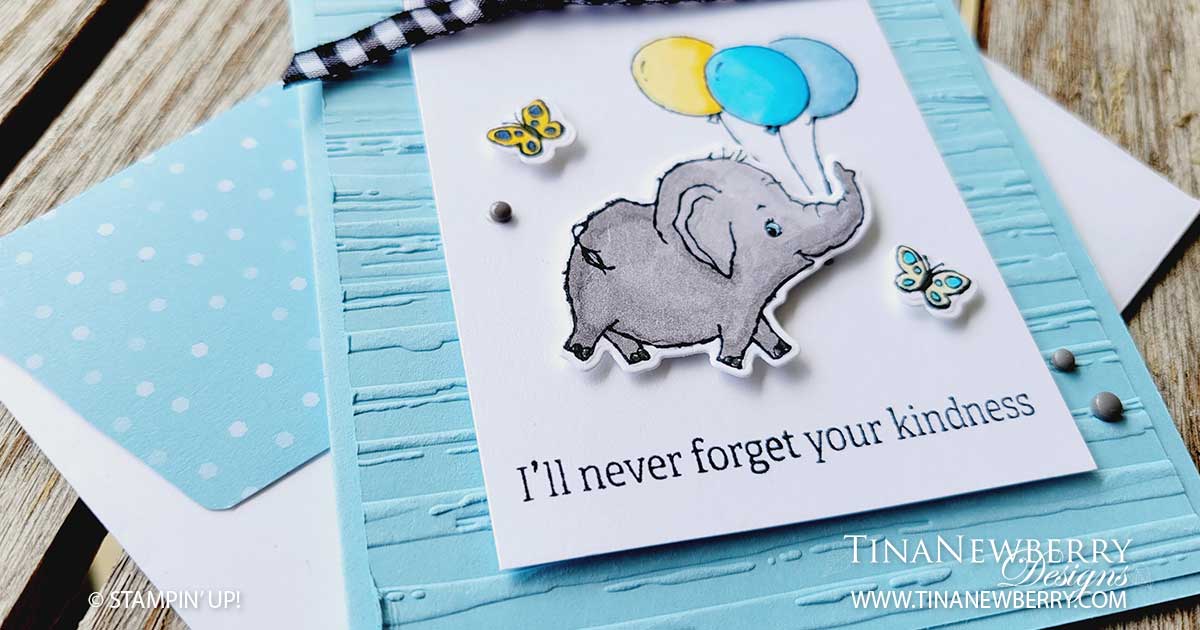
I’ll Never Forget Your Kindness Cheery Elephant Greeting Card

Thank you for your interest in this project. Some projects are exclusive to subscribers who will receive passwords by email.

Are you a subscriber? Awesome! Check your email for the password and enter it here to view this project.

Not yet subscribed?  We’d love for you to join us.  Subscribe to my email list and receive news, information and inspiration by email.

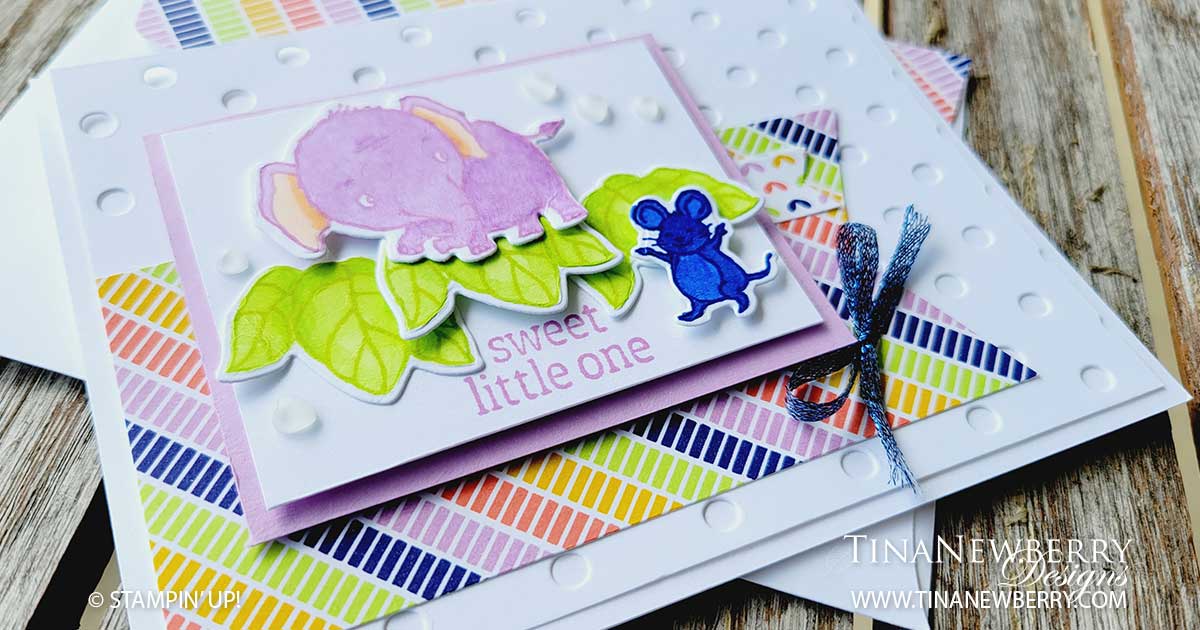
Sweet Little One Baby Card

This striped paper from the Butterfly Kisses Designer series paper sets a fun color palette for a sweet baby card. It would be fun to switch up the colors and make a Starry Sky elephant for a boy card.

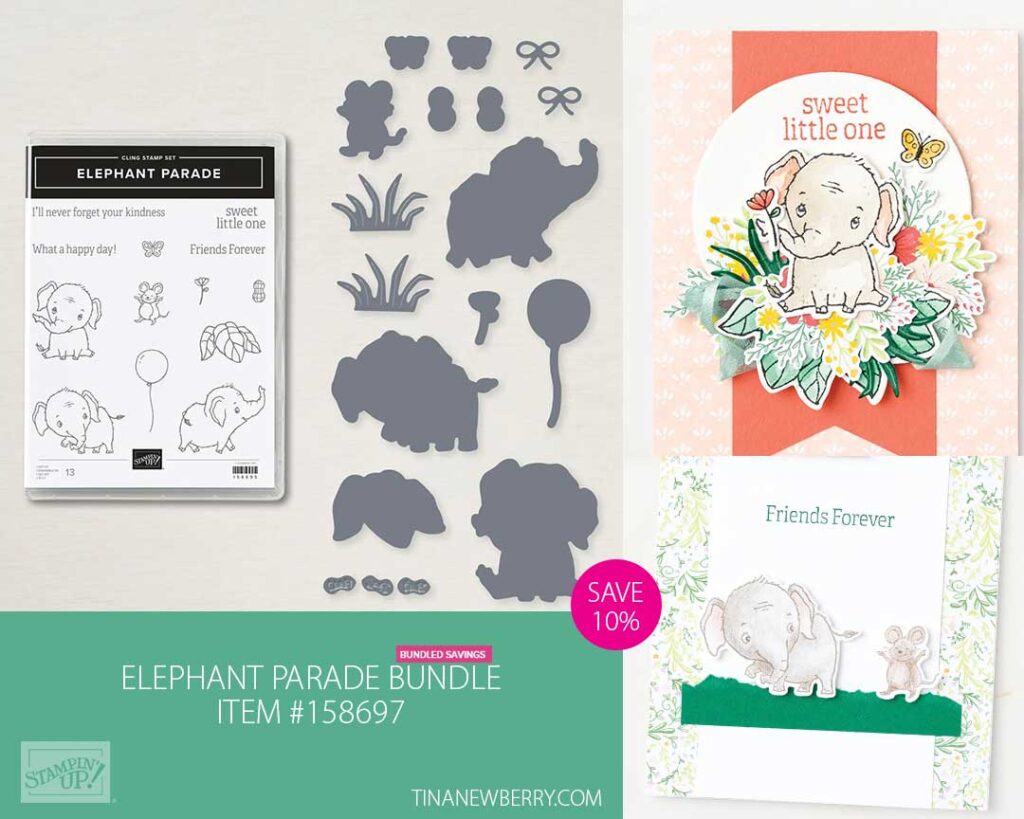
Embellish and enhance all your elephant-themed projects with the Elephant Parade Bundle. This bundle includes the Elephant Parade Stamp Set and the Elephant Dies.
Save 10% when you buy the stamp set and coordianting dies as a bundle.

Measurements

Full list of supplies needed, listed below. A die cutting machine is needed for this card.

Basic White Thick Cardstock: 

  • 8 ½” h x 5 ½” w scored and folded on the long side at 4 ¼” h
  • Scrap for elephant, leaves and mouse

Basic White Cardstock:

  • 4 ¼” h x 5 ½” w (2)
  • 2 ¼” h x 3” w

Fresh Freesia Cardstock: 2 ½” h x 3 ¼” w

Butterfly Kisses 6” x 6” Designer Series Paper (DSP):

  • 2 ¼” h x 4 ⅝” w
  • ½” h x 1” w

Let’s Create

  1. Affix all stamps to Acrylic Blocks.
  2. Fold the Card Base at score line using a Bone Folder to sharpen the crease.
  3. Run one of the 4 ¼” h x 5 ½” w Basic White panels through the Stampin’ Cut & Emboss machine with the Dots & Spots Die, then attach to the Card Base with Multipurpose Glue. 
  4. To make the banner: Halfway up the right side of the 2 ¼” h x 4 ⅝” w, use Paper Snips to snip about ¾” into the panel. Then use the snips to cut from the lower right corner into the end of the snip you made. Then cut from the top right corner down to the snip. Remove the two small triangles to leave a banner edge. Use Stampin’ Seal to attach this piece to the bottom of your card front.
  5. On the 2 ¼” h x 3” w Basic White cardstock, stamp sentiment in the lower center in Fresh Freesia ink, then attach to the Fresh Freesia Cardstock.
  6. Attach the Fresh Freesia with Stampin’ Dimensionals.
  7. One Basic White Thick Cardstock scrap stamp the elephant in Fresh Freesia ink, the leaves in Parakeet Party ink and the mouse in Starry Sky ink, then use the coordinating Stampin’ Blends to color them in. I color in light first then, shade with dark and then blend with light, but for the mouse I used the Light Starry Sky for his body and the light Orchid Oasis for his ears and tummy. 
  8. Die cut these pieces. Attach the two outer leaves with Stampin’ Seal and then the elephant, center leaves and mouse with Stampin’ Dimensionals. 
  9. Sprinkle on some Heart Pearls
  10. Tie a bow with the Starry Sky Metallic ribbon and attach with a Mini Glue Dot.
  11. Decorate the remaining 4 ¼” h x 5 ½” w Basic White panel and attach to the inside with Stampin’ Seal.
  12. Decorate your envelope.
  13. So cute!! Who has a baby you can send this to?

Shopping List

Recommended Stamper’s Toolkit

Product List
Order online from the convenience of your own home or send me your order and I’ll take care of you. ❤ Either way, please use the host code ANTD9UHS. Order online AND, if your order is $50 or more using host code ANTD9UHS between now and the end of the month you’ll receive a free pack of embellishment as a THANK YOU gift from me. ❤ If your order is over $150, skip the host code, earn Stampin’ Rewards for free stuff yourself and I’ll still send you a free pack of embellishment as a THANK YOU gift from me. ❤

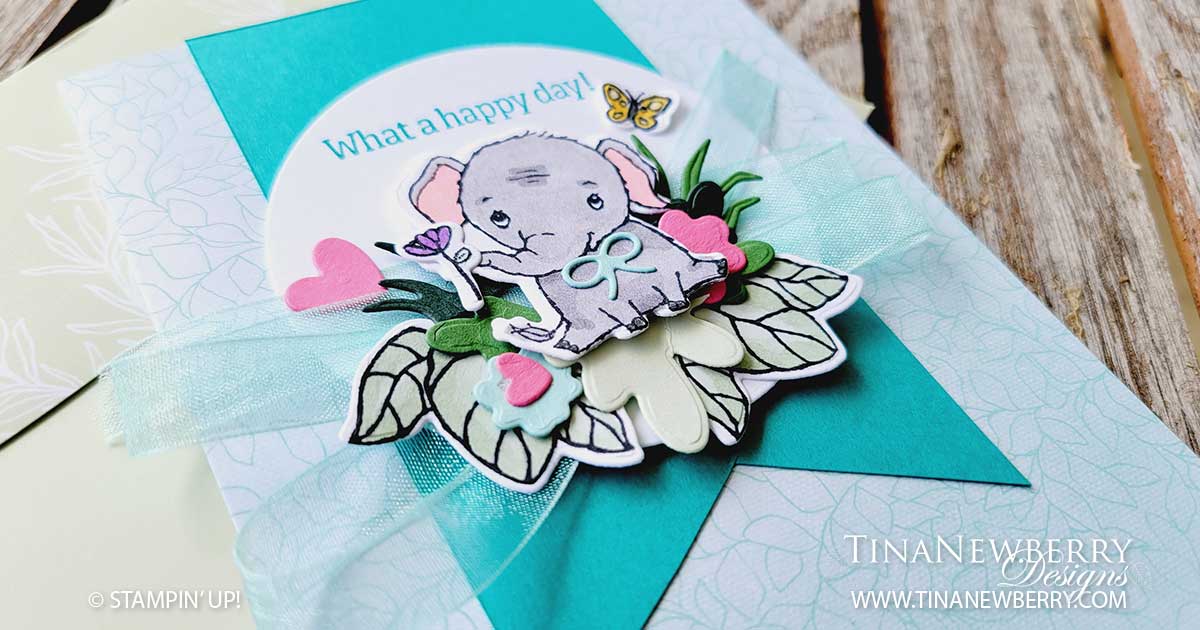
What a Happy Day Greeting Card

CASE – Copy and Share Everything – the catalog and create your own adorable Elephant Card. For my card base I used the Pool Party and Soft Sea Foam Cards & Envelopes. So cute!

Embellish and enhance all your elephant-themed projects with the Elephant Parade Bundle.
Save 10% when you buy the bundle

Measurements

Full list of supplies needed, listed below. A die cutting machine is needed for this card.

Soft Seafoam and Pool Party Sale-a-bration Card Base and Envelope

Bermuda Bay Cardstock:

  • 4 ½’ h x 2 ½” w x 

Basic White Cardstock:

  • 3 ½” square
  • 5 1/4″ h x 4″ w for inside

Basic White Thick Cardstock 

  • Scrap for leaves, elephant, flower and butterfly

Scrap cardstock:

  • Soft Seafoam, Pool Party, Polished Pink, Garden Green, Evening Evergreen

Let’s Create

  1. Affix all stamps to Acrylic Blocks.
  2. Fold the Card Base at score line using a Bone Folder to sharpen the crease.
  3. Make the Banner Tip:  With Paper Snips, add a ½” to ¾” slice in the middle of the short end of the Bermuda Bay Cardstock.. Then cut from each corner to the top of the slice and remove the triangle pieces to make the banner tip.
  4. Attach the Bermuda Bay banner with Stampin’ Seal.
  5. Die cut the 3 ½” Basic White square with the 3” layering circle die. Stamp the sentiment toward the top in Bermuda Bay ink and attach with Stampin’ Dimensionals.
  6. Zigzag some Tear & Tape on the bottom of the stamped circle and attach a piece of Pool Party Sheer Ribbon.
  7. On Basic White Thick Cardstock scrap, use Tuxedo Black Memento Ink to stamp the elephant, leaves, flower and butterfly. Use Stampin’ Blends to color them all in and then die cut from the Elephant Dies. I used Smoky Slate and Flirty Flamingo on the elephant, Daffodil Delight on the butterfly, Highland Heather on the flower and Mint Macaron on the leaves. 
  8. Next die cut several leaves, hearts, flowers and a bow using the Elephant Dies, Teacup Dies and Perfect Plants dies from various cardstock. I used Polished Pink, Soft Sea Foam, Garden Green, Pool Party and Evening Evergreen.
  9. Use Mini Glue Dots to create a nest of leaves, flowers and hearts, then place the Elephant on top. Add the flower and bow before attaching everything to the car dwith several Mini Glue Dots. Then add the butterfly in the upper right of the circle. 
  10. Decorate the remaining Basic White panel and attach to the inside with Stampin’ Seal.
  11. Decorate your envelope.
  12. So fun!! Put it in the mail today and make someone’s day!

Shopping List

Recommended Stamper’s Toolkit

Product List
Order online from the convenience of your own home or send me your order and I’ll take care of you. ❤ Either way, please use the host code ANTD9UHS. Order online AND, if your order is $50 or more using host code ANTD9UHS between now and the end of the month you’ll receive a free pack of embellishment as a THANK YOU gift from me. ❤ If your order is over $150, skip the host code, earn Stampin’ Rewards for free stuff yourself and I’ll still send you a free pack of embellishment as a THANK YOU gift from me. ❤