Have a Purr-fect Halloween

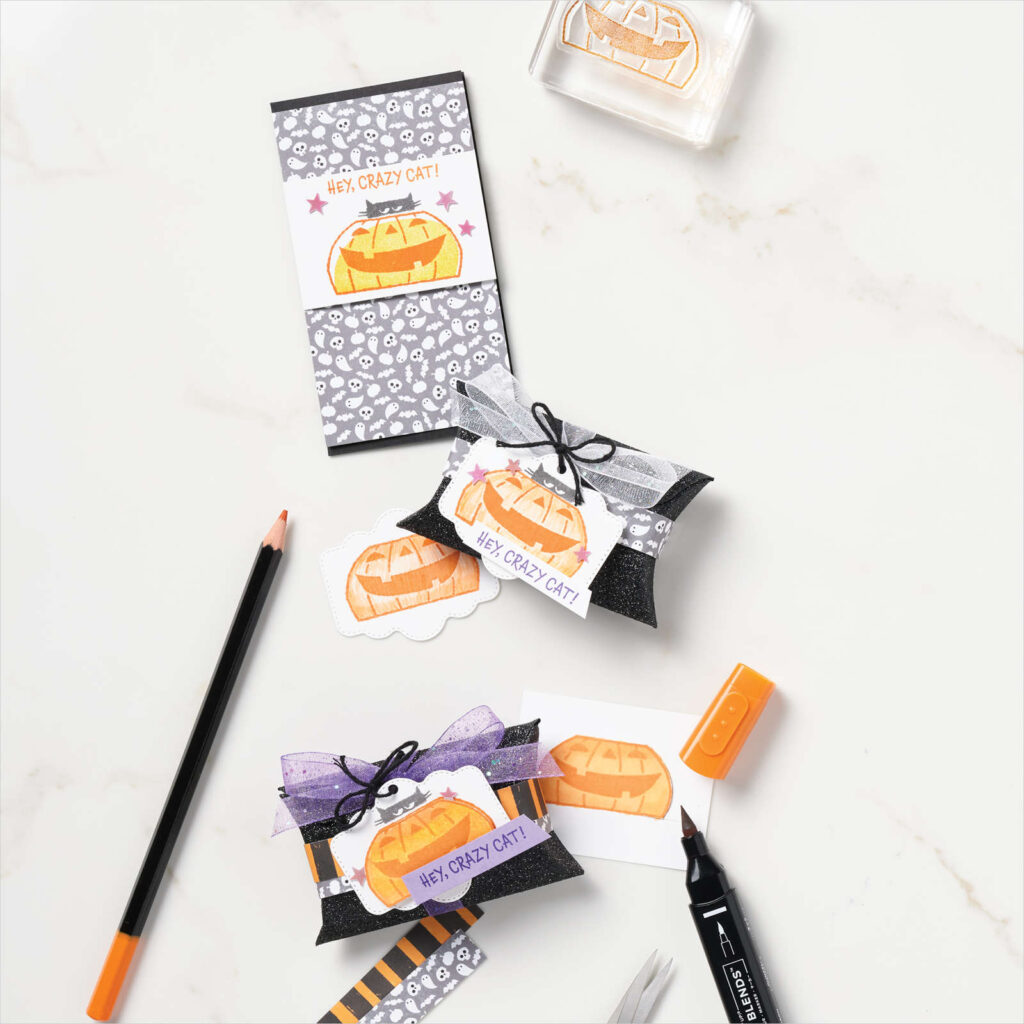
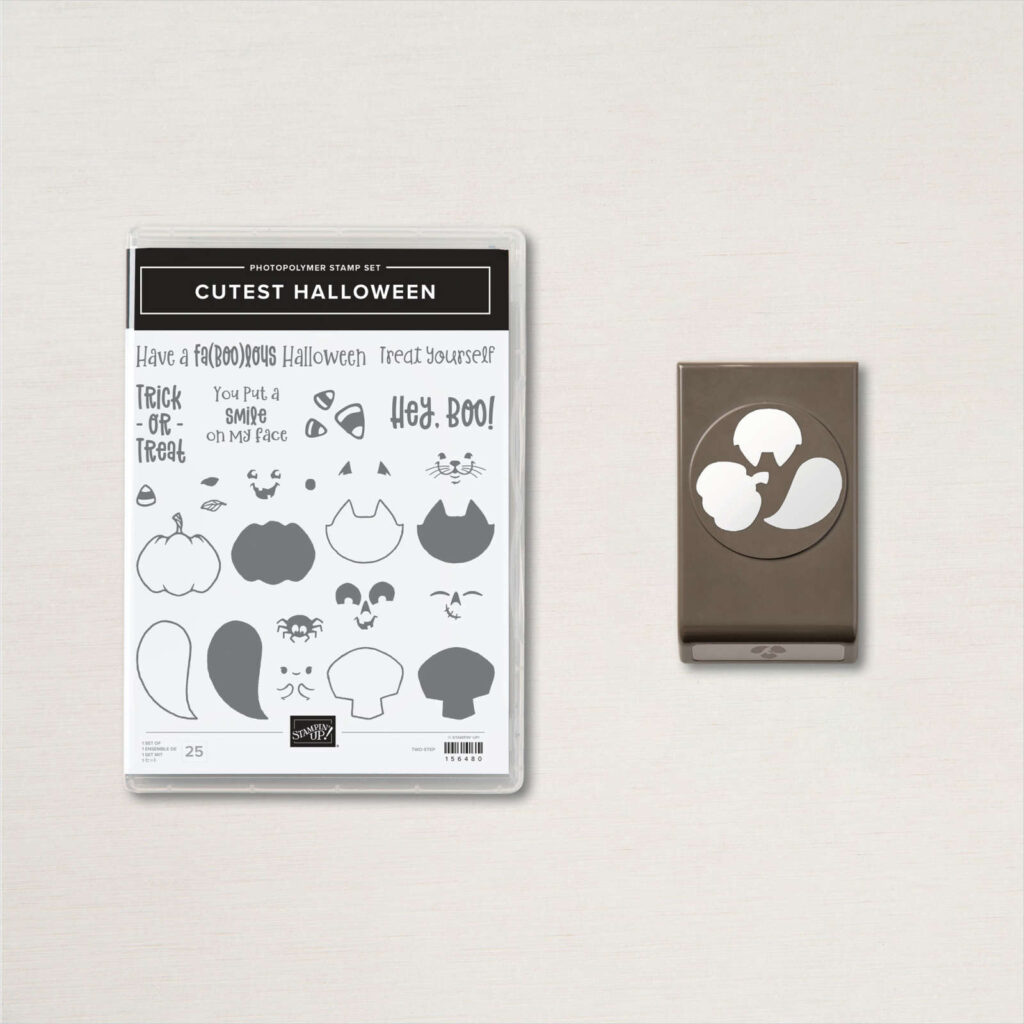
I’ve had many cats over the years and most have been quite entertaining. Each with their own personality. The big fat cat in the box in this stamp set made me chuckle and reminded me of Fletcher, a stray feral kitten we adopted about 8 years ago. He continues to be a bit wild living the dream on an inlet at our dear friends’ the Lynn’s, and for sure will be the first to try to fit in a box half his size. Bwahahah!

Measurements

Full list of supplies needed, listed below.
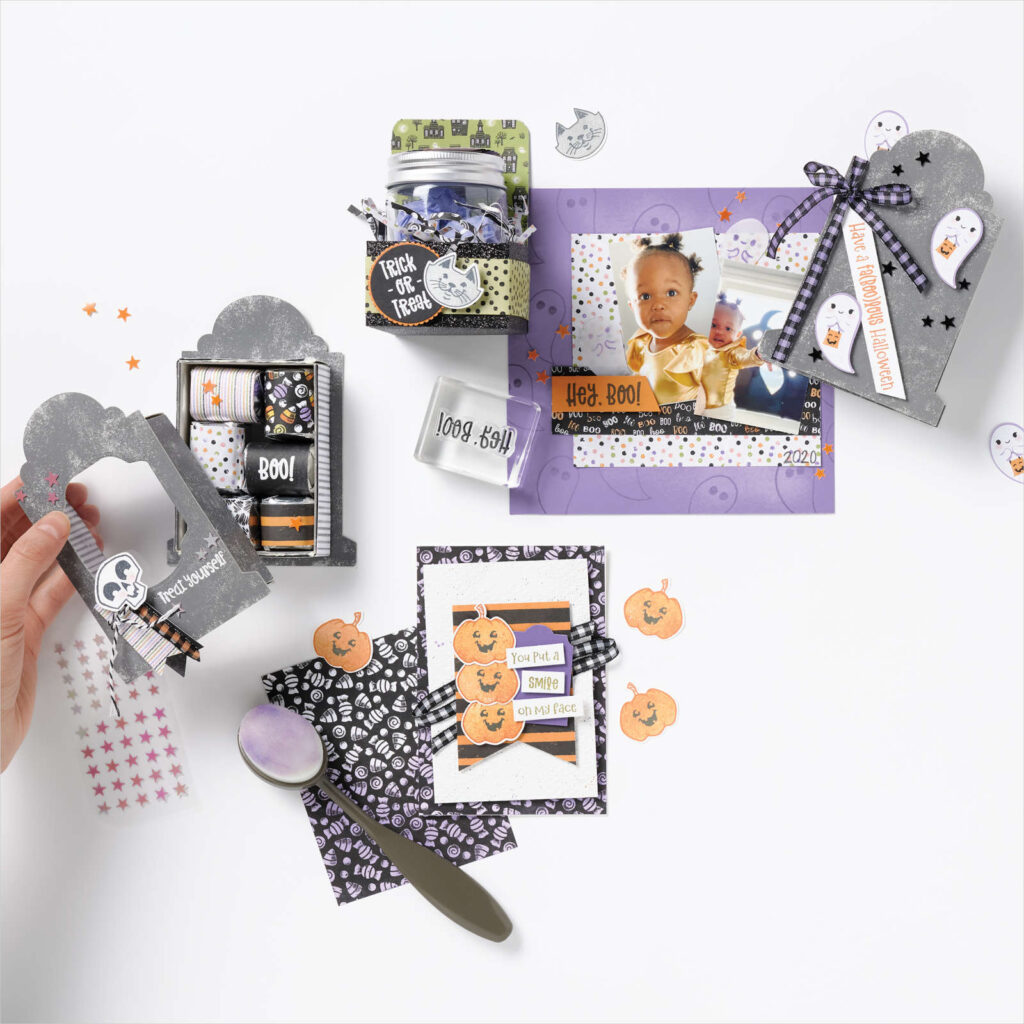
Card Base: Granny Apple Green Cardstock 5 1/2″ h x 8 1/2″ w folded to 5 1/2″ h x 4 1/4″ w
Background: Cute Halloween Designer Series Paper 5 1/4″ h x 4″ w
Banner: Black Glitter Paper 4 1/2″h x 2 1/2″ w
Sentiment Layer: Basic White Cardstock scrap
Pumpkin, Bat, & Spider: Basic White Cardstock scrap
Inside Layer (optional): Basic White Cardstock 5 1/4″ h x 4″ w

Let’s Create

  1. Affix all stamps to Acrylic Blocks.
  2. Fold the Card Base in half using a Bone Folder to sharpen the crease.
  3. Use a Blending Brush to apply Granny Apple Ink to the Cute Halloween Designer Series Paper Background and then attach using Stampin’ Seal.
  4. Stamp the Spider, Pumpkin, Bat and Sentiment using Tuxedo Black Memento Ink on Basic White Cardstock scrap and stamp the Pumpkin fill stamp in Pumpkin Pie. If preferred, use a Pumpkin Pie Stampin’ Blend to darken the color on the Pumpkin.
  5. Fussy cut all of them out and set aside.
  6. To create the banner tip:
    1. Gently pinch one end of the Black Glitter Banner layer in half to mark the middle. Then unfold.
    2. Use Paper Snips to cut a 1/4″ – 1/2″ slit along the center crease you just made. The longer your slit the deeper your banner will be.
    3. Cut from the corner to the bottom of the slit, removing a triangle. Repeat from other corner.
  7. Wrap about 6″ of Black and White Gingham Ribbon around the top of the Banner and tie a bow.
  8. Use Stampin’ Dimensionals to attach the Spider, Pumpkin and Bat to the Banner – extra adhesive may be needed to adhere to the Glitter Paper.
  9. Use a Chalk Marker to draw a spider web strand from the Ribbon to the Spider.
  10. Use Stampin’ Dimensionals to attach the Banner.
  11. Use Stampin’ Seal to attach the Sentiment.
  12. Sprinkle with Silver Metallic Pearls.
  13. Stamp the Inside Layer to your liking and attach with adhesive of your choice.
  14. Decorate your envelope.
  15. HA! Love it! Who will you send it to?

Shopping List

Stamper’s Toolkit

You will also need adhesive, acrylic blocks, scissors and other basic PaperCrafting items from the Stamper’s Toolkit

Sweet and #SimpleStamping

#SimpleStamping is a great way to create beautiful cards, using minimal supplies, layers and embellishments. Just stick to a SIP – stamps, ink and paper.

All three cards use one stamp set—the Garden Birdhouses Stamp Set—and yet each card uses a different technique to create a unique style. Explore the stamp sets in your annual catalog and plan three simple cards that you can share with your friends and family. If you post online, use #SimpleStamping in the caption.

Each card features only two ink pads and one or two colors of cardstock.

  1. The Birthday Wishes card is the simplest with just one color of cardstock and a couple of images, all stamped on a single layer.
  2. The Hello card uses more images, layers, and a punch. We even customized the punch shape to fit the sentiment a little better—all it took was a couple of snips with our trusty Paper Snips.
  3. And lastly, the third card has some additional color added in, which is easy to do with a set of Watercolor Pencils.

What will you make today?

Treat Yourself

OK so bats are TOTALLY not my thing. Ick! But look at how cute these little Batty Dudes are!!!! OMgoodness. I couldn’t wait to make a cute Halloween card featuring these little dudes. So fun!

Measurements

Full list of supplies needed, listed below. A die cutting machine is needed for this card.
Card Base: Basic Black Cardstock 5 1/2″ h x 8 1/2″ w scored at 4 1/4″ and folded to 5 1/2″ h x 4 1/4″ w
Background: Flirty Flamingo Cardstock 4″ h x 4″ w
DSP Strips (3): Cute Halloween Designer Series Paper 3 7/8″ w x 1″, 1 1/4″ and 1 1/2″ h
Sentiment Layer: Basic White Cardstock 5/8″ h x 1 3/4″ w (stamp first then trim)
Sentiment Matte: Flirty Flamingo Cardstock with the Scalloped Contour Dies.
Inside Layer (Optional): Basic White Cardstock 5 1/2″ h x 4 1/4″ w

Let’s Create

  1. Affix all stamps to Acrylic Blocks.
  2. Fold the Card Base in half using a Bone Folder to sharpen the crease.
  3. Attach the DSP Strips to the Flirty Flamingo Background with Stampin’ Seal.
  4. Wrap the White Glittered Organdy Ribbon around the Flirty Flamingo Background and tie a bow.
  5. Attach the Flirty Flamingo Background with Stampin’ Dimensionals.
  6. Die Cut the Flirty Flamingo Sentiment Matte.
  7. Stamp the Sentiment in Tuxedo Black Memento Ink, trim to size and attach to the Sentiment Matte with Stampin’ Seal.
  8. Attach the Sentiment with Stampin’ Dimensionals.
  9. Fussy cut a cute little bat and attach with Stampin’ Dimensional.
  10. Use the Flirty Flamingo Dark Stampin’ Blend to color Basic Rhinestones, then sprinkle them on.
  11. Use the Flirty Flamingo Dark Stampin’ Blend to color bits of the Designer Series Paper.
  12. Stamp the Inside Layer to your liking and attach with adhesive of your choice.
  13. Decorate your envelope
  14. Super Cute!!! Now go make someone’s day! Put it in the mail.

Shopping List

Stamper’s Toolkit

You will also need adhesive, acrylic blocks, scissors and other basic PaperCrafting items from the Stamper’s Toolkit

Cute Trick or Treat

I’m not much into scary things. Actually I’m a total wimp around thrillers making Halloween not my favorite kind of celebration. That’s why I fell in love with the Cute Halloween Suite by Stampin’ Up! It’s all cute little pumpkins and ghosts, black cats and yes even friendly skulls. The sentiments in the stamp set are adorable and the fonts so fun.

Measurements

Full list of supplies needed, listed below. A die cutting machine is needed for this card.
Card Base: Basic Black Cardstock 4 1/4″ h x 11″ w scored at 5 1/2″ w and folded to 4 1/4″ h x 5 1/2″ w
Background: Highland Heather Cardstock 4″ h x 5 1/4″ w
White Rectangle: Basic White Cardstock 3 3/4″ h x 1″ w
Square Background: Gorgeous Grape Cardstock 3 3/4″ h x 3 3/4″ w
Squares (4): Cute Halloween Designer Series Paper 1 3/4″ h x 1 3/4″ w
Sentiment:
 Basic White Thick Cardstock Scrap with the Layering Circles Dies
Sentiment Matte: Highland Heather Cardstock Scrap Layering Circles Dies
Inside Layer (Optional): Basic White Cardstock 4″ h x 5 1/4″ w

Let’s Create

  1. Affix all stamps to Acrylic Blocks.
  2. Fold the Card Base in half using a Bone Folder to sharpen the crease.
  3. Attach the Highland Heather Background using Stampin’ Seal.
  4. Attach the White Rectangle using Stampin’ Seal.
  5. On the Gorgeous Grape Square Background, layout the 4 Cute Halloween DSP Squares. Once you get them where you want them, attach with Stampin’ Dimensionals.
  6. From the Cute Halloween DSP, fussy cut a cat, ghost and skull with bird. Attach to the DSP squares with Dimensionals.
  7. Stamp the Sentiment on Basic White Scrap and die cut with the Layering Circles Dies.
  8. Die cut the Highland Heather Sentiment Matte with the Layering Circles Dies.
  9. Attach the Sentiment to the Sentiment Matte.
  10. Add Stampin’ Dimensionals to the back of the Sentiment Matte. Attach a piece of Silver Trim behind the Sentiment Matte and attach to the Square Background.
  11. Attach the Gorgeous Grape Square Background with Stampin’ Dimensionals.
  12. Tie a bow with the Black and White Gingham Ribbon.
  13. Sprinkle with Cute Stars Adhesive Backed Sequins.
  14. Stamp the Inside Layer to your liking and attach with adhesive of your choice.
  15. Decorate your envelope.
  16. A-DORBS!!!! Who will you send it to?

Shopping List

Stamper’s Toolkit

You will also need adhesive, acrylic blocks, scissors and other basic PaperCrafting items from the Stamper’s Toolkit