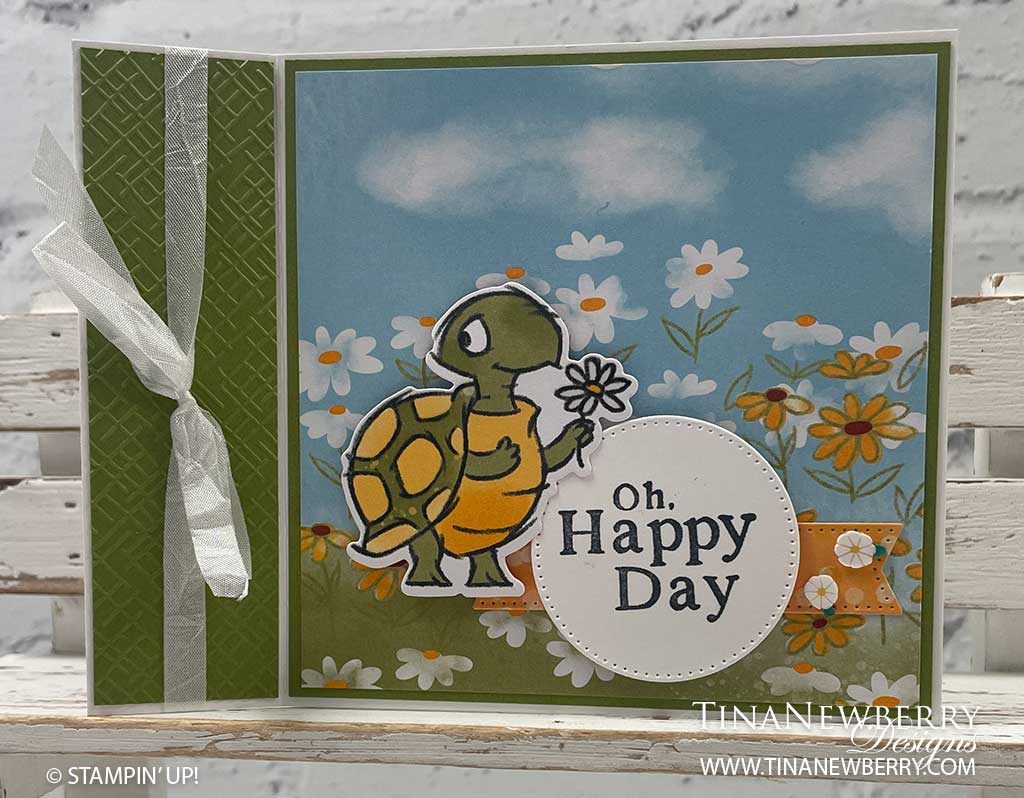
Creating a sweet and cheerful card to send to someone who needs a pick me up is easy and fun.
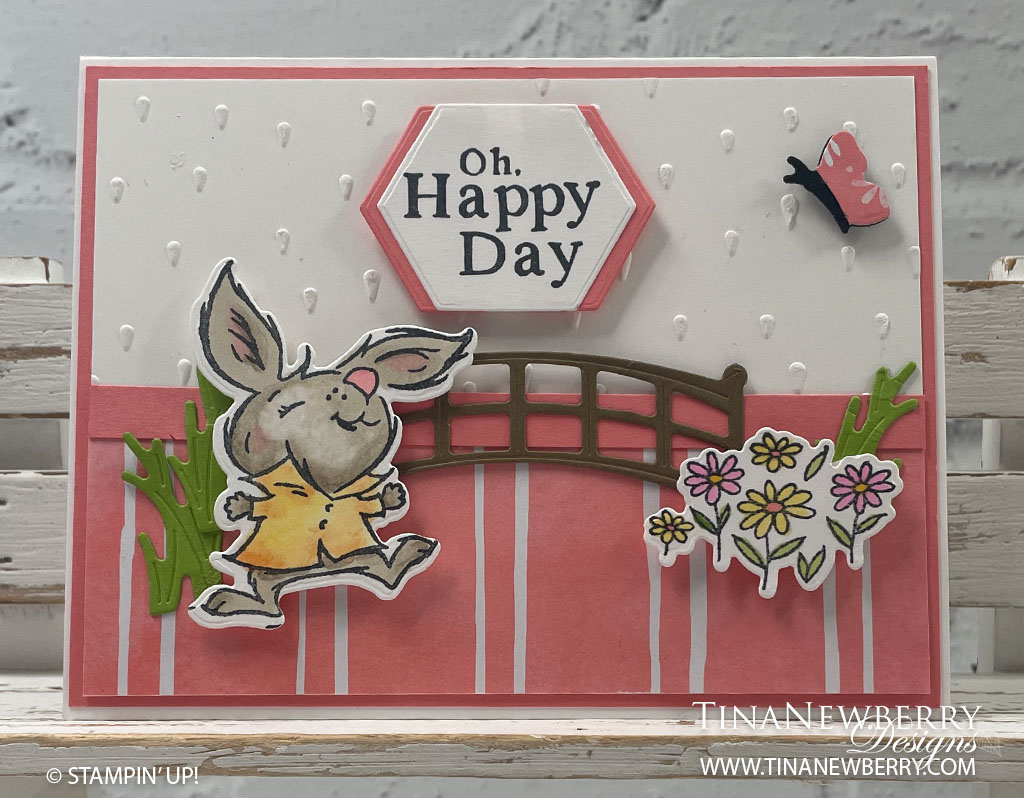
It’s all rain and smiles here in the Rain or Shine Suite! With raindrops falling on the heads of the cutest little animals, you’ll have fun creating with this fresh take on springtime crafting.
Measurements
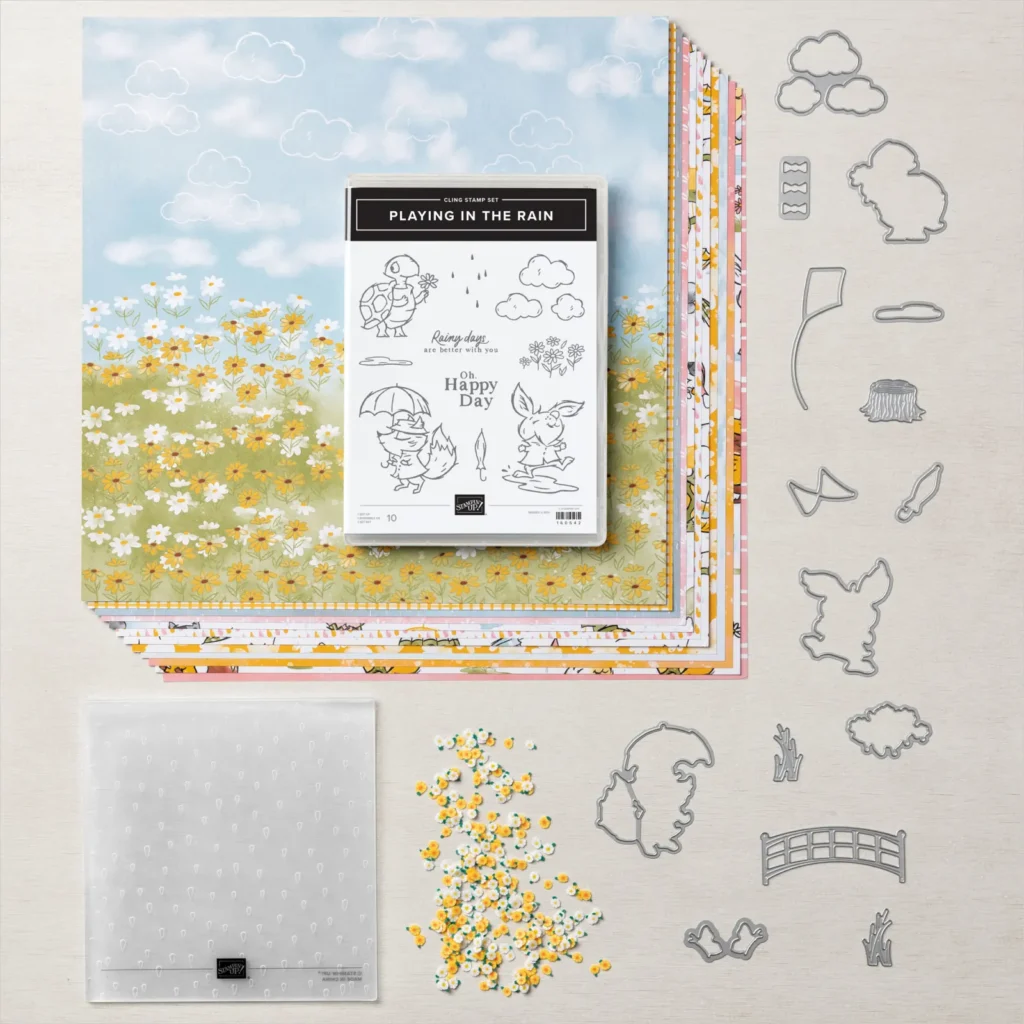
Full list of supplies needed, listed below. A die cutting machine is needed for this card.
Basic White
5 ½” x 8 ½” scored and folded on the long-side at 4 ¼”
5 ¼” x 4”
2” x 2” (for Die Cutting sentiment)
4 ¼” x 3” (for stamping and die cutting rabbit & flowers)
Flirty Flamingo
5 ⅜” x 4 ⅛”
5 ¼” x ⅜”
2” x 2” (for framing sentiment)
Granny Apple Green
1 ½” x 2” (for die cutting grass)
Soft Suede
3 ¼” x 1 ½” (for die cutting fence)
Rain Or Shine Designer Series Paper
5 ¼” x 1 ¾” Flirty Flamingo Stripe
Small Scrap of Flirty Flamingo print for butterfly
Let’s Create
Affix all stamps to Acrylic Blocks.
Fold the Card Base in half using a Bone Folder to sharpen the crease.
Using the Raindrops Embossing Folder, emboss the 5 ¼” x 4” Basic White layer.
Using the Memento Black ink pad, stamp the rabbit and the grouping of flowers on the 4 ¼” x 3” Basic White. Color these images using Stampin’ Blends and die cut using the coordinating dies.
Die cut 3 sets of the grass with Granny Apple Green Cardstock, the fence using Soft Suede Cardstock and a butterfly both in Basic Black Cardstock, and flirty Flamingo DSP.
Cut the butterfly body off of the DSP butterfly and adhere the wings to the black cardstock butterfly.
Using Basic Black Memento ink pad, stamp the sentiment onto the 2” x 2” Basic White. Die cut using the hexagon shape from the Something Fancy die set. Using this same die, die cut a hexagon shape from Flirty Flamingo Cardstock. Cut this piece in half down the middle to create the frame around the Basic White Sentiment. Attach to each side of the sentiment.
Adhere the embossed layer of Basic White Cardstock to the 5 ⅜” x 4 ⅛” flirty flamingo cardstock. Adhere the Flirty Flamingo Striped Designer Series Paper to the bottom edge of the embossed white layer.
Attach the narrow strip of flirty flamingo cardstock to the upper edge of the DSP. Adhere these layers to the folded card base.
Adhere the Fence to the center of the card. Adhere the grass to both sides of the fence.
Using Stampin’ Dimensionals Adhere the Rabbit to one side of the fence and the grouping of flowers to the other side of the fence.
Using Stampin’ Dimensionals, adhere the sentiment to the upper part of the card, centering side to side. Using a Mini Stampin’ Dimensional, adhere the butterfly to the upper right corner of the card.
Stamp and decorate the inside of your card and the envelope. You have a cute little turtle to send off to a friend.
Order online from the convenience of your own home or send me your order and I’ll take care of you. ❤ Either way, please use the host code KBSZKQ3A. Order online AND, if your order is $50 or more using host code KBSZKQ3A between now and the end of the month you’ll receive a free pack of embellishment as a THANK YOU gift from me. ❤ If your order is over $150, skip the host code, earn Stampin’ Rewards for free stuff yourself and I’ll still send you a free pack of embellishment as a THANK YOU gift from me. ❤
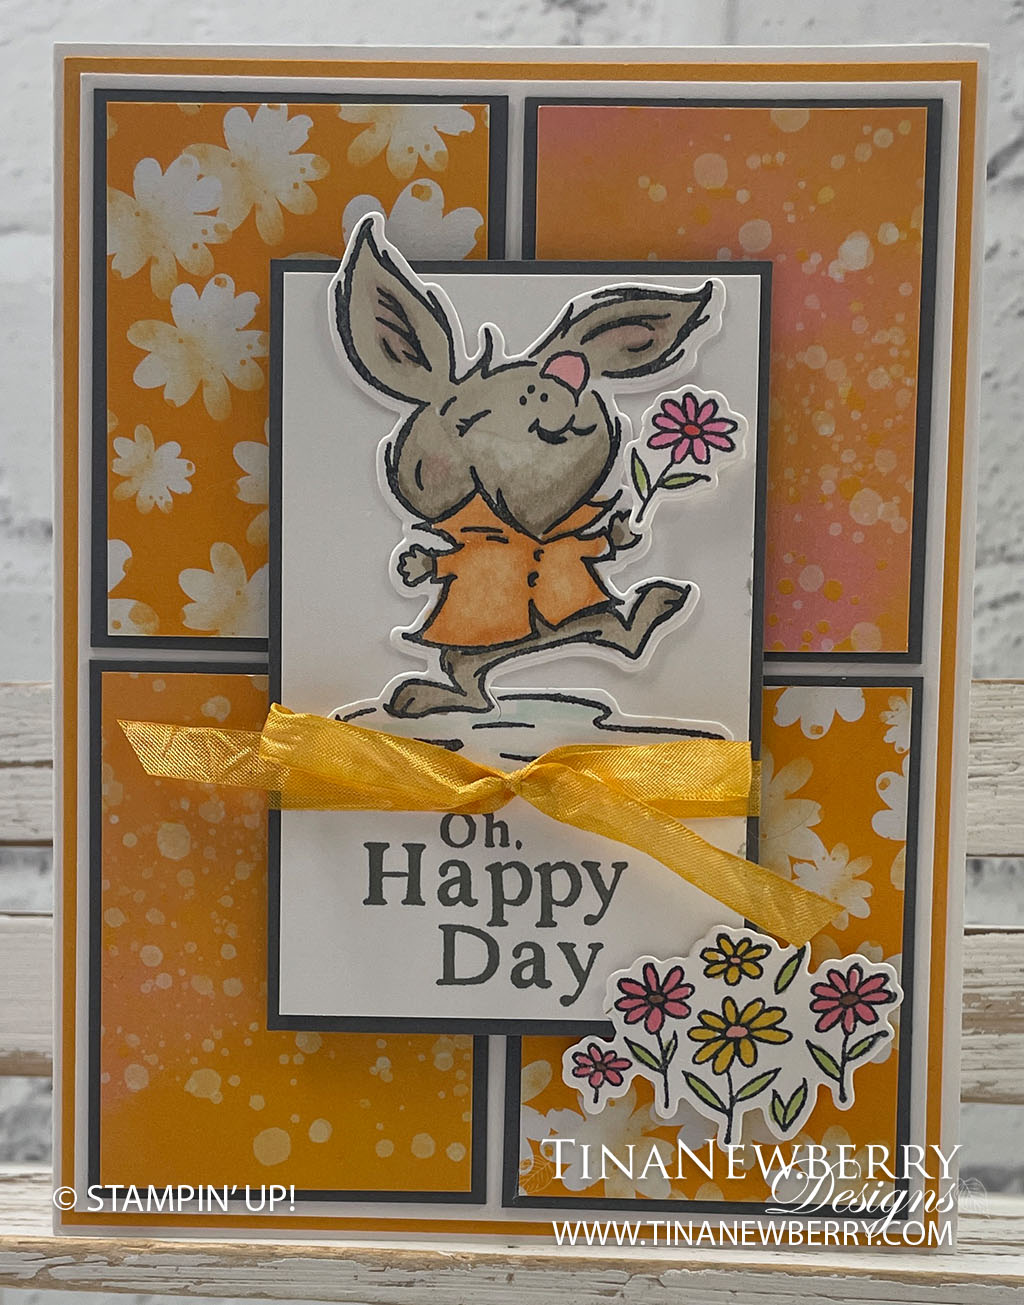
Such a cute and fun card! Perfect for sending cheer and joy to someone who needs a pick-me-up!
It’s all rain and smiles here in the Rain or Shine Suite! With raindrops falling on the heads of the cutest little animals, you’ll have fun creating with this fresh take on springtime crafting.
Measurements
Full list of supplies needed, listed below. A die cutting machine is needed for this card.
Basic White
5 ½” x 8 ½” scored and folded on the long-side at 4 ¼”
5 ¼” x 4”
3 ⅜” x 2 ⅛”
5” x 2 ¼” (for stamping and die cutting rabbit and grouping of flowers)
Mango Melody: 5 3/8 x 4 1/8
Basic Gray
3 ½” x 2 ¼”
2 ½” x 1 ¾” 2 35/64 x 1 29/32 OR 2 ½ h x 1 7/8 w cut 4
Rain Or Shine Designer Series Paper (DSP)
2 ⅜” x 1 ⅝” 2 27/64 h x 1 51/64 OR 2 3/8 h x 1 ¾ w– cut 2 this size of Mango Melody Floral Print and 2 of this size Mango Melody Bubbly print.
Let’s Create
Affix all stamps to Acrylic Blocks.
Fold the Card Base in half using a Bone Folder to sharpen the crease
Using Memento Black ink pad. Stamp 1 rabbit and 2 sets of the grouping of flowers. Color these images using Stampin’ Blends and die cut using coordinating dies.
Using Basic Gray ink, Stamp the sentiment at the bottom of the 3 ⅜” x 2 ⅛” Basic White Cardstock. (Be sure not to stamp it too high. Stamp the rabbit above the sentiment, leaving just a small space. The rabbit will go off the top edge of your cardstock… it’s okay, you’re stamping here for the puddle. Give the puddle a little color by shading a bit with a light pool party Stampin’ Blend.
Adhere the colored and die cut rabbit onto this piece of cardstock covering the uncolored stamped image.
Adhere this Basic White Panel to the coordinating Basic Gray layer.
Cut a 12” length of White Crinkle Seam Binding Ribbon. Using the brush end of a Daffodil Delight Dark Stampin’ Blend, color the length of ribbon. Color again using a Pumpkin Pie light Stampin’ Blend. (this will give it more of a Mango color). Tie this ribbon around the stamped panel just able the sentiment.
Fussy cut one of the larger flowers from one of the sets of die cut flowers and adhere with a mini dimensional to the rabbit’s hand.
Adhere the small pieces of Designer Series Paper to their coordinating Basic Gray mats.
Adhere the 5 ¼” x 4” Basic White layer to the 5 ⅜” x 4 ⅛” Mango Melody layer.
Adhere the 4 small pieces of layered Designer Series Paper pieces to the Basic White Panel. Positioning these pieces with a slight gap in between, alternating the prints.
Adhere these layers to the folded card base.
Using Stampin’ Dimensionals adhere the stamped layers to the center of the card. Adhere the grouping of flowers to the lower right of the card.
Stamp and decorate the inside of your card and the envelope. And it’s ready to send off to a special friend.
Order online from the convenience of your own home or send me your order and I’ll take care of you. ❤ Either way, please use the host code KBSZKQ3A. Order online AND, if your order is $50 or more using host code KBSZKQ3A between now and the end of the month you’ll receive a free pack of embellishment as a THANK YOU gift from me. ❤ If your order is over $150, skip the host code, earn Stampin’ Rewards for free stuff yourself and I’ll still send you a free pack of embellishment as a THANK YOU gift from me. ❤
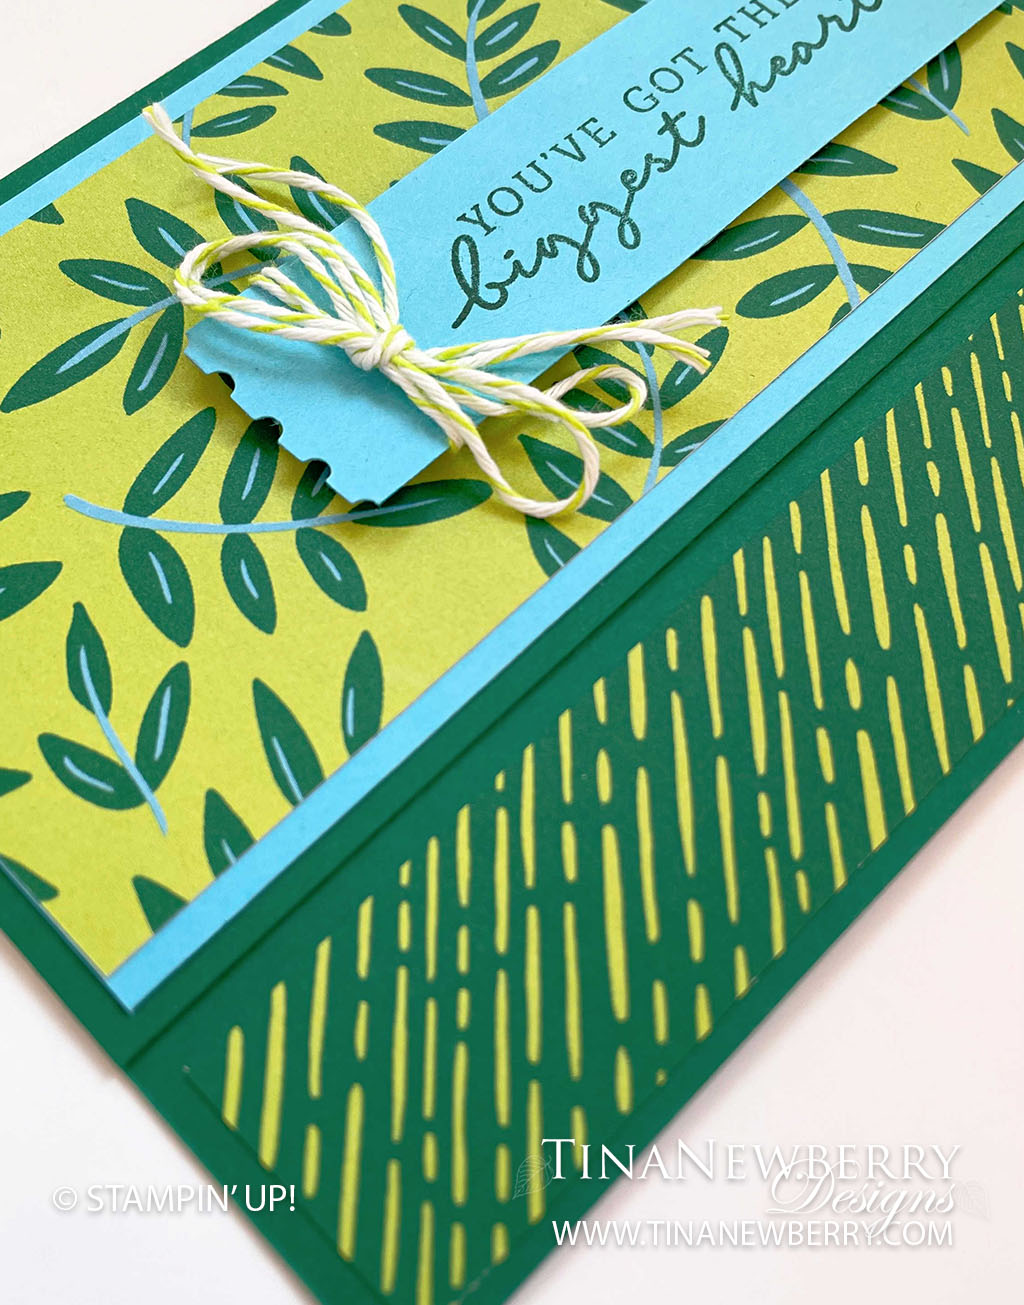
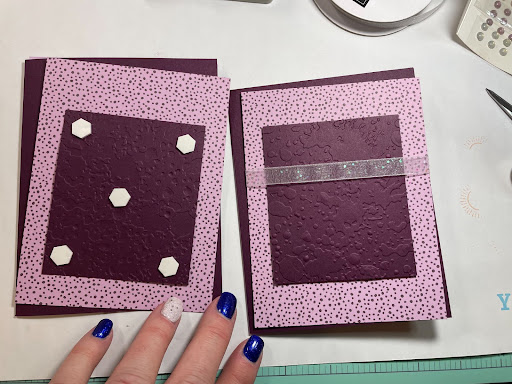
In a hurry and need a card? You’ve got it with this simple layout. Grab your favorite patterned paper and coordinating cardstock from your stash and pull this card together in minutes.
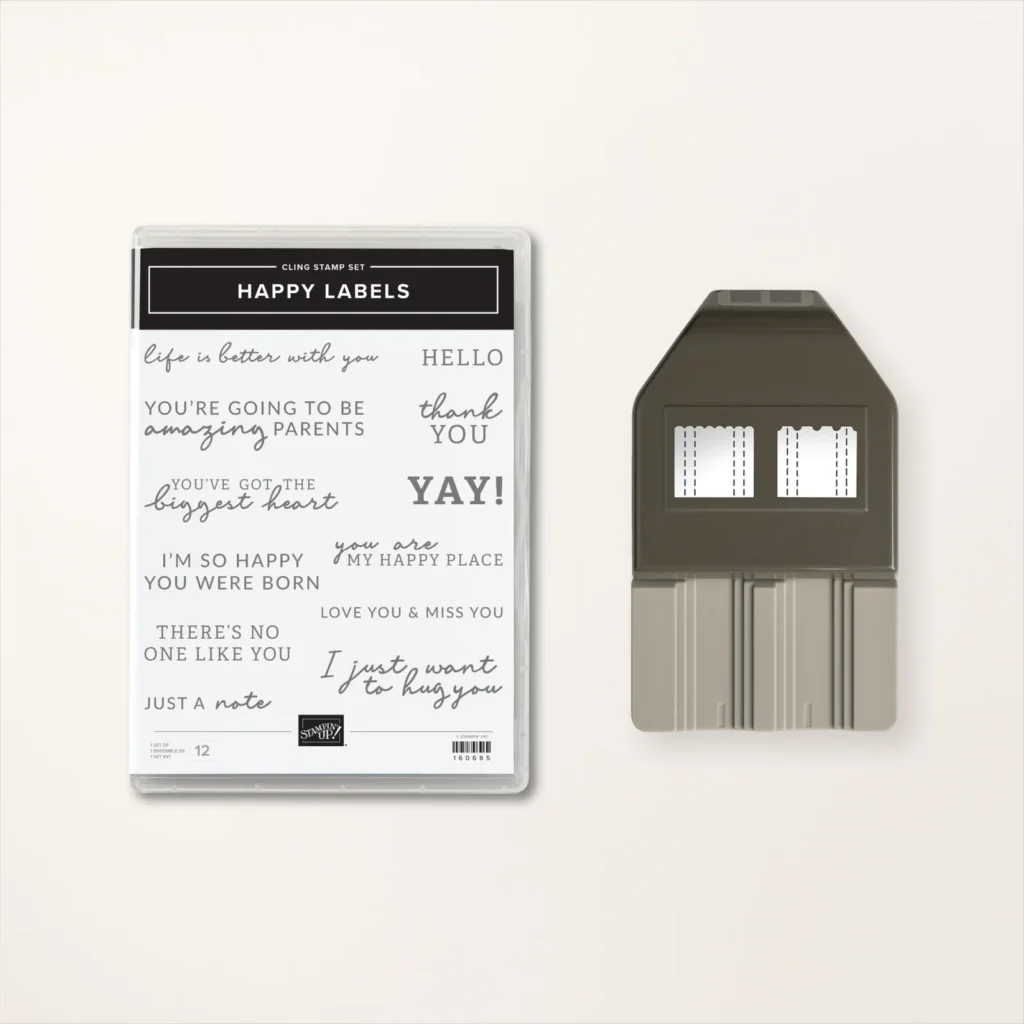
Celebrate the people you love by sending them handmade tags or cards: stamp greetings from the stamp set and punch out labels in different sizes with the Happy Labels Bundle.
Measurements
Full list of supplies needed, listed below. A die cutting machine is needed for this card.
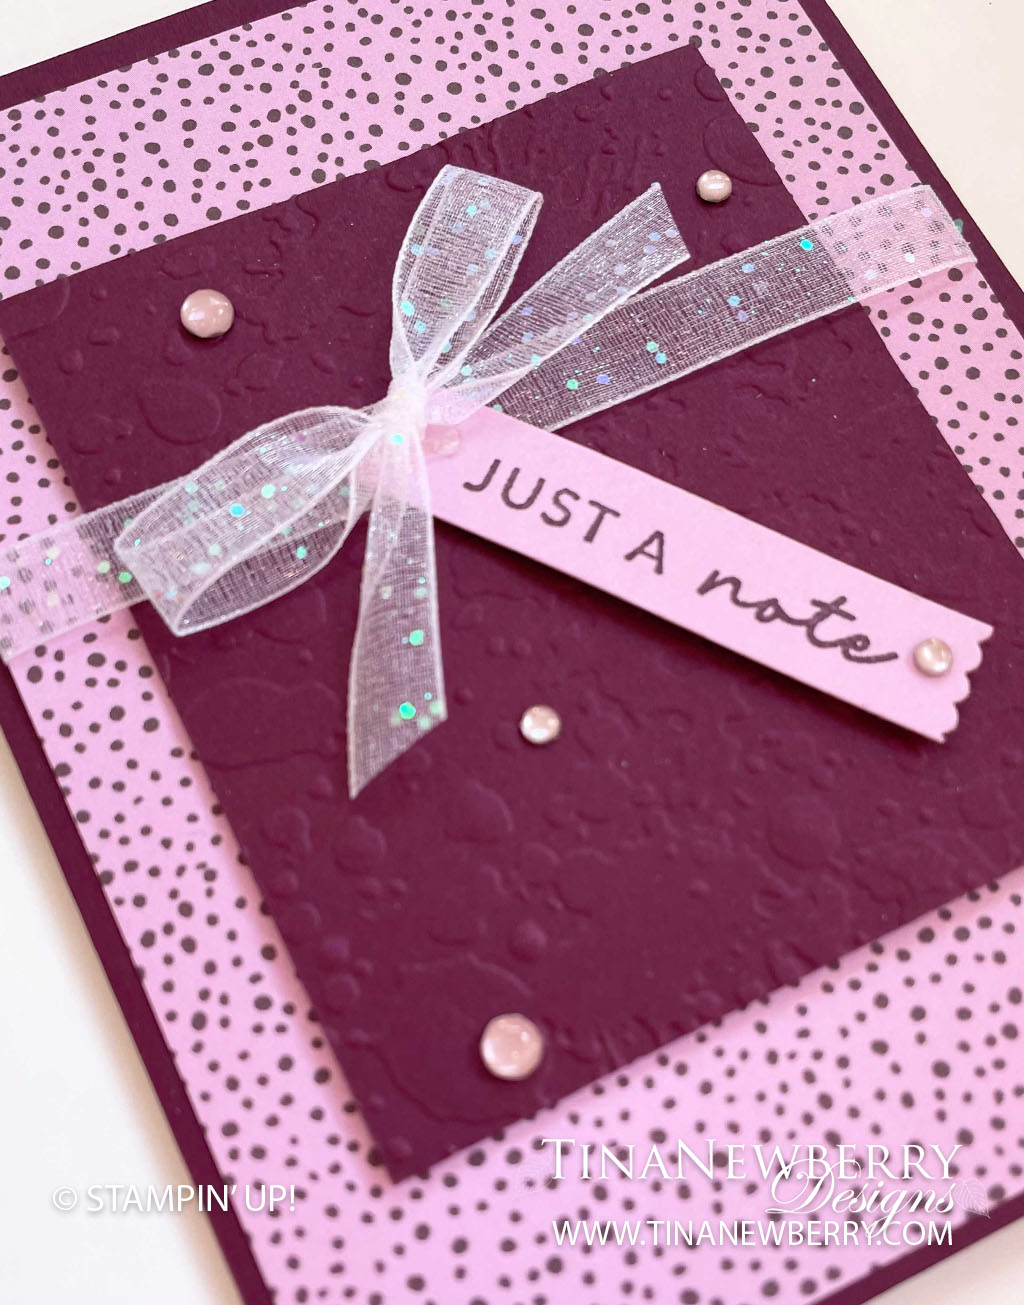
Card base: Blackberry Bliss cardstock 5 ½”h x 8 ½”w, scored at 4 ¼”
Background layer: Flowers & More DSP 5 ¼”h x 4”w
Embossed layer: Blackberry Bliss cardstock 3 ½”h x 3”w
Sentiment layer: Fresh Freesia cardstock ½”h x 3”w
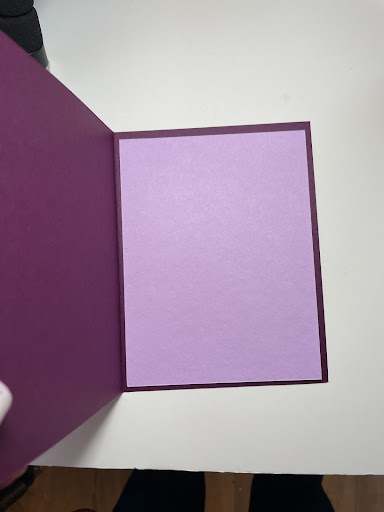
Interior greeting layer: Fresh Freesia cardstock 5 ¼” h x 4” w
Let’s Create
Affix all stamps to Acrylic Blocks.
Fold the Card Base in half using a Bone Folder to sharpen the crease.
Emboss Blackberry Bliss cardstock layer with the Splatters embossing folder.
Adhere embossed Blackberry Bliss layer with Dimensionals onto the Flowers & More DSP layer.
Wrap ribbon around the layers and adhere the ends to the backside.
Adhere the layers onto the card front.
Tie a ribbon bow and adhere with 1-3 Mini Glue Dots.
Stamp the sentiment with Blackberry Bliss Stampin’ Pad onto the Fresh Freesia cardstock layer.
Punch the right hand end with the Happy Labels Punch, left hand side is plain.
Adhere the sentiment label onto the card front with Dimensionals on diagonal, tuck the end under the ribbon.
Embellish with Adhesive Backed Milky Dots.
Adhere the Fresh Freesia cardstock layer into the interior of the card base with Stampin’ Seal.
Order online from the convenience of your own home or send me your order and I’ll take care of you. ❤ Either way, please use the host code KBSZKQ3A. Order online AND, if your order is $50 or more using host code KBSZKQ3A between now and the end of the month you’ll receive a free pack of embellishment as a THANK YOU gift from me. ❤ If your order is over $150, skip the host code, earn Stampin’ Rewards for free stuff yourself and I’ll still send you a free pack of embellishment as a THANK YOU gift from me. ❤
")


 Designer Series Paper")


 Crinkled Seam Binding Ribbon")


")


 Host Designer Series Paper")

 Glittered Organdy Ribbon")
